
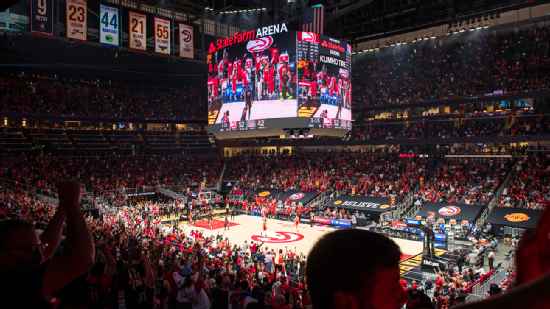
Sacramento Kings @ Atlanta Hawks

18-32, 6-16 Away
104
18-32, 6-16 Away

22-25, 12-11 Home
121
22-25, 12-11 Home
Game Leaders


Team Stats


42% (39-93)
Field Goal %
53% (48-90)
30% (12-40)
Three Point %
33% (12-36)
74% (14-19)
Free Throw %
76% (13-17)
12
Turnovers
9
42
Rebounds
48
14
Largest Lead
30
Game Information
Atlanta, GA
Referee:Lauren Holtkamp
Referee:Tyler Ford
Referee:Evan Scott
Probabilities & Game Flow

0%
--SAC
100%
--ATL
According to ESPN Analytics
Shot Chart

- Richaun Holmes misses alley oop layup
- Clint Capela makes two point shot (Trae Young assists)
- Davion Mitchell makes 26-foot three point jumper (Harrison Barnes assists)
- John Collins makes 9-foot two point shot (Trae Young assists)
- Tyrese Haliburton makes driving floating jump shot (Davion Mitchell assists)
- Davion Mitchell makes 25-foot three point shot (Richaun Holmes assists)
- De'Andre Hunter makes 26-foot three point jumper (Trae Young assists)
- Kevin Huerter misses 26-foot three point shot
- Davion Mitchell makes driving layup (Tyrese Haliburton assists)
- Davion Mitchell misses free throw 1 of 1
- John Collins misses 26-foot three point jumper
- Marvin Bagley III makes driving layup
- Trae Young misses driving floating jump shot
- Trae Young makes 8-foot two point shot
- Harrison Barnes misses 15-foot step back jumpshot
- Clint Capela makes alley oop layup (Trae Young assists)
- Richaun Holmes makes dunk (Tyrese Haliburton assists)
- Kevin Huerter makes 6-foot two point shot
- Davion Mitchell makes 12-foot pullup jump shot
- Trae Young misses 25-foot three point pullup jump shot
- Harrison Barnes misses driving floating jump shot
- Richaun Holmes makes 6-foot two point shot
- Kevin Huerter misses 26-foot step back jumpshot
- Harrison Barnes makes free throw 1 of 2
- Harrison Barnes makes free throw 2 of 2
- Harrison Barnes makes 7-foot two point shot (Buddy Hield assists)
- Trae Young misses 26-foot three point pullup jump shot
- Harrison Barnes makes 24-foot three point jumper (Buddy Hield assists)
- Danilo Gallinari misses 26-foot three point jumper
- Davion Mitchell misses 26-foot three point shot
- Davion Mitchell misses driving layup
- Marvin Bagley III misses tip shot
- Delon Wright makes two point shot (Bogdan Bogdanovic assists)
- Buddy Hield misses 26-foot three point jumper
- Bogdan Bogdanovic misses free throw 1 of 2
- Bogdan Bogdanovic makes free throw 2 of 2
- Damian Jones makes dunk (Buddy Hield assists)
- John Collins misses 26-foot three point jumper
- Maurice Harkless misses 25-foot three point jumper
- Harrison Barnes misses three point jumper
- Danilo Gallinari misses 26-foot three point jumper
- Richaun Holmes makes alley oop dunk shot (Buddy Hield assists)
- Bogdan Bogdanovic makes 13-foot two point shot
- Tyrese Haliburton makes 9-foot two point shot
- Onyeka Okongwu misses free throw 1 of 2
- Onyeka Okongwu makes free throw 2 of 2
- Maurice Harkless makes 1-foot dunk (Harrison Barnes assists)
- Lou Williams makes driving dunk
- Tyrese Haliburton misses 15-foot step back jumpshot
- Danilo Gallinari misses 13-foot jumper
- Buddy Hield makes technical free throw
- Onyeka Okongwu makes free throw 1 of 2
- Onyeka Okongwu makes free throw 2 of 2
- Buddy Hield misses 24-foot three point jumper
- Richaun Holmes misses dunk
- Bogdan Bogdanovic misses 25-foot three point jumper
- Bogdan Bogdanovic makes 26-foot three point jumper (Onyeka Okongwu assists)
- Tyrese Haliburton misses 19-foot pullup jump shot
- Lou Williams makes free throw 1 of 2
- Lou Williams makes free throw 2 of 2
- Onyeka Okongwu makes 1-foot alley oop dunk shot (Lou Williams assists)
- Buddy Hield makes 26-foot three point jumper (Tyrese Haliburton assists)
- Onyeka Okongwu makes dunk (Bogdan Bogdanovic assists)
- Tyrese Haliburton misses 26-foot step back jumpshot
- Lou Williams misses driving layup
- Buddy Hield misses 27-foot three point pullup jump shot
- Lou Williams makes 25-foot three point jumper (Bogdan Bogdanovic assists)
- Maurice Harkless makes 26-foot three point jumper (Marvin Bagley III assists)
- Danilo Gallinari makes 16-foot jumper
- Onyeka Okongwu makes dunk (Bogdan Bogdanovic assists)
- Marvin Bagley III makes 8-foot two point shot
- Bogdan Bogdanovic makes 26-foot three point jumper (Lou Williams assists)
- Marvin Bagley III misses 25-foot three point jumper
- Bogdan Bogdanovic makes driving layup
- Tyrese Haliburton misses 18-foot pullup jump shot
- Bogdan Bogdanovic makes 26-foot running pullup jump shot
- Tyrese Haliburton misses 23-foot three point jumper
- Bogdan Bogdanovic misses 31-foot three point jumper
- Danilo Gallinari makes 27-foot three point jumper (Lou Williams assists)
- Davion Mitchell makes 25-foot three pointer (Damian Jones assists)
- Delon Wright makes 5-foot driving floating jump shot
- Marvin Bagley III makes 6-foot two point shot (Tyrese Haliburton assists)
- Danilo Gallinari misses 32-foot three point jumper
- Harrison Barnes misses 9-foot two point shot
- Bogdan Bogdanovic makes free throw 1 of 2
- Bogdan Bogdanovic makes free throw 2 of 2
- Harrison Barnes makes 26-foot three pointer (Davion Mitchell assists)
- Clint Capela makes layup (Trae Young assists)
- Davion Mitchell misses 16-foot pullup jump shot
- Trae Young misses 27-foot three point pullup jump shot
- Trae Young misses 18-foot two point shot
- Maurice Harkless misses 23-foot three point jumper
- Tyrese Haliburton misses 25-foot three point jumper
- Davion Mitchell misses 17-foot pullup jump shot
- De'Andre Hunter makes two point shot (Trae Young assists)
- De'Andre Hunter misses free throw 1 of 1
- Harrison Barnes misses 25-foot three point pullup jump shot
- De'Andre Hunter makes driving layup
- Kevin Huerter makes two point shot (Trae Young assists)
- Trae Young makes driving layup
- Jahmi'us Ramsey misses 23-foot three point jumper
- Trae Young makes 29-foot step back jumpshot
- Trae Young makes 10-foot driving floating jump shot
- De'Andre Hunter makes 4-foot two point shot
- Marvin Bagley III makes 23-foot three point jumper (Tyrese Haliburton assists)
- Kevin Huerter misses layup
- Trae Young misses 26-foot three point pullup jump shot
- Trae Young makes 25-foot three point jumper (Clint Capela assists)
- Marvin Bagley III misses 25-foot three point jumper
- John Collins makes driving layup (Trae Young assists)
- John Collins makes free throw 1 of 1
- Davion Mitchell misses 25-foot three point jumper
- Trae Young makes driving layup
- Kevin Huerter makes 21-foot pullup jump shot
- Harrison Barnes makes 23-foot three point jumper (Tyrese Haliburton assists)
- Trae Young misses 22-foot pullup jump shot
- Buddy Hield misses driving layup
- Richaun Holmes makes two point shot
- Tyrese Haliburton misses 25-foot three point shot
- John Collins makes 4-foot two point shot (Kevin Huerter assists)
- De'Andre Hunter misses 14-foot jumper
- Kevin Huerter makes two point shot (Trae Young assists)
- Harrison Barnes makes free throw 1 of 2
- Harrison Barnes makes free throw 2 of 2
- Clint Capela makes dunk
- Marvin Bagley III misses 23-foot three point jumper
- Trae Young makes 35-foot running pullup jump shot
- Buddy Hield misses 24-foot three point jumper
- Trae Young misses 28-foot three point jumper
- Buddy Hield makes 13-foot step back jumpshot (Tyrese Haliburton assists)
- Trae Young misses 13-foot pullup jump shot
- Buddy Hield misses 25-foot three point pullup jump shot
- John Collins misses 27-foot three point jumper
- Alex Len makes free throw 1 of 2
- Alex Len makes free throw 2 of 2
- Kevin Huerter misses driving floating jump shot
- Harrison Barnes makes driving floating jump shot
- Harrison Barnes makes free throw 1 of 1
- John Collins makes alley oop dunk shot (Trae Young assists)
- Davion Mitchell makes 13-foot pullup jump shot
- Harrison Barnes makes two point shot
- Bogdan Bogdanovic misses 25-foot three point pullup jump shot
- Harrison Barnes misses driving floating jump shot
- Trae Young misses two point shot
- Buddy Hield makes driving layup (Davion Mitchell assists)
- Bogdan Bogdanovic makes 13-foot pullup jump shot (Onyeka Okongwu assists)
- Harrison Barnes makes free throw 1 of 2
- Harrison Barnes misses free throw 2 of 2
- Bogdan Bogdanovic misses 25-foot three point pullup jump shot
- Alex Len misses free throw 1 of 2
- Alex Len misses free throw 2 of 2
- Delon Wright misses 24-foot three point jumper
- Tyrese Haliburton misses 26-foot three point jumper
- Buddy Hield misses tip shot
- Richaun Holmes misses driving floating jump shot
- Bogdan Bogdanovic misses 27-foot three point jumper
- Richaun Holmes makes two point shot
- Danilo Gallinari misses 26-foot three point jumper
- Louis King misses 20-foot pullup jump shot
- Tyrese Haliburton misses 12-foot two point shot
- Onyeka Okongwu makes layup (Lou Williams assists)
- Louis King misses 23-foot three point jumper
- Lou Williams makes 21-foot pullup jump shot
- Maurice Harkless misses 24-foot three point jumper
- Danilo Gallinari makes dunk (Bogdan Bogdanovic assists)
- Harrison Barnes makes free throw 1 of 2
- Harrison Barnes makes free throw 2 of 2
- Delon Wright makes layup
- Tyrese Haliburton makes 23-foot three point jumper (Davion Mitchell assists)
- Buddy Hield misses 28-foot three point jumper
- Lou Williams makes 33-foot three point jumper (Bogdan Bogdanovic assists)
- Tyrese Haliburton makes 13-foot driving floating jump shot
- Onyeka Okongwu makes layup (Lou Williams assists)
- Onyeka Okongwu makes free throw 1 of 1
- Richaun Holmes misses 8-foot hook shot
- Onyeka Okongwu makes 8-foot hook shot (Bogdan Bogdanovic assists)
- Tyrese Haliburton makes 12-foot driving floating jump shot
- Danilo Gallinari misses 21-foot step back jumpshot
- Davion Mitchell misses driving floating jump shot
- Richaun Holmes makes two point shot
- Lou Williams misses driving floating jump shot
- Harrison Barnes makes 2-foot layup (Davion Mitchell assists)
- Harrison Barnes makes free throw 1 of 1
- Lou Williams makes 23-foot three point jumper (Delon Wright assists)
- Davion Mitchell misses 25-foot three point jumper
- Davion Mitchell misses 26-foot three point pullup jump shot
- Onyeka Okongwu misses layup
- Buddy Hield misses 26-foot three point jumper
- Onyeka Okongwu misses 9-foot two point shot
- Harrison Barnes makes free throw 1 of 2
- Harrison Barnes makes free throw 2 of 2
- Onyeka Okongwu makes free throw 1 of 2
- Onyeka Okongwu makes free throw 2 of 2
- Robert Woodard II misses 14-foot pullup jump shot
- Jahmi'us Ramsey makes 27-foot three point jumper (Davion Mitchell assists)
- Gorgui Dieng makes layup (Kevin Knox II assists)
- Neemias Queta misses 20-foot jumper
- Kevin Knox II misses 26-foot step back jumpshot
- Louis King misses 14-foot pullup jump shot
- Kevin Knox II misses 23-foot three point jumper
- Louis King misses 27-foot three point pullup jump shot
- Jalen Johnson makes 23-foot three point jumper (Skylar Mays assists)
- Davion Mitchell makes 27-foot three pointer
- Jalen Johnson misses driving layup
- Louis King misses 21-foot jumper
- Skylar Mays misses free throw 1 of 2
- Skylar Mays makes free throw 2 of 2
- Louis King makes driving layup (Jahmi'us Ramsey assists)
- Louis King misses free throw 1 of 1
- Davion Mitchell misses 26-foot three point jumper
- Jahmi'us Ramsey makes driving layup
- Gorgui Dieng misses 26-foot three point jumper
- Davion Mitchell makes 17-foot pullup jump shot
Shot Made
Shot Missed
Shot Made
Shot Missed
Data is currently unavailable.
Matchups
2025-26 Standings
Western Conference
| Pacific | W | L | PCT | GB | STRK |
|---|---|---|---|---|---|
| LA Lakers | 41 | 25 | .621 | - | W4 |
| Phoenix | 39 | 28 | .582 | 2.5 | L1 |
| LA Clippers | 33 | 32 | .508 | 7.5 | W3 |
| Golden State | 32 | 33 | .492 | 8.5 | L3 |
| Sacramento | 16 | 51 | .239 | 25.5 | L1 |
Eastern Conference
| Southeast | W | L | PCT | GB | STRK |
|---|---|---|---|---|---|
| Orlando | 37 | 28 | .569 | - | W6 |
| Miami | 38 | 29 | .567 | - | W7 |
| Atlanta | 35 | 31 | .530 | 2.5 | W8 |
| Charlotte | 34 | 33 | .507 | 4 | W2 |
| Washington | 16 | 49 | .246 | 21 | L10 |
NBA News
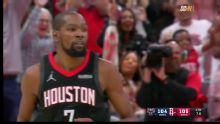
New Orleans Pelicans vs. Houston Rockets: Game Highlights
New Orleans Pelicans vs. Houston Rockets: Game Highlights
31m
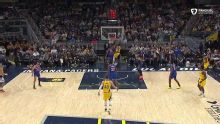
New York Knicks vs. Indiana Pacers: Game Highlights
New York Knicks vs. Indiana Pacers: Game Highlights
31m
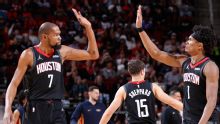
Rockets outlast Pelicans 107-105 to move into 3rd place in West
— Kevin Durant hit a go-ahead 18-footer with 7.6 seconds left and the Houston Rockets outlasted the New Orleans Pelicans 107-105 on Friday night to move into third place in the crowded Western Conference.
1h