
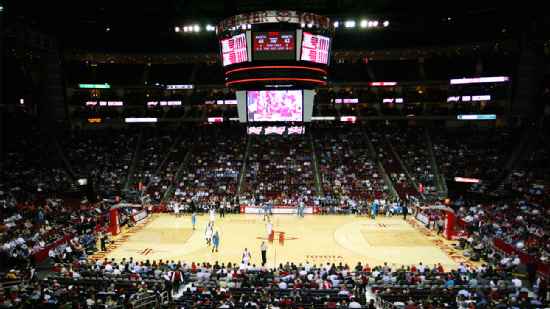
Golden State Warriors @ Houston Rockets

36-39, 9-28 Away
110
36-39, 9-28 Away

47-28, 26-12 Home
99
47-28, 26-12 Home
Game Leaders


Team Stats


44% (36-82)
Field Goal %
41% (31-75)
46% (16-35)
Three Point %
41% (15-37)
81% (22-27)
Free Throw %
76% (22-29)
22
Turnovers
48
43
Rebounds
59
16
Largest Lead
3
Game Information
Houston, TX
Referee:Bennett Salvatore
Referee:Michael Smith
Referee:Zach Zarba
Game Flow

--GS
--HOU
Shot Chart

- Rafer Alston makes 24-foot three point jumper (Tracy McGrady assists)
- Stephen Jackson makes 23-foot three point jumper (Baron Davis assists)
- Al Harrington misses 25-foot three point jumper
- Baron Davis misses 18-foot two point shot
- Shane Battier misses 24-foot three point jumper
- Stephen Jackson makes free throw 1 of 2
- Stephen Jackson makes free throw 2 of 2
- Monta Ellis misses 20-foot jumper
- Rafer Alston makes 25-foot three point jumper (Tracy McGrady assists)
- Tracy McGrady misses 26-foot three point jumper
- Baron Davis makes driving layup
- Stephen Jackson makes layup
- Chuck Hayes makes 7-foot two point shot (Tracy McGrady assists)
- Monta Ellis makes layup
- Monta Ellis makes free throw 1 of 1
- Tracy McGrady misses 23-foot jumper
- Monta Ellis makes layup (Stephen Jackson assists)
- Shane Battier misses 23-foot three point jumper
- Al Harrington makes free throw 1 of 2
- Al Harrington makes free throw 2 of 2
- Tracy McGrady misses 25-foot three point jumper
- Chuck Hayes makes layup
- Al Harrington misses layup
- Yao Ming makes layup (Shane Battier assists)
- Jason Richardson makes 26-foot three point jumper (Al Harrington assists)
- Shane Battier misses 23-foot three point jumper
- Jason Richardson misses 22-foot jumper
- Luther Head misses 26-foot three point jumper
- Luther Head makes 18-foot jumper (Rafer Alston assists)
- Stephen Jackson misses 26-foot three point jumper
- Stephen Jackson misses 15-foot jumper
- Rafer Alston makes 25-foot three point jumper (Shane Battier assists)
- Al Harrington misses three point jumper
- Luther Head makes 23-foot three point jumper (Rafer Alston assists)
- Monta Ellis makes driving layup
- Shane Battier misses free throw 1 of 2
- Shane Battier makes free throw 2 of 2
- Jason Richardson misses layup
- Shane Battier misses 25-foot three point jumper
- Monta Ellis makes layup (Stephen Jackson assists)
- Luther Head makes 26-foot three point jumper (Kirk Snyder assists)
- Stephen Jackson misses 21-foot jumper
- Jason Richardson misses 24-foot three point jumper
- Monta Ellis misses layup
- Kirk Snyder misses free throw 1 of 2
- Kirk Snyder misses free throw 2 of 2
- Baron Davis makes 23-foot three point jumper (Stephen Jackson assists)
- Jason Richardson misses 7-foot two point shot
- Baron Davis makes 26-foot three point jumper
- Kirk Snyder misses 25-foot three point jumper
- Baron Davis makes free throw 1 of 2
- Baron Davis makes free throw 2 of 2
- Juwan Howard makes technical free throw
- Luther Head makes free throw 1 of 3
- Luther Head makes free throw 2 of 3
- Luther Head makes free throw 3 of 3
- Matt Barnes misses 25-foot three point jumper
- Baron Davis makes free throw 1 of 2
- Baron Davis misses free throw 2 of 2
- Kirk Snyder misses 10-foot two point shot
- Luther Head makes 26-foot three point jumper (Chuck Hayes assists)
- Baron Davis makes jumper
- Chuck Hayes makes driving layup (John Lucas assists)
- Matt Barnes makes layup (Baron Davis assists)
- Juwan Howard misses 6-foot hook shot
- Baron Davis makes layup
- Rafer Alston misses 26-foot three point jumper
- Stephen Jackson misses 24-foot three point jumper
- Kirk Snyder misses 24-foot three point jumper
- Baron Davis makes 25-foot three point jumper (Stephen Jackson assists)
- Juwan Howard misses 12-foot jumper
- Stephen Jackson makes layup (Baron Davis assists)
- Luther Head makes 6-foot two point shot
- Mickael Pietrus makes layup (Stephen Jackson assists)
- Mickael Pietrus makes free throw 1 of 1
- Yao Ming makes technical free throw
- Kirk Snyder makes driving layup
- Stephen Jackson makes layup
- Kirk Snyder makes 25-foot three point jumper (Yao Ming assists)
- Al Harrington misses 25-foot three point jumper
- Kirk Snyder misses free throw 1 of 2
- Kirk Snyder makes free throw 2 of 2
- Al Harrington makes 17-foot jumper
- Vassilis Spanoulis misses 8-foot running jumper
- Baron Davis misses 26-foot three point jumper
- Rafer Alston makes 23-foot three point jumper (Kirk Snyder assists)
- Al Harrington misses layup
- Rafer Alston misses layup
- Shane Battier misses tip shot
- Al Harrington makes 25-foot three point jumper (Monta Ellis assists)
- Shane Battier makes 25-foot three point jumper (Vassilis Spanoulis assists)
- Jason Richardson makes 24-foot three point jumper (Matt Barnes assists)
- Yao Ming makes free throw 1 of 2
- Yao Ming makes free throw 2 of 2
- Al Harrington misses 25-foot three point jumper
- Matt Barnes misses 26-foot three point jumper
- Al Harrington misses free throw 1 of 2
- Al Harrington makes free throw 2 of 2
- Shane Battier makes free throw 1 of 2
- Shane Battier makes free throw 2 of 2
- Rafer Alston misses driving layup
- Jason Richardson makes 23-foot three point jumper (Baron Davis assists)
- Yao Ming makes 7-foot two point shot (Kirk Snyder assists)
- Rafer Alston misses 24-foot three point jumper
- Rafer Alston misses layup
- Al Harrington misses 5-foot hook shot
- Al Harrington makes tip shot
- Kirk Snyder misses three point jumper
- Al Harrington misses 26-foot three point jumper
- Shane Battier misses 25-foot three point jumper
- Shane Battier makes 23-foot three point jumper (Luther Head assists)
- Monta Ellis misses 19-foot jumper
- Luther Head misses 26-foot three point jumper
- Matt Barnes misses layup
- Shane Battier misses 19-foot jumper
- Jason Richardson misses 25-foot three point jumper
- Shane Battier makes 25-foot three point jumper (Luther Head assists)
- Rafer Alston makes two point shot (Chuck Hayes assists)
- Matt Barnes makes 25-foot three point jumper (Baron Davis assists)
- Shane Battier misses 7-foot running jumper
- Shane Battier makes layup
- Monta Ellis makes 23-foot three point jumper (Matt Barnes assists)
- Rafer Alston makes driving layup
- Jason Richardson misses free throw 1 of 2
- Jason Richardson makes free throw 2 of 2
- Jason Richardson misses 25-foot three point jumper
- Al Harrington misses layup
- Al Harrington misses tip shot
- Stephen Jackson misses 25-foot three point jumper
- Yao Ming makes free throw 1 of 2
- Yao Ming makes free throw 2 of 2
- Monta Ellis misses 19-foot jumper
- Al Harrington makes 26-foot three point jumper (Baron Davis assists)
- Yao Ming misses 9-foot two point shot
- Rafer Alston misses 20-foot jumper
- Stephen Jackson makes free throw 1 of 2
- Stephen Jackson makes free throw 2 of 2
- Al Harrington makes free throw 1 of 2
- Al Harrington makes free throw 2 of 2
- Luther Head makes 19-foot jumper
- Andris Biedrins makes layup (Stephen Jackson assists)
- Jason Richardson makes layup
- Jason Richardson makes free throw 1 of 1
- Shane Battier misses running jumper
- Shane Battier makes free throw 1 of 2
- Shane Battier makes free throw 2 of 2
- Stephen Jackson misses 26-foot three point jumper
- Jason Richardson makes 26-foot three point jumper (Andris Biedrins assists)
- Shane Battier misses 26-foot three point jumper
- Vassilis Spanoulis misses 24-foot three point jumper
- Juwan Howard makes free throw 1 of 2
- Juwan Howard makes free throw 2 of 2
- Monta Ellis misses driving layup
- Andris Biedrins misses layup
- Shane Battier misses three point jumper
- Jason Richardson makes 25-foot three point jumper (Baron Davis assists)
- John Lucas misses 7-foot running jumper
- Jason Richardson makes 23-foot three point jumper (Baron Davis assists)
- Kirk Snyder misses 22-foot jumper
- Al Harrington misses 25-foot three point jumper
- Luther Head makes 25-foot three point jumper
- Baron Davis misses layup
- Kirk Snyder makes free throw 1 of 2
- Kirk Snyder makes free throw 2 of 2
- Jason Richardson makes 25-foot three point jumper (Matt Barnes assists)
- Juwan Howard makes layup (Kirk Snyder assists)
- Matt Barnes makes driving dunk (Baron Davis assists)
- Jason Richardson makes 10-foot two point shot (Baron Davis assists)
- Juwan Howard misses 9-foot two point shot
- Chuck Hayes makes layup
- Baron Davis misses 10-foot two point shot
- Luther Head makes 25-foot three point jumper (Rafer Alston assists)
- Monta Ellis makes 13-foot jumper (Andris Biedrins assists)
- Kirk Snyder misses 25-foot three point jumper
- Baron Davis misses 6-foot two point shot
- Luther Head makes 25-foot three point jumper
- Monta Ellis misses 11-foot two point shot
- Rafer Alston misses 25-foot three point jumper
- Jason Richardson misses 20-foot jumper
- Shane Battier makes free throw 1 of 2
- Shane Battier misses free throw 2 of 2
- Luther Head makes 25-foot three point jumper
- Stephen Jackson makes free throw 1 of 2
- Stephen Jackson misses free throw 2 of 2
- Juwan Howard makes free throw 1 of 2
- Juwan Howard misses free throw 2 of 2
- Baron Davis misses 25-foot three point jumper
- Luther Head misses 23-foot jumper
- Juwan Howard makes 6-foot hook shot
- Jason Richardson misses 26-foot three point jumper
- Stephen Jackson makes 25-foot three point jumper (Jason Richardson assists)
- Juwan Howard misses free throw 1 of 2
- Juwan Howard makes free throw 2 of 2
- Baron Davis makes 17-foot two point shot
- Rafer Alston makes driving layup
- Stephen Jackson misses 25-foot three point jumper
- Shane Battier misses 24-foot three point jumper
- Baron Davis misses free throw 1 of 2
- Baron Davis makes free throw 2 of 2
- Baron Davis makes free throw 1 of 2
- Baron Davis makes free throw 2 of 2
- Baron Davis makes free throw 1 of 2
- Baron Davis makes free throw 2 of 2
- Rafer Alston misses 26-foot three point jumper
- Rafer Alston misses 26-foot three point jumper
Shot Made
Shot Missed
Shot Made
Shot Missed
Data is currently unavailable.
Matchups
2025-26 Standings
Western Conference
| Pacific | W | L | PCT | GB | STRK |
|---|---|---|---|---|---|
| LA Lakers | 47 | 26 | .644 | - | W1 |
| Phoenix | 40 | 33 | .548 | 7 | L1 |
| LA Clippers | 37 | 36 | .507 | 10 | W3 |
| Golden State | 35 | 38 | .479 | 12 | W2 |
| Sacramento | 19 | 55 | .257 | 28.5 | L2 |
| Southwest | W | L | PCT | GB | STRK |
|---|---|---|---|---|---|
| San Antonio | 55 | 18 | .753 | - | W7 |
| Houston | 43 | 29 | .597 | 11.5 | L2 |
| New Orleans | 25 | 49 | .338 | 30.5 | L3 |
| Memphis | 24 | 48 | .333 | 30.5 | L4 |
| Dallas | 23 | 50 | .315 | 32 | L5 |
NBA News

New Orleans plays Toronto on 4-game road skid
New Orleans Pelicans (25-49, 11th in the Western Conference) vs. Toronto Raptors (40-32, sixth in the Eastern Conference)
6h

Charlotte faces Philadelphia, looks for 6th straight home win
Philadelphia 76ers (40-33, seventh in the Eastern Conference) vs. Charlotte Hornets (39-34, ninth in the Eastern Conference)
6h

Spurs take on the Bucks, aim for 8th straight win
San Antonio Spurs (55-18, second in the Western Conference) vs. Milwaukee Bucks (29-43, 11th in the Eastern Conference)
6h