
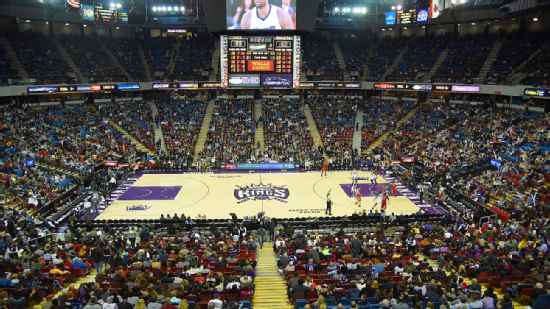
Portland Trail Blazers @ Sacramento Kings

8-5, 4-5 Away
117
8-5, 4-5 Away
Final
| 1 | 2 | 3 | 4 | T | |
|---|---|---|---|---|---|
| 28 | 29 | 37 | 23 | 117 | |
SAC | 25 | 26 | 18 | 27 | 96 |

5-9, 3-4 Home
96
5-9, 3-4 Home
Game Leaders


Team Stats


56% (45-81)
Field Goal %
50% (40-80)
54% (14-26)
Three Point %
29% (4-14)
87% (13-15)
Free Throw %
80% (12-15)
32
Turnovers
26
44
Rebounds
37
29
Largest Lead
3
Game Information
Sacramento, CA
Referee:Ken Mauer
Referee:Jim Clark
Referee:Derrick Collins
Game Flow

--POR
--SAC
Shot Chart

- Nicolas Batum misses 24-foot three point jumper
- Brad Miller makes layup (Beno Udrih assists)
- Joel Przybilla makes two point shot (Steve Blake assists)
- Jason Thompson misses free throw 1 of 2
- Jason Thompson makes free throw 2 of 2
- LaMarcus Aldridge misses 5-foot two point shot
- Jason Thompson makes free throw 1 of 2
- Jason Thompson makes free throw 2 of 2
- Brandon Roy makes free throw 1 of 2
- Brandon Roy makes free throw 2 of 2
- John Salmons misses dunk
- John Salmons misses 7-foot jumper
- Donte Greene makes layup (Beno Udrih assists)
- Brandon Roy makes 16-foot jumper
- Jason Thompson makes 7-foot jumper
- LaMarcus Aldridge misses 4-foot jumper
- Steve Blake makes 23-foot three point jumper
- Beno Udrih makes layup (Brad Miller assists)
- Steve Blake makes 25-foot three point jumper (LaMarcus Aldridge assists)
- Beno Udrih makes 13-foot jumper
- Steve Blake misses 11-foot jumper
- Donte Greene misses layup
- Nicolas Batum makes 24-foot three point jumper (Steve Blake assists)
- Beno Udrih misses jumper
- Steve Blake makes 24-foot three point jumper (Brandon Roy assists)
- Beno Udrih misses 16-foot jumper
- Donte Greene misses 25-foot three point jumper
- Jason Thompson misses layup
- LaMarcus Aldridge misses layup
- Donte Greene misses layup
- Jason Thompson makes 9-foot two point shot
- Brandon Roy misses driving layup
- Joel Przybilla makes tip shot
- Beno Udrih makes driving layup
- Steve Blake misses 25-foot three point jumper
- Donte Greene misses 25-foot three point jumper
- Beno Udrih misses 24-foot three point jumper
- Brandon Roy makes free throw 1 of 2
- Brandon Roy makes free throw 2 of 2
- John Salmons makes driving layup
- Bobby Jackson makes jumper
- Travis Outlaw makes 8-foot two point shot
- Bobby Jackson misses 7-foot jumper
- LaMarcus Aldridge makes 8-foot two point shot
- John Salmons misses 18-foot jumper
- LaMarcus Aldridge misses 20-foot jumper
- John Salmons makes layup (Beno Udrih assists)
- Greg Oden misses 9-foot jumper
- Spencer Hawes misses 25-foot three point jumper
- Channing Frye makes dunk (Greg Oden assists)
- Bobby Brown makes driving layup
- Sergio Rodriguez misses 49-foot three point jumper
- Rudy Fernandez misses 25-foot three point jumper
- Spencer Hawes makes 7-foot two point shot (John Salmons assists)
- Channing Frye misses 5-foot jumper
- Spencer Hawes makes free throw 1 of 2
- Spencer Hawes makes free throw 2 of 2
- Donte Greene misses 24-foot three point jumper
- Travis Outlaw misses 13-foot jumper
- Channing Frye makes 18-foot jumper (Rudy Fernandez assists)
- Bobby Brown makes driving layup
- Bobby Brown misses free throw 1 of 1
- Greg Oden misses 8-foot jumper
- Rudy Fernandez misses 18-foot jumper
- Greg Oden makes slam dunk (Channing Frye assists)
- Jason Thompson makes free throw 1 of 2
- Jason Thompson makes free throw 2 of 2
- Bobby Jackson makes layup (Spencer Hawes assists)
- Rudy Fernandez makes 25-foot three point jumper (Travis Outlaw assists)
- Spencer Hawes misses 21-foot jumper
- Bobby Brown misses 20-foot jumper
- Joel Przybilla makes 5-foot two point shot (Rudy Fernandez assists)
- Spencer Hawes makes 13-foot two point shot (Donte Greene assists)
- LaMarcus Aldridge makes 10-foot two point shot
- Steve Blake makes 23-foot three point jumper (Rudy Fernandez assists)
- Brad Miller makes jumper
- Steve Blake misses 22-foot three point jumper
- Brandon Roy makes layup (Steve Blake assists)
- Bobby Jackson misses 26-foot three point jumper
- Spencer Hawes makes 13-foot jumper
- LaMarcus Aldridge makes 21-foot jumper (Steve Blake assists)
- Bobby Brown makes 23-foot three point jumper (Bobby Jackson assists)
- LaMarcus Aldridge makes two point shot
- Spencer Hawes makes 22-foot jumper (Bobby Brown assists)
- LaMarcus Aldridge makes 11-foot two point shot
- Bobby Brown makes driving layup
- LaMarcus Aldridge makes 4-foot jumper
- LaMarcus Aldridge makes free throw 1 of 1
- LaMarcus Aldridge makes 7-foot jumper
- LaMarcus Aldridge misses free throw 1 of 1
- Brad Miller makes 17-foot jumper (Beno Udrih assists)
- Bobby Jackson misses 23-foot three point jumper
- Travis Outlaw makes 12-foot two point shot
- Beno Udrih misses free throw 1 of 2
- Beno Udrih makes free throw 2 of 2
- Steve Blake makes 25-foot three point jumper (LaMarcus Aldridge assists)
- Brad Miller makes 22-foot jumper (Beno Udrih assists)
- Joel Przybilla makes 7-foot two point shot
- John Salmons misses 20-foot jumper
- Steve Blake makes layup (Brandon Roy assists)
- Donte Greene makes layup (Brad Miller assists)
- Brandon Roy makes two point shot
- Steve Blake misses 23-foot three point jumper
- Beno Udrih misses 25-foot three point jumper
- Steve Blake misses 26-foot three point jumper
- Brad Miller makes 23-foot three point jumper
- Nicolas Batum misses 23-foot three point jumper
- Brad Miller misses layup
- LaMarcus Aldridge misses 23-foot three point jumper
- Steve Blake makes 25-foot three point jumper
- Beno Udrih misses 16-foot jumper
- LaMarcus Aldridge misses 15-foot jumper
- John Salmons misses 23-foot jumper
- Steve Blake misses layup
- Brandon Roy makes driving layup
- John Salmons makes layup (Jason Thompson assists)
- Brandon Roy makes 12-foot jumper (Steve Blake assists)
- LaMarcus Aldridge misses 11-foot jumper
- Joel Przybilla makes free throw 1 of 2
- Joel Przybilla makes free throw 2 of 2
- Jason Thompson makes 6-foot two point shot
- Travis Outlaw makes 23-foot three point jumper (LaMarcus Aldridge assists)
- Brad Miller makes layup (Jason Thompson assists)
- LaMarcus Aldridge makes 19-foot jumper (Brandon Roy assists)
- Brad Miller makes 25-foot three point jumper (Jason Thompson assists)
- Brandon Roy misses 25-foot three point jumper
- LaMarcus Aldridge makes free throw 1 of 2
- LaMarcus Aldridge makes free throw 2 of 2
- Spencer Hawes misses 22-foot jumper
- Brandon Roy makes dunk (Greg Oden assists)
- John Salmons makes layup (Beno Udrih assists)
- Rudy Fernandez makes 23-foot three point jumper (Sergio Rodriguez assists)
- John Salmons misses 10-foot jumper
- Sergio Rodriguez makes free throw 1 of 2
- Sergio Rodriguez makes free throw 2 of 2
- Bobby Jackson misses 24-foot three point jumper
- Travis Outlaw makes 24-foot three point jumper
- Spencer Hawes misses 21-foot jumper
- Travis Outlaw makes slam dunk (Sergio Rodriguez assists)
- Bobby Jackson misses 7-foot running jumper
- Bobby Brown misses layup
- Greg Oden makes 8-foot two point shot
- Jason Thompson makes 18-foot jumper (Bobby Brown assists)
- Greg Oden makes free throw 1 of 2
- Greg Oden misses free throw 2 of 2
- Donte Greene makes free throw 1 of 2
- Donte Greene makes free throw 2 of 2
- Rudy Fernandez makes 25-foot three point jumper (Greg Oden assists)
- Channing Frye makes layup (Sergio Rodriguez assists)
- Spencer Hawes makes 25-foot three point jumper (Bobby Brown assists)
- Sergio Rodriguez misses 14-foot jumper
- Quincy Douby makes driving layup
- Jason Thompson makes 17-foot jumper (Bobby Brown assists)
- Rudy Fernandez makes 20-foot jumper (Sergio Rodriguez assists)
- Donte Greene misses 20-foot jumper
- LaMarcus Aldridge misses 12-foot two point shot
- Spencer Hawes misses 7-foot two point shot
- LaMarcus Aldridge misses 15-foot jumper
- Jason Thompson makes free throw 1 of 2
- Jason Thompson makes free throw 2 of 2
- Rudy Fernandez misses 24-foot three point jumper
- Travis Outlaw misses 24-foot three point jumper
- Greg Oden makes dunk (Rudy Fernandez assists)
- Bobby Brown makes 19-foot jumper
- Steve Blake misses 17-foot jumper
- Channing Frye misses 19-foot jumper
- Spencer Hawes misses 14-foot jumper
- Donte Greene misses 24-foot three point jumper
- Travis Outlaw misses 17-foot jumper
- Travis Outlaw makes 24-foot three point jumper (Jerryd Bayless assists)
- Donte Greene makes dunk (Bobby Brown assists)
- Rudy Fernandez makes 25-foot three point jumper (Channing Frye assists)
- Jason Thompson makes 22-foot jumper (Bobby Brown assists)
- Jerryd Bayless makes 8-foot two point shot
- Jason Thompson misses 6-foot jumper
- Spencer Hawes misses tip shot
- Jason Thompson misses tip shot
- Quincy Douby makes 10-foot two point shot
- Shelden Williams misses 19-foot jumper
- Jerryd Bayless misses 9-foot running jumper
- Jerryd Bayless makes layup
- Jerryd Bayless makes free throw 1 of 1
- Spencer Hawes makes layup (Shelden Williams assists)
- Bobby Brown makes dunk (Spencer Hawes assists)
- Shelden Williams makes dunk (Bobby Brown assists)
Shot Made
Shot Missed
Shot Made
Shot Missed
Data is currently unavailable.
Matchups
2025-26 Standings
Western Conference
| Northwest | W | L | PCT | GB | STRK |
|---|---|---|---|---|---|
| Oklahoma City | 42 | 14 | .750 | - | L1 |
| Denver | 35 | 20 | .636 | 6.5 | W1 |
| Minnesota | 34 | 22 | .607 | 8 | W2 |
| Portland | 27 | 29 | .482 | 15 | W1 |
| Utah | 18 | 38 | .321 | 24 | L1 |
| Pacific | W | L | PCT | GB | STRK |
|---|---|---|---|---|---|
| LA Lakers | 33 | 21 | .611 | - | W1 |
| Phoenix | 32 | 23 | .582 | 1.5 | L1 |
| Golden State | 29 | 26 | .527 | 4.5 | L1 |
| LA Clippers | 26 | 28 | .481 | 7 | W1 |
| Sacramento | 12 | 44 | .214 | 22 | L14 |
NBA News

Johnson and McCollum power Hawks past the 76ers 117-117 as Atlanta snaps 3-game skid
— Jalen Johnson had 32 points and 10 rebounds and CJ McCollum added 23 points as the Atlanta Hawks beat the Philadelphia 76ers 117-107 on Thursday night in the teams' first game after the All-Star break.
22m
Atlanta Hawks vs. Philadelphia 76ers: Game Highlights
Atlanta Hawks vs. Philadelphia 76ers: Game Highlights
27m
Wizards beat the Pacers 112-105, snapping a 3-game slide
— Bub Carrington and Anthony Gill each scored 13 points and helped spark a decisive fourth-quarter run as the Washington Wizards outlasted the Indiana Pacers 112-105 on Thursday night.
1h