
Atlanta Hawks @ Portland Trail Blazers

32-23, 13-17 Away
98
32-23, 13-17 Away
Final
| 1 | 2 | 3 | 4 | T | |
|---|---|---|---|---|---|
ATL | 26 | 22 | 24 | 26 | 98 |
| 23 | 27 | 30 | 28 | 108 |

34-20, 22-5 Home
108
34-20, 22-5 Home
Game Leaders


Team Stats


47% (37-78)
Field Goal %
48% (44-92)
32% (7-22)
Three Point %
35% (8-23)
74% (17-23)
Free Throw %
75% (12-16)
26
Turnovers
16
48
Rebounds
51
7
Largest Lead
16
Game Information
Portland, OR
Referee:Bennett Salvatore
Referee:Brian Forte
Referee:Derrick Stafford
Game Flow

--ATL
--POR
Shot Chart

- Joe Johnson makes free throw 1 of 2
- Joe Johnson misses free throw 2 of 2
- LaMarcus Aldridge misses 17-foot jumper
- Steve Blake makes 20-foot jumper (LaMarcus Aldridge assists)
- Mike Bibby makes 18-foot jumper (Joe Johnson assists)
- LaMarcus Aldridge makes jumper
- LaMarcus Aldridge makes free throw 1 of 1
- Josh Smith makes 5-foot two point shot (Joe Johnson assists)
- Steve Blake makes 16-foot two point shot
- Mike Bibby misses 18-foot jumper
- Steve Blake misses 23-foot three point jumper
- Marvin Williams misses three point jumper
- Josh Smith misses 21-foot jumper
- Nicolas Batum misses 23-foot three point jumper
- Joe Johnson misses 16-foot jumper
- LaMarcus Aldridge misses layup
- LaMarcus Aldridge makes tip shot
- Joe Johnson makes 3-foot two point shot
- Marvin Williams makes two point shot (Joe Johnson assists)
- Brandon Roy makes driving dunk (Steve Blake assists)
- LaMarcus Aldridge misses 15-foot two point shot
- Marvin Williams makes 21-foot jumper (Joe Johnson assists)
- Nicolas Batum misses 24-foot three point jumper
- Marvin Williams makes layup (Joe Johnson assists)
- Brandon Roy misses 21-foot jumper
- Josh Smith misses two point shot
- Josh Smith makes tip shot
- Brandon Roy makes 4-foot two point shot
- Al Horford makes 8-foot two point shot
- Steve Blake makes 20-foot jumper
- Brandon Roy makes dunk (Nicolas Batum assists)
- LaMarcus Aldridge misses 21-foot two point shot
- Maurice Evans makes 25-foot three point jumper (Al Horford assists)
- Brandon Roy misses 21-foot jumper
- Joel Przybilla misses layup
- Josh Smith misses layup
- Josh Smith makes layup
- Josh Smith makes free throw 1 of 1
- LaMarcus Aldridge misses 19-foot jumper
- Joe Johnson misses jumper
- Steve Blake misses 25-foot three point jumper
- Mike Bibby makes free throw 1 of 2
- Mike Bibby misses free throw 2 of 2
- Rudy Fernandez misses 26-foot three point jumper
- Channing Frye misses layup
- LaMarcus Aldridge makes dunk
- Mike Bibby makes 18-foot running jumper
- Channing Frye misses 21-foot jumper
- LaMarcus Aldridge makes dunk
- Channing Frye makes 20-foot jumper (Rudy Fernandez assists)
- Joe Johnson misses 17-foot jumper
- Sergio Rodriguez misses 23-foot jumper
- Maurice Evans misses 24-foot three point jumper
- LaMarcus Aldridge makes two point shot
- LaMarcus Aldridge makes free throw 1 of 1
- Ronald Murray makes 11-foot running jumper (Marvin Williams assists)
- Channing Frye misses 22-foot jumper
- Zaza Pachulia misses hook shot
- Maurice Evans misses two point shot
- Travis Outlaw makes 24-foot three point jumper (Rudy Fernandez assists)
- Ronald Murray makes 18-foot two point shot
- Joel Przybilla makes 3-foot two point shot (Rudy Fernandez assists)
- Sergio Rodriguez makes two point shot
- Maurice Evans misses 25-foot three point jumper
- Rudy Fernandez misses 25-foot three point jumper
- Mike Bibby makes 18-foot two point shot
- Sergio Rodriguez misses 8-foot jumper
- Rudy Fernandez makes jumper
- Mike Bibby makes 25-foot three point jumper (Joe Johnson assists)
- Joe Johnson makes 24-foot three point jumper (Ronald Murray assists)
- Brandon Roy misses 11-foot two point shot
- Joel Przybilla makes tip shot
- Joe Johnson misses 17-foot jumper
- Brandon Roy makes two point shot
- Ronald Murray makes 25-foot three point jumper (Mike Bibby assists)
- Brandon Roy makes 20-foot jumper
- Rudy Fernandez misses driving layup
- Brandon Roy makes tip shot
- Joe Johnson makes 6-foot jumper
- Rudy Fernandez misses 23-foot three point jumper
- Mike Bibby makes 21-foot two point shot
- Brandon Roy misses 24-foot three point jumper
- Joe Johnson misses 23-foot three point jumper
- Ronald Murray misses 22-foot three point jumper
- Brandon Roy misses running jumper
- Mike Bibby makes 20-foot jumper
- LaMarcus Aldridge makes 19-foot jumper
- Maurice Evans misses 24-foot three point jumper
- Mike Bibby misses 25-foot three point jumper
- Steve Blake makes 11-foot two point shot (Jerryd Bayless assists)
- Joe Johnson makes technical free throw
- Joe Johnson misses 4-foot running jumper
- LaMarcus Aldridge makes dunk (Jerryd Bayless assists)
- Steve Blake misses free throw 1 of 3
- Steve Blake makes free throw 2 of 3
- Steve Blake misses free throw 3 of 3
- Steve Blake misses 23-foot three point jumper
- Nicolas Batum misses 22-foot three point jumper
- Marvin Williams misses three point jumper
- Steve Blake makes 25-foot three point jumper (LaMarcus Aldridge assists)
- LaMarcus Aldridge makes slam dunk
- Josh Smith misses jumper
- LaMarcus Aldridge misses 4-foot two point shot
- Nicolas Batum misses 11-foot running jumper
- Joe Johnson makes two point shot
- Brandon Roy makes 23-foot three point jumper (Steve Blake assists)
- Mike Bibby makes 25-foot three point jumper (Joe Johnson assists)
- Joe Johnson makes three point jumper
- Brandon Roy makes 21-foot jumper
- Marvin Williams makes 14-foot running jumper
- Brandon Roy misses 13-foot jumper
- Nicolas Batum makes 17-foot two point shot (Brandon Roy assists)
- Al Horford misses free throw 1 of 2
- Al Horford makes free throw 2 of 2
- LaMarcus Aldridge makes 16-foot two point shot
- Mike Bibby makes 21-foot jumper (Marvin Williams assists)
- LaMarcus Aldridge makes 21-foot jumper (Steve Blake assists)
- Joe Johnson misses jumper
- Joel Przybilla makes dunk (Nicolas Batum assists)
- Joe Johnson makes 17-foot two point shot (Al Horford assists)
- Brandon Roy misses 18-foot two point shot
- Steve Blake misses 25-foot three point jumper
- Marvin Williams makes 25-foot three point jumper (Al Horford assists)
- Marvin Williams misses 21-foot two point shot
- Brandon Roy makes 17-foot two point shot
- Marvin Williams misses 23-foot three point jumper
- Travis Outlaw makes 23-foot three point jumper (Rudy Fernandez assists)
- Travis Outlaw makes dunk (Channing Frye assists)
- Mike Bibby makes 12-foot jumper (Josh Smith assists)
- Rudy Fernandez misses three point jumper
- Brandon Roy misses two point shot
- Joe Johnson misses 9-foot running jumper
- Mike Bibby misses three point jumper
- Rudy Fernandez makes three point jumper (Brandon Roy assists)
- Mike Bibby makes free throw 1 of 2
- Mike Bibby makes free throw 2 of 2
- Travis Outlaw misses 25-foot three point jumper
- Josh Smith makes 18-foot jumper (Mike Bibby assists)
- Rudy Fernandez makes two point shot (Sergio Rodriguez assists)
- Ronald Murray misses 54-foot three point jumper
- Josh Smith misses driving layup
- Ronald Murray makes free throw 1 of 2
- Ronald Murray misses free throw 2 of 2
- Rudy Fernandez makes 9-foot two point shot
- Joe Johnson makes free throw 1 of 2
- Joe Johnson makes free throw 2 of 2
- Joe Johnson misses two point shot
- Rudy Fernandez misses technical free throw
- Joel Przybilla misses layup
- Joel Przybilla misses layup
- Al Horford misses free throw 1 of 2
- Al Horford makes free throw 2 of 2
- Rudy Fernandez makes 24-foot three point jumper (Brandon Roy assists)
- Ronald Murray makes free throw 1 of 2
- Ronald Murray makes free throw 2 of 2
- Brandon Roy makes two point shot (Steve Blake assists)
- Josh Smith makes two point shot (Ronald Murray assists)
- Travis Outlaw makes free throw 1 of 2
- Travis Outlaw makes free throw 2 of 2
- Josh Smith misses layup
- Brandon Roy makes 24-foot three point jumper (Steve Blake assists)
- Joe Johnson makes technical free throw
- Joe Johnson misses 24-foot three point jumper
- LaMarcus Aldridge makes 20-foot jumper (Brandon Roy assists)
- Mike Bibby misses 26-foot three point jumper
- Brandon Roy makes free throw 1 of 2
- Brandon Roy misses free throw 2 of 2
- Brandon Roy makes 18-foot jumper
- Joe Johnson misses two point shot
- Brandon Roy misses driving layup
- Mike Bibby makes two point shot
- Steve Blake makes 23-foot jumper (Brandon Roy assists)
- Joe Johnson misses 23-foot three point jumper
- Marvin Williams misses tip shot
- Brandon Roy misses 19-foot jumper
- Mike Bibby makes free throw 1 of 2
- Mike Bibby makes free throw 2 of 2
- Travis Outlaw makes free throw 1 of 2
- Travis Outlaw makes free throw 2 of 2
- Joe Johnson makes layup
- Steve Blake misses three point jumper
- Ronald Murray makes free throw 1 of 2
- Ronald Murray misses free throw 2 of 2
- Rudy Fernandez makes 25-foot three pointer
- Marvin Williams misses 23-foot jumper
- LaMarcus Aldridge misses 14-foot jumper
- Marvin Williams makes layup (Ronald Murray assists)
- Steve Blake misses 25-foot three point jumper
- Marvin Williams makes dunk (Ronald Murray assists)
- Travis Outlaw misses 16-foot two point shot
- Joe Johnson misses 11-foot two point shot
- Steve Blake misses 11-foot two point shot
- Ronald Murray makes two point shot
- Rudy Fernandez makes free throw 1 of 2
- Rudy Fernandez makes free throw 2 of 2
- Ronald Murray makes driving dunk
- Rudy Fernandez makes free throw 1 of 2
- Rudy Fernandez makes free throw 2 of 2
- Ronald Murray makes two point shot
- Joe Johnson misses 25-foot three point jumper
Shot Made
Shot Missed
Shot Made
Shot Missed
Data is currently unavailable.
Matchups
2025-26 Standings
Eastern Conference
| Southeast | W | L | PCT | GB | STRK |
|---|---|---|---|---|---|
| Orlando | 30 | 26 | .536 | - | W1 |
| Miami | 31 | 27 | .534 | - | W3 |
| Atlanta | 28 | 31 | .475 | 3.5 | W1 |
| Charlotte | 27 | 31 | .466 | 4 | W1 |
| Washington | 16 | 40 | .286 | 14 | L1 |
Western Conference
| Northwest | W | L | PCT | GB | STRK |
|---|---|---|---|---|---|
| Oklahoma City | 44 | 14 | .759 | - | W2 |
| Denver | 36 | 22 | .621 | 8 | L1 |
| Minnesota | 35 | 23 | .603 | 9 | L1 |
| Portland | 28 | 30 | .483 | 16 | W1 |
| Utah | 18 | 40 | .310 | 26 | L3 |
NBA News
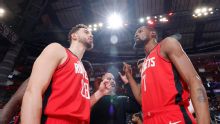
Utah Jazz vs. Houston Rockets: Game Highlights
Utah Jazz vs. Houston Rockets: Game Highlights
3h
Smith scores 31 points and Thompson adds 20 as Rockets beat the Jazz 125-105
— Jabari Smith Jr. had 31 points and nine rebounds and Amen Thompson scored 20 points as the Houston Rockets beat the Utah Jazz 125-105 on Monday night.
3h
The best plays in the NBA from Monday
The high-profile Spurs-Pistons matchup headlines the top plays around the association on Monday.
3h