
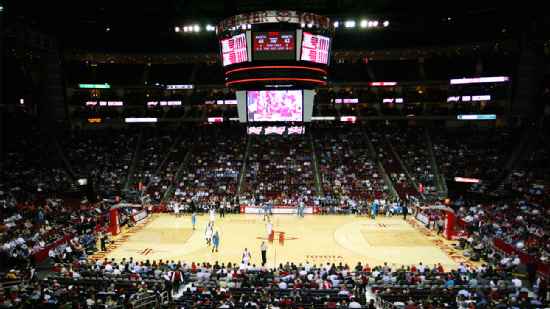
Toronto Raptors @ Houston Rockets

31-28, 10-19 Away
92
31-28, 10-19 Away

30-29, 17-13 Home
116
30-29, 17-13 Home
Game Leaders


Team Stats


44% (34-77)
Field Goal %
51% (41-80)
36% (5-14)
Three Point %
52% (13-25)
76% (19-25)
Free Throw %
91% (21-23)
36
Turnovers
34
43
Rebounds
47
0
Largest Lead
36
Game Information
Houston, TX
Referee:Ron Garretson
Referee:Phil Robinson
Referee:Michael Smith
Game Flow

--TOR
--HOU
Shot Chart

- Andrea Bargnani misses layup
- Shane Battier makes 26-foot three point jumper (Chuck Hayes assists)
- Jarrett Jack misses two point shot
- Luis Scola makes layup (Shane Battier assists)
- Hedo Turkoglu makes 19-foot jumper
- Luis Scola makes 21-foot jumper (Chuck Hayes assists)
- Jarrett Jack makes free throw 1 of 2
- Jarrett Jack makes free throw 2 of 2
- Aaron Brooks makes 25-foot three point jumper
- Hedo Turkoglu misses 25-foot three point jumper
- Aaron Brooks makes 17-foot two point shot
- Andrea Bargnani makes 20-foot jumper (Jarrett Jack assists)
- Kevin Martin makes three point jumper (Shane Battier assists)
- Kevin Martin makes dunk (Chuck Hayes assists)
- Aaron Brooks makes two point shot (Chuck Hayes assists)
- Jarrett Jack makes driving layup
- Luis Scola makes layup (Aaron Brooks assists)
- Luis Scola makes free throw 1 of 1
- Andrea Bargnani makes 27-foot three point jumper (Jarrett Jack assists)
- Aaron Brooks makes driving layup
- Kevin Martin misses 17-foot two point shot
- Andrea Bargnani makes layup (Rasho Nesterovic assists)
- Aaron Brooks misses 27-foot three point jumper
- Kevin Martin misses 20-foot two point shot
- Andrea Bargnani makes driving layup (Jarrett Jack assists)
- Andrea Bargnani misses free throw 1 of 1
- Shane Battier misses 24-foot three point jumper
- Chuck Hayes misses free throw 1 of 2
- Chuck Hayes misses free throw 2 of 2
- Andrea Bargnani makes 25-foot three point jumper (Jarrett Jack assists)
- Kevin Martin makes free throw 1 of 2
- Kevin Martin makes free throw 2 of 2
- Jarrett Jack makes 21-foot two point shot
- Kevin Martin makes two point shot (Chuck Hayes assists)
- Andrea Bargnani misses 22-foot jumper
- Amir Johnson misses layup
- Luis Scola makes free throw 1 of 2
- Luis Scola makes free throw 2 of 2
- Andrea Bargnani misses 25-foot three point jumper
- Andrea Bargnani makes dunk
- Luis Scola misses 19-foot jumper
- Reggie Evans makes free throw 1 of 2
- Reggie Evans misses free throw 2 of 2
- Reggie Evans makes layup
- Kevin Martin makes 25-foot three point jumper (Aaron Brooks assists)
- Jarrett Jack makes two point shot
- Aaron Brooks makes 12-foot two point shot
- Andrea Bargnani misses 12-foot two point shot
- Reggie Evans makes free throw 2 of 2
- Reggie Evans misses free throw 1 of 2
- Kevin Martin makes free throw 1 of 2
- Kevin Martin makes free throw 2 of 2
- Reggie Evans misses 7-foot hook shot
- Aaron Brooks misses 25-foot three point jumper
- Marcus Banks makes 23-foot three point jumper (Amir Johnson assists)
- Kevin Martin misses 25-foot three point jumper
- Marcus Banks makes 22-foot jumper
- Aaron Brooks makes 16-foot two point shot
- Hedo Turkoglu makes free throw 1 of 2
- Hedo Turkoglu makes free throw 2 of 2
- Luis Scola misses two point shot
- Sonny Weems misses 15-foot jumper
- Aaron Brooks makes layup (David Andersen assists)
- Antoine Wright misses 24-foot three point jumper
- Aaron Brooks makes free throw 1 of 2
- Aaron Brooks makes free throw 2 of 2
- Antoine Wright misses 10-foot two point shot
- Antoine Wright makes layup (Marcus Banks assists)
- David Andersen makes 13-foot jumper (Chase Budinger assists)
- Rasho Nesterovic misses 10-foot two point shot
- Chase Budinger misses 26-foot three point jumper
- Sonny Weems makes dunk (Marcus Banks assists)
- Chase Budinger makes two point shot (David Andersen assists)
- Andrea Bargnani misses 12-foot two point shot
- David Andersen makes 18-foot jumper (Kevin Martin assists)
- Sonny Weems makes two point shot (Rasho Nesterovic assists)
- Kevin Martin makes 24-foot three point jumper (Garrett Temple assists)
- Marcus Banks makes driving layup
- Andrea Bargnani misses 18-foot jumper
- David Andersen misses 9-foot two point shot
- Jarrett Jack misses 25-foot three point jumper
- Kevin Martin misses 16-foot two point shot
- David Andersen makes 25-foot three point jumper (Kevin Martin assists)
- Andrea Bargnani misses 25-foot three point jumper
- Jarrett Jack makes layup (Hedo Turkoglu assists)
- Kevin Martin misses 13-foot running jumper
- Antoine Wright misses 21-foot jumper
- Kevin Martin makes technical free throw
- Shane Battier makes free throw 1 of 2
- Shane Battier makes free throw 2 of 2
- Sonny Weems makes dunk
- Chuck Hayes misses driving layup
- Andrea Bargnani misses 8-foot two point shot
- David Andersen makes free throw 1 of 2
- David Andersen makes free throw 2 of 2
- Andrea Bargnani misses 16-foot jumper
- Aaron Brooks makes 26-foot three point jumper (Kevin Martin assists)
- Hedo Turkoglu misses 26-foot three pointer
- Aaron Brooks makes 13-foot two point shot (Kevin Martin assists)
- Hedo Turkoglu misses 22-foot two point shot
- David Andersen makes 25-foot three point jumper (Aaron Brooks assists)
- Aaron Brooks misses 26-foot three point jumper
- Sonny Weems misses 14-foot two point shot
- Kevin Martin makes two point shot (Aaron Brooks assists)
- Jarrett Jack misses free throw 1 of 2
- Jarrett Jack makes free throw 2 of 2
- Luis Scola makes 17-foot jumper (Chuck Hayes assists)
- Aaron Brooks makes 25-foot three point jumper (Luis Scola assists)
- Sonny Weems makes running jumper (Jarrett Jack assists)
- Aaron Brooks misses 27-foot three point jumper
- Chuck Hayes makes layup (Luis Scola assists)
- Sonny Weems misses two point shot
- Kevin Martin misses 24-foot three point jumper
- Jarrett Jack misses 22-foot jumper
- Kevin Martin misses 25-foot three point jumper
- Rasho Nesterovic makes 9-foot two point shot (Jarrett Jack assists)
- Luis Scola misses 6-foot two point shot
- Shane Battier misses 23-foot three point jumper
- Andrea Bargnani misses 20-foot two point shot
- Rasho Nesterovic misses 21-foot jumper
- Aaron Brooks misses 25-foot three point jumper
- Aaron Brooks makes 25-foot three point jumper (Chuck Hayes assists)
- Jarrett Jack misses two point shot
- Chase Budinger misses 21-foot jumper
- Marcus Banks makes two point shot
- Kevin Martin makes 27-foot three point jumper (Aaron Brooks assists)
- Marco Belinelli misses driving layup
- Kevin Martin makes layup (Chuck Hayes assists)
- Marcus Banks makes technical free throw
- Andrea Bargnani misses 11-foot two point shot
- David Andersen makes 7-foot hook shot
- Marco Belinelli makes free throw 1 of 2
- Marco Belinelli makes free throw 2 of 2
- Kevin Martin makes 23-foot three point jumper (Aaron Brooks assists)
- Chase Budinger makes two point shot (Aaron Brooks assists)
- Chase Budinger makes free throw 1 of 1
- Antoine Wright makes 9-foot two point shot
- Chase Budinger misses 15-foot jumper
- Reggie Evans makes layup
- Garrett Temple makes free throw 1 of 2
- Garrett Temple makes free throw 2 of 2
- Marco Belinelli makes free throw 1 of 2
- Marco Belinelli makes free throw 2 of 2
- Chase Budinger misses 8-foot running jumper
- Amir Johnson makes 8-foot hook shot
- David Andersen makes 22-foot jumper (Garrett Temple assists)
- Antoine Wright misses 26-foot three point jumper
- Jermaine Taylor misses 14-foot jumper
- Antoine Wright makes two point shot (Marcus Banks assists)
- David Andersen misses 26-foot three point jumper
- Jared Jeffries misses 20-foot jumper
- Marco Belinelli misses 23-foot jumper
- Marco Belinelli misses 24-foot three point jumper
- Chase Budinger misses 11-foot running jumper
- Marcus Banks misses jumper
- Garrett Temple misses 21-foot two point shot
- Jermaine Taylor misses 20-foot jumper
- Marco Belinelli makes 20-foot jumper (Marcus Banks assists)
- Marco Belinelli misses 22-foot jumper
- Chase Budinger makes driving layup (Jermaine Taylor assists)
- Antoine Wright makes 23-foot three point jumper
- Garrett Temple makes 24-foot three point jumper (Chase Budinger assists)
- Reggie Evans makes layup (Antoine Wright assists)
- Reggie Evans makes free throw 1 of 1
- Reggie Evans misses free throw 1 of 2
- Reggie Evans makes free throw 2 of 2
- Antoine Wright makes layup
- Jermaine Taylor makes driving layup
- Jermaine Taylor makes free throw 1 of 1
- Marco Belinelli makes 18-foot jumper (Reggie Evans assists)
- Garrett Temple misses 19-foot two point shot
- Marcus Banks makes free throw 1 of 2
- Marcus Banks misses free throw 2 of 2
- Jordan Hill makes 21-foot jumper (Jermaine Taylor assists)
- Marcus Banks misses 16-foot two point shot
- Reggie Evans misses 9-foot jumper
- Marcus Banks makes free throw 1 of 2
- Marcus Banks makes free throw 2 of 2
- Jordan Hill misses 17-foot jumper
- Chase Budinger misses 22-foot jumper
- Marco Belinelli makes 25-foot three pointer
- Jordan Hill makes 6-foot two point shot
- Jermaine Taylor makes two point shot (Chase Budinger assists)
- Jermaine Taylor misses 20-foot jumper
- Antoine Wright misses 26-foot three point jumper
- Hilton Armstrong misses 18-foot jumper
- Patrick O'Bryant makes 14-foot jumper (Marco Belinelli assists)
- Garrett Temple makes free throw 1 of 2
- Garrett Temple makes free throw 2 of 2
- Marco Belinelli misses 21-foot two point shot
- Jermaine Taylor makes layup (Garrett Temple assists)
- Jermaine Taylor makes free throw 1 of 1
- Antoine Wright makes free throw 1 of 2
- Antoine Wright makes free throw 2 of 2
- Marcus Banks makes layup
Shot Made
Shot Missed
Shot Made
Shot Missed
Data is currently unavailable.
Matchups
2025-26 Standings
Eastern Conference
| Atlantic | W | L | PCT | GB | STRK |
|---|---|---|---|---|---|
| Boston | 53 | 25 | .679 | - | W3 |
| New York | 51 | 28 | .646 | 2.5 | W3 |
| Toronto | 43 | 35 | .551 | 10 | L1 |
| Philadelphia | 43 | 36 | .544 | 10.5 | L2 |
| Brooklyn | 19 | 59 | .244 | 34 | W1 |
Western Conference
| Southwest | W | L | PCT | GB | STRK |
|---|---|---|---|---|---|
| San Antonio | 60 | 19 | .759 | - | W1 |
| Houston | 49 | 29 | .628 | 10.5 | W6 |
| Dallas | 25 | 53 | .321 | 34.5 | W1 |
| New Orleans | 25 | 54 | .316 | 35 | L8 |
| Memphis | 25 | 54 | .316 | 35 | L5 |
NBA News

San Antonio takes home win streak into matchup with Portland
Portland Trail Blazers (40-39, ninth in the Western Conference) vs. San Antonio Spurs (60-19, second in the Western Conference)
7h

Denver plays Memphis, looks for 10th straight home win
Memphis Grizzlies (25-54, 13th in the Western Conference) vs. Denver Nuggets (51-28, third in the Western Conference)
7h

Cleveland faces Atlanta, aims for 4th straight victory
Atlanta Hawks (45-34, fifth in the Eastern Conference) vs. Cleveland Cavaliers (50-29, fourth in the Eastern Conference)
7h