
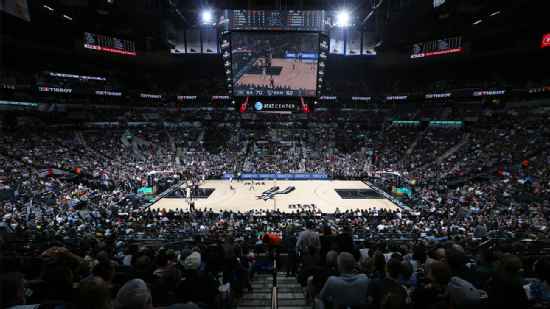
Brooklyn Nets @ San Antonio Spurs

0-2, 0-1 Away
75
0-2, 0-1 Away

1-1, 1-0 Home
102
1-1, 1-0 Home
Game Leaders


Team Stats


40% (31-77)
Field Goal %
47% (40-86)
31% (5-16)
Three Point %
41% (9-22)
53% (8-15)
Free Throw %
100% (13-13)
15
Turnovers
18
39
Rebounds
60
10
Largest Lead
27
Game Information
San Antonio, TX
Referee:Derek Richardson
Referee:Bill Kennedy
Referee:John Goble
Game Flow

--BKN
--SA
Shot Chart

- Thaddeus Young makes 24-foot three point jumper (Jarrett Jack assists)
- LaMarcus Aldridge makes 12-foot two point shot
- Jarrett Jack misses 9-foot Running Jumper
- Kawhi Leonard misses 17-foot jumper
- Jarrett Jack misses 25-foot three point jumper
- Tony Parker makes 16-foot jumper
- Brook Lopez makes 12-foot jumper
- Tim Duncan makes layup (Tony Parker assists)
- Thaddeus Young misses 18-foot jumper
- Tony Parker misses finger roll layup
- Danny Green makes 26-foot three point jumper (LaMarcus Aldridge assists)
- Wayne Ellington misses 23-foot three point jumper
- Tim Duncan makes free throw 1 of 2
- Tim Duncan makes free throw 2 of 2
- Thaddeus Young misses 4-foot Running Jumper
- Tony Parker misses 18-foot jumper
- Joe Johnson misses 5-foot driving bank shot
- LaMarcus Aldridge misses 11-foot two point shot
- Jarrett Jack misses 15-foot jumper
- Kawhi Leonard misses 17-foot jumper
- Thaddeus Young misses 24-foot three point jumper
- Kawhi Leonard misses 17-foot jumper
- Brook Lopez makes 19-foot jumper (Jarrett Jack assists)
- Brook Lopez misses 21-foot jumper
- Kawhi Leonard makes free throw 1 of 2
- Kawhi Leonard makes free throw 2 of 2
- Wayne Ellington misses 26-foot three point jumper
- Tim Duncan makes 20-foot jumper (Kawhi Leonard assists)
- Jarrett Jack makes 17-foot jumper
- Kawhi Leonard misses 24-foot three point jumper
- Bojan Bogdanovic makes layup (Brook Lopez assists)
- Kawhi Leonard misses 4-foot jumper
- Bojan Bogdanovic misses 7-foot two point shot
- LaMarcus Aldridge misses 11-foot Running Jumper
- Rondae Hollis-Jefferson makes 3-foot two point shot (Brook Lopez assists)
- Manu Ginobili misses driving layup
- Rondae Hollis-Jefferson makes layup (Shane Larkin assists)
- Patty Mills misses 25-foot three point shot
- LaMarcus Aldridge makes layup
- Patty Mills makes 24-foot three point jumper (Manu Ginobili assists)
- Shane Larkin makes 21-foot jumper
- Rasual Butler misses 27-foot three point jumper
- Shane Larkin makes jumper
- David West misses 16-foot jumper
- Thaddeus Young makes jumper
- Manu Ginobili makes 5-foot two point shot
- Shane Larkin misses driving layup
- Rasual Butler makes 25-foot three point jumper (Manu Ginobili assists)
- Rasual Butler misses 25-foot three point jumper
- Bojan Bogdanovic makes 5-foot jumper
- Bojan Bogdanovic makes two point shot
- Rasual Butler misses 6-foot jumper
- Rondae Hollis-Jefferson makes driving layup
- Boris Diaw makes driving layup (Patty Mills assists)
- Andrea Bargnani makes 16-foot jumper (Shane Larkin assists)
- Danny Green misses 27-foot three point jumper
- Shane Larkin makes driving layup
- Boris Diaw makes 22-foot jumper (Patty Mills assists)
- Andrea Bargnani makes 24-foot three point jumper (Shane Larkin assists)
- Patty Mills misses 26-foot three point jumper
- Bojan Bogdanovic misses 23-foot three point jumper
- David West makes 7-foot jumper (Danny Green assists)
- Andrea Bargnani misses 17-foot jumper
- Bojan Bogdanovic misses free throw 1 of 2
- Bojan Bogdanovic misses free throw 2 of 2
- Tony Parker misses two point shot
- Brook Lopez makes 7-foot jumper
- Brook Lopez makes technical free throw
- Rondae Hollis-Jefferson makes two point shot (Brook Lopez assists)
- Brook Lopez misses 17-foot jumper
- LaMarcus Aldridge misses 15-foot jumper
- Jarrett Jack makes 18-foot jumper (Brook Lopez assists)
- Joe Johnson misses 20-foot jumper
- Manu Ginobili misses 26-foot three point jumper
- LaMarcus Aldridge makes two point shot
- Tim Duncan misses layup
- LaMarcus Aldridge makes layup
- Thaddeus Young misses 15-foot jumper
- Thaddeus Young makes 3-foot jumper (Jarrett Jack assists)
- Thaddeus Young misses free throw 1 of 1
- Brook Lopez misses 13-foot jump bank shot
- Jarrett Jack misses 19-foot jumper
- Kawhi Leonard makes 6-foot jumper (LaMarcus Aldridge assists)
- Joe Johnson misses 15-foot jumper
- Jarrett Jack misses layup
- LaMarcus Aldridge misses layup
- LaMarcus Aldridge makes two point shot
- Manu Ginobili misses 25-foot three point jumper
- Thaddeus Young makes 6-foot jumper (Jarrett Jack assists)
- Tim Duncan misses 13-foot jumper
- Jarrett Jack makes 17-foot jumper
- Manu Ginobili makes 24-foot three point jumper (Tony Parker assists)
- Tony Parker makes layup
- Wayne Ellington makes three point jumper (Jarrett Jack assists)
- Tony Parker makes 20-foot jumper
- Brook Lopez misses 22-foot jumper
- Tony Parker makes 7-foot two point shot
- Jarrett Jack makes 26-foot three point jumper (Joe Johnson assists)
- Tony Parker makes 18-foot two point shot (LaMarcus Aldridge assists)
- Brook Lopez makes two point shot
- Kawhi Leonard makes 12-foot jumper (Tony Parker assists)
- Kawhi Leonard makes 14-foot two point shot
- Wayne Ellington misses three point jumper
- Danny Green makes 25-foot three point jumper (LaMarcus Aldridge assists)
- Jarrett Jack makes 26-foot three point jumper
- Kawhi Leonard misses 19-foot jumper
- Thaddeus Young misses 9-foot two point shot
- Tim Duncan misses jumper
- Danny Green makes two point shot
- Kawhi Leonard makes two point shot (Tim Duncan assists)
- Kawhi Leonard makes 16-foot two point shot (Tony Parker assists)
- Andrea Bargnani misses layup
- Kawhi Leonard misses 5-foot jumper
- Brook Lopez makes free throw 1 of 2
- Brook Lopez makes free throw 2 of 2
- Manu Ginobili makes 26-foot three point jumper (Boris Diaw assists)
- Rondae Hollis-Jefferson misses layup
- Manu Ginobili misses 26-foot three point pullup jump shot
- Kawhi Leonard makes dunk
- Brook Lopez makes 14-foot two point shot
- Patty Mills makes two point shot
- Kawhi Leonard misses 21-foot two point jumper
- LaMarcus Aldridge misses 16-foot jumper
- Brook Lopez misses technical free throw
- Thomas Robinson makes 8-foot two point shot (Shane Larkin assists)
- Patty Mills makes 25-foot three point jumper (Boris Diaw assists)
- Boris Diaw makes 25-foot three point jumper (Patty Mills assists)
- Bojan Bogdanovic misses three point jumper
- Manu Ginobili misses layup
- Shane Larkin misses 21-foot two point jumper
- Manu Ginobili misses 25-foot three point jumper
- Jarrett Jack misses two point jumper
- Danny Green misses 25-foot three point jumper
- Kawhi Leonard misses 25-foot three point jumper
- Brook Lopez makes free throw 1 of 2
- Brook Lopez makes free throw 2 of 2
- Jarrett Jack misses Running Jumper
- Patty Mills makes 26-foot three point jumper (Boris Diaw assists)
- Joe Johnson misses 16-foot step back jumpshot
- Kawhi Leonard makes free throw 1 of 2
- Kawhi Leonard makes free throw 2 of 2
- Danny Green misses 25-foot three point jumper
- Joe Johnson makes two point shot (Jarrett Jack assists)
- Boris Diaw misses two point shot
- Joe Johnson misses 26-foot three point jumper
- Kawhi Leonard misses 17-foot two point shot
- Thaddeus Young misses free throw 1 of 2
- Thaddeus Young misses free throw 2 of 2
- Tim Duncan makes 4-foot two point shot (Manu Ginobili assists)
- Tim Duncan makes free throw 1 of 1
- Brook Lopez makes 13-foot jumper (Jarrett Jack assists)
- Tim Duncan makes free throw 1 of 2
- Tim Duncan makes free throw 2 of 2
- Markel Brown misses 25-foot three point jumper
- Tim Duncan makes free throw 1 of 2
- Tim Duncan makes free throw 2 of 2
- Jarrett Jack misses 17-foot jumper
- Tim Duncan makes 4-foot two point shot (Manu Ginobili assists)
- Shane Larkin misses free throw 1 of 2
- Shane Larkin makes free throw 2 of 2
- Kyle Anderson misses 9-foot Running Jumper
- Wayne Ellington misses 22-foot jumper
- Manu Ginobili makes two point shot
- Markel Brown misses 26-foot three point jumper
- Thaddeus Young misses two point shot
- Boban Marjanovic makes free throw 1 of 2
- Boban Marjanovic makes free throw 2 of 2
- Markel Brown misses 18-foot two point jumper
- Thomas Robinson misses 15-foot jumper
- Boban Marjanovic makes 10-foot jumper
- Rondae Hollis-Jefferson makes 13-foot jumper (Markel Brown assists)
- Boban Marjanovic misses layup
- Boban Marjanovic makes two point shot
- Sergey Karasev makes free throw 1 of 2
- Sergey Karasev makes free throw 2 of 2
- Rondae Hollis-Jefferson misses driving layup
- Boban Marjanovic misses 4-foot jumper
- Donald Sloan misses 8-foot Running Jumper
- Markel Brown misses 24-foot three point jumper
- Boban Marjanovic misses 19-foot jump bank shot
- Ray McCallum makes layup (Boban Marjanovic assists)
Shot Made
Shot Missed
Shot Made
Shot Missed
Data is currently unavailable.
Matchups
2025-26 Standings
Eastern Conference
| Atlantic | W | L | PCT | GB | STRK |
|---|---|---|---|---|---|
| Boston | 56 | 26 | .683 | - | W2 |
| New York | 53 | 29 | .646 | 3 | L1 |
| Toronto | 46 | 36 | .561 | 10 | W1 |
| Philadelphia | 45 | 37 | .549 | 11 | W2 |
| Brooklyn | 20 | 62 | .244 | 36 | L3 |
Western Conference
| Southwest | W | L | PCT | GB | STRK |
|---|---|---|---|---|---|
| San Antonio | 62 | 20 | .756 | - | L1 |
| Houston | 52 | 30 | .634 | 10 | W1 |
| New Orleans | 26 | 56 | .317 | 36 | L2 |
| Dallas | 26 | 56 | .317 | 36 | W1 |
| Memphis | 25 | 57 | .305 | 37 | L8 |
NBA News

Nike's trademark filing for Bronny James' 'B9' logo denied
Nike's trademark filing for Lakers guard Bronny James' "B9" logo has been refused because of a "likelihood of confusion" with an already-registered mark.
2h

Stephen A.: James Harden has it all to prove in the playoffs
Stephen A. Smith believes James Harden needs a strong showing for the Cavs in the playoffs to help reverse the narrative surrounding him.
3h

Stephen A.: KD hasn't been relevant in the postseason in years
Stephen A. Smith explains why he believes Kevin Durant has more on the line than LeBron James does in the in the Rockets' series vs. the Lakers.
4h