
Atlanta Hawks @ Miami Heat
East 1st Round - Game 5 • MIA leads series 4-1

43-39, 16-25 Away
94
43-39, 16-25 Away

53-29, 29-12 Home
97
53-29, 29-12 Home
Game Leaders


Team Stats


42% (31-74)
Field Goal %
45% (37-82)
32% (8-25)
Three Point %
23% (7-31)
86% (24-28)
Free Throw %
76% (16-21)
19
Turnovers
14
42
Rebounds
33
6
Largest Lead
15
Game Information
Miami, FL
Referee:Bill Kennedy
Referee:Zach Zarba
Referee:Kevin Cutler
Referee:Mitchell Ervin
Probabilities & Game Flow

0%
--ATL
100%
--MIA
According to ESPN Analytics
Shot Chart

- Max Strus misses 25-foot three point jumper
- Kevin Huerter makes 23-foot three point jumper
- P.J. Tucker makes 6-foot two point shot (Max Strus assists)
- De'Andre Hunter misses 6-foot two point shot
- John Collins makes dunk
- Gabe Vincent misses driving floating jump shot
- Kevin Huerter misses 25-foot step back jumpshot
- Max Strus misses driving layup
- Kevin Huerter makes 9-foot pullup jump shot (Trae Young assists)
- Bam Adebayo makes 9-foot two point shot (Gabe Vincent assists)
- John Collins misses three point jumper
- Victor Oladipo makes driving layup
- Kevin Huerter makes 11-foot pullup jump shot
- Victor Oladipo makes driving layup
- Trae Young misses 27-foot three point pullup jump shot
- Victor Oladipo makes 12-foot pullup jump shot
- Trae Young misses 30-foot three point pullup jump shot
- P.J. Tucker makes 1-foot layup (Gabe Vincent assists)
- De'Andre Hunter misses three point jumper
- Victor Oladipo makes two point shot
- De'Andre Hunter misses 9-foot two point shot
- Max Strus misses 27-foot three point pullup jump shot
- John Collins misses three point jumper
- Victor Oladipo misses 18-foot two point shot
- De'Andre Hunter makes free throw 1 of 2
- De'Andre Hunter makes free throw 2 of 2
- Bam Adebayo misses 7-foot pullup jump shot
- De'Andre Hunter misses 10-foot pullup jump shot
- John Collins makes 6-foot jumper (Kevin Huerter assists)
- John Collins makes free throw 1 of 1
- Kevin Huerter misses 28-foot three point jumper
- Delon Wright misses tip shot
- Delon Wright makes tip shot
- Tyler Herro makes driving layup
- Trae Young makes 9-foot two point shot
- Caleb Martin misses 23-foot three point jumper
- Trae Young misses 29-foot three point jumper
- Tyler Herro makes free throw 1 of 2
- Tyler Herro makes free throw 2 of 2
- Delon Wright misses 7-foot two point shot
- Bam Adebayo makes 3-foot layup (Tyler Herro assists)
- Kevin Huerter misses 14-foot pullup jump shot
- Tyler Herro misses 24-foot three point jumper
- De'Andre Hunter makes 11-foot driving floating jump shot
- Duncan Robinson misses 26-foot three point jumper
- Danilo Gallinari misses 9-foot two point shot
- Danilo Gallinari misses 16-foot jumper
- Duncan Robinson misses 26-foot three point jumper
- Bam Adebayo makes free throw 1 of 2
- Bam Adebayo misses free throw 2 of 2
- Trae Young misses driving layup
- Trae Young misses tip shot
- Bam Adebayo misses 15-foot jumper
- Trae Young makes free throw 1 of 2
- Trae Young makes free throw 2 of 2
- Caleb Martin misses pullup jump shot
- Onyeka Okongwu makes free throw 1 of 2
- Onyeka Okongwu makes free throw 2 of 2
- Caleb Martin misses free throw 1 of 2
- Caleb Martin misses free throw 2 of 2
- Tyler Herro misses 19-foot pullup jump shot
- Danilo Gallinari makes layup (Delon Wright assists)
- Duncan Robinson misses 26-foot three point jumper
- Caleb Martin makes driving layup
- Delon Wright misses 26-foot three point jumper
- De'Andre Hunter misses step back jumpshot
- Danilo Gallinari misses 20-foot two point shot
- Tyler Herro makes technical free throw
- P.J. Tucker misses 12-foot two point shot
- Caleb Martin makes dunk
- De'Andre Hunter misses 19-foot pullup jump shot
- De'Andre Hunter makes 11-foot pullup jump shot (Trae Young assists)
- Danilo Gallinari makes 27-foot three point jumper (De'Andre Hunter assists)
- Caleb Martin makes two point shot
- De'Andre Hunter makes 23-foot three point jumper (Onyeka Okongwu assists)
- Tyler Herro makes 20-foot pullup jump shot (Bam Adebayo assists)
- Delon Wright misses driving floating jump shot
- Clint Capela misses tip shot
- Victor Oladipo makes free throw 1 of 2
- Victor Oladipo makes free throw 2 of 2
- Delon Wright makes 23-foot three point jumper (De'Andre Hunter assists)
- P.J. Tucker misses 24-foot three point jumper
- P.J. Tucker misses two point shot
- Max Strus makes tip shot
- Trae Young misses free throw 1 of 2
- Trae Young makes free throw 2 of 2
- Victor Oladipo makes 27-foot three point jumper (Tyler Herro assists)
- Clint Capela makes 2-foot dunk (Kevin Huerter assists)
- Tyler Herro misses 24-foot three point shot
- Tyler Herro makes 17-foot step back jumpshot (Bam Adebayo assists)
- Tyler Herro misses 17-foot two point shot
- John Collins misses 27-foot three point jumper
- Trae Young misses 28-foot three point jumper
- P.J. Tucker misses 24-foot three point jumper
- Gabe Vincent misses layup
- Max Strus makes dunk
- Max Strus makes 25-foot three point jumper (Gabe Vincent assists)
- John Collins misses driving layup
- Max Strus makes 26-foot three point jumper (Bam Adebayo assists)
- Max Strus makes two point shot (Gabe Vincent assists)
- Kevin Huerter misses 26-foot three point jumper
- Bam Adebayo makes free throw flagrant 1 of 2
- Bam Adebayo makes free throw flagrant 2 of 2
- Gabe Vincent makes 2-foot layup (Bam Adebayo assists)
- Gabe Vincent makes free throw 1 of 1
- Caleb Martin misses three point jumper
- De'Andre Hunter makes free throw 1 of 2
- De'Andre Hunter makes free throw 2 of 2
- De'Andre Hunter makes pullup jump shot (Kevin Huerter assists)
- De'Andre Hunter makes 14-foot pullup jump shot (Trae Young assists)
- Victor Oladipo misses driving layup
- Trae Young makes 9-foot driving floating jump shot
- Victor Oladipo misses 28-foot three point pullup jump shot
- John Collins makes 2-foot dunk (Trae Young assists)
- Victor Oladipo misses 21-foot pullup jump shot
- Bam Adebayo makes dunk
- Trae Young misses 18-foot pullup jump shot
- Bam Adebayo makes 3-foot layup (Max Strus assists)
- De'Andre Hunter misses 17-foot pullup jump shot
- Gabe Vincent misses 29-foot three point jumper
- Bam Adebayo misses 7-foot two point shot
- Gabe Vincent misses 13-foot step back jumpshot
- Trae Young makes technical free throw
- Max Strus misses 27-foot three point jumper
- Victor Oladipo misses 27-foot three point jumper
- John Collins misses 11-foot pullup jump shot
- Trae Young misses 16-foot jumper
- Onyeka Okongwu makes free throw 1 of 2
- Onyeka Okongwu misses free throw 2 of 2
- Caleb Martin misses 27-foot three point jumper
- Victor Oladipo makes 27-foot three pointer
- Onyeka Okongwu misses 7-foot two point shot
- Bam Adebayo makes free throw 1 of 2
- Bam Adebayo makes free throw 2 of 2
- Victor Oladipo misses 23-foot step back jumpshot
- Caleb Martin makes two point shot (Victor Oladipo assists)
- Bam Adebayo makes driving layup
- De'Andre Hunter misses 12-foot jumper
- Danilo Gallinari makes 15-foot two point shot
- Kevin Huerter makes dunk
- Caleb Martin misses 23-foot three point jumper
- Duncan Robinson misses 29-foot three point jumper
- Danilo Gallinari misses 29-foot three point jumper
- Caleb Martin makes driving layup
- Caleb Martin misses free throw 1 of 1
- Kevin Huerter makes 27-foot three point jumper (Delon Wright assists)
- Tyler Herro makes 17-foot pullup jump shot (P.J. Tucker assists)
- De'Andre Hunter makes free throw 1 of 2
- De'Andre Hunter makes free throw 2 of 2
- Gabe Vincent makes 23-foot three point jumper (Tyler Herro assists)
- Gabe Vincent makes free throw 1 of 1
- Danilo Gallinari makes 26-foot three point jumper (Trae Young assists)
- Tyler Herro misses 31-foot three point jumper
- Duncan Robinson misses 29-foot three point jumper
- De'Andre Hunter misses 24-foot three point jumper
- Gabe Vincent makes 3-foot layup (Tyler Herro assists)
- Danilo Gallinari makes 11-foot two point shot
- Tyler Herro makes driving layup
- Danilo Gallinari misses 13-foot two point shot
- Onyeka Okongwu makes two point shot
- De'Andre Hunter makes 25-foot three point jumper (Delon Wright assists)
- De'Andre Hunter misses free throw 1 of 1
- Gabe Vincent misses 14-foot pullup jump shot
- De'Andre Hunter makes 12-foot pullup jump shot
- Caleb Martin misses 11-foot two point shot
- Onyeka Okongwu makes 2-foot layup (Trae Young assists)
- Onyeka Okongwu makes free throw 1 of 1
- Tyler Herro makes two point shot
- Trae Young misses 17-foot jumper
- Victor Oladipo makes 26-foot step back jumpshot
- De'Andre Hunter makes driving dunk
- Victor Oladipo misses alley oop dunk shot
- Bam Adebayo makes dunk (P.J. Tucker assists)
- De'Andre Hunter misses 25-foot three point pullup jump shot
- Delon Wright makes free throw 1 of 2
- Delon Wright makes free throw 2 of 2
- Victor Oladipo makes driving layup
- Tyler Herro makes technical free throw
- Bam Adebayo misses free throw 1 of 2
- Bam Adebayo makes free throw 2 of 2
- De'Andre Hunter makes 12-foot pullup jump shot
- Victor Oladipo makes free throw 1 of 2
- Victor Oladipo makes free throw 2 of 2
- De'Andre Hunter makes free throw 1 of 2
- De'Andre Hunter makes free throw 2 of 2
- Bam Adebayo misses layup
- De'Andre Hunter makes free throw 1 of 2
- De'Andre Hunter makes free throw 2 of 2
- Max Strus makes 27-foot three point jumper (Victor Oladipo assists)
- Trae Young misses three point jumper
- Max Strus misses 29-foot three point jumper
- Trae Young makes free throw 1 of 2
- Trae Young makes free throw 2 of 2
- De'Andre Hunter makes 26-foot three pointer
- Tyler Herro misses 26-foot three point pullup jump shot
- De'Andre Hunter makes 21-foot pullup jump shot
- Bam Adebayo makes 2-foot dunk (Victor Oladipo assists)
- Trae Young misses free throw 1 of 2
- Trae Young makes free throw 2 of 2
- Max Strus misses 26-foot three point jumper
- Danilo Gallinari misses 14-foot two point shot
Shot Made
Shot Missed
Shot Made
Shot Missed
Data is currently unavailable.
Matchups
2025-26 Standings
Eastern Conference
| Southeast | W | L | PCT | GB | STRK |
|---|---|---|---|---|---|
| Atlanta | 42 | 33 | .560 | - | W1 |
| Orlando | 39 | 34 | .534 | 2 | W1 |
| Miami | 39 | 35 | .527 | 2.5 | L1 |
| Charlotte | 39 | 35 | .527 | 2.5 | L1 |
| Washington | 17 | 56 | .233 | 24 | L1 |
NBA News
Hawks withstand fourth-quarter surge by Kings in 123-113 victory as Snyder gets 500th win
— Nickeil Alexander-Walker scored 27 points and the Atlanta Hawks shot 8 of 12 on 3-pointers in the fourth quarter to survive a late surge from Sacramento and...
7h
Sacramento Kings vs. Atlanta Hawks: Game Highlights
Sacramento Kings vs. Atlanta Hawks: Game Highlights
7h
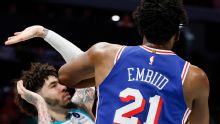
Embiid, George rally 76ers' to 118-114 win over Hornets, snap Charlotte's 5-game win streak
— Joel Embiid scored 29 points, Paul George finished with 26 points and 13 rebounds and Philadelphia 76ers rallied from 13 points down in the second half for a 118-114 win over the Charlotte Hornets on Saturday night.
8h