
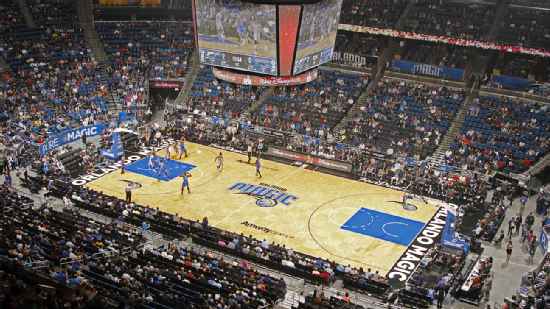
Sacramento Kings @ Orlando Magic

3-5, 2-2 Away
126
3-5, 2-2 Away

2-8, 2-2 Home
123
2-8, 2-2 Home
Game Leaders


Team Stats


51% (47-93)
Field Goal %
54% (50-92)
38% (15-40)
Three Point %
17% (4-23)
65% (17-26)
Free Throw %
95% (19-20)
14
Turnovers
18
36
Rebounds
48
10
Largest Lead
20
Game Information
Orlando, FL
Referee:Leon Wood
Referee:David Guthrie
Referee:Lauren Holtkamp
Probabilities & Game Flow

100%
--SAC
0%
--ORL
According to ESPN Analytics
Shot Chart

- Paolo Banchero misses 12-foot two point shot
- Bol Bol makes finger roll layup
- De'Aaron Fox makes 27-foot three pointer
- Keegan Murray misses 27-foot three point jumper
- Paolo Banchero makes driving layup (Jalen Suggs assists)
- Harrison Barnes misses two point shot
- Bol Bol makes 1-foot dunk
- De'Aaron Fox makes 4-foot layup (Domantas Sabonis assists)
- Franz Wagner makes jumper
- Franz Wagner makes three point jumper (Paolo Banchero assists)
- Domantas Sabonis misses 4-foot jumper
- Franz Wagner makes two point shot (Bol Bol assists)
- Harrison Barnes misses 26-foot three point pullup jump shot
- Domantas Sabonis makes free throw 1 of 2
- Domantas Sabonis misses free throw 2 of 2
- De'Aaron Fox misses 10-foot pullup jump shot
- Bol Bol makes 3-foot two point shot (Wendell Carter Jr. assists)
- Harrison Barnes misses 21-foot pullup jump shot
- Wendell Carter Jr. makes 20-foot pullup jump shot (Franz Wagner assists)
- Harrison Barnes makes driving layup
- Paolo Banchero makes driving layup
- Paolo Banchero makes free throw 1 of 1
- Franz Wagner makes free throw 1 of 2
- Franz Wagner makes free throw 2 of 2
- Trey Lyles makes driving layup
- Trey Lyles makes free throw 1 of 1
- Jalen Suggs makes 15-foot pullup jump shot
- Trey Lyles makes 27-foot three point jumper (Malik Monk assists)
- Bol Bol makes 7-foot two point shot
- Domantas Sabonis makes 3-foot two point shot
- Paolo Banchero misses driving layup
- Domantas Sabonis makes two point shot
- Chuma Okeke misses 23-foot three point jumper
- Domantas Sabonis makes driving layup (Davion Mitchell assists)
- Paolo Banchero misses 12-foot jumper
- Keegan Murray makes 26-foot three point shot (Malik Monk assists)
- Paolo Banchero misses 16-foot pullup jump shot
- Keegan Murray misses 27-foot three point jumper
- Kevon Harris misses 24-foot three point jumper
- Davion Mitchell misses three point pullup jump shot
- Wendell Carter Jr. makes alley oop dunk shot (Franz Wagner assists)
- Malik Monk misses 8-foot pullup jump shot
- Chuma Okeke makes driving layup
- Davion Mitchell misses driving floating jump shot
- Wendell Carter Jr. makes 23-foot three point jumper (Terrence Ross assists)
- Malik Monk misses 26-foot three point jumper
- Franz Wagner misses layup
- Malik Monk misses 30-foot step back jumpshot
- Malik Monk makes 3-foot two point shot
- Keegan Murray misses 41-foot three point jumper
- Franz Wagner makes 2-foot two point shot
- Kevon Harris misses two point shot
- Richaun Holmes makes 1-foot dunk (Terence Davis assists)
- Franz Wagner makes 3-foot two point shot
- De'Aaron Fox misses 26-foot three point pullup jump shot
- Richaun Holmes misses 3-foot hook shot
- Wendell Carter Jr. misses three point jumper
- Kevon Harris makes free throw 1 of 2
- Kevon Harris makes free throw 2 of 2
- Malik Monk makes 27-foot three point jumper (De'Aaron Fox assists)
- Kevon Harris makes alley oop layup (Franz Wagner assists)
- Terence Davis makes 3-foot layup (De'Aaron Fox assists)
- Wendell Carter Jr. makes alley oop dunk shot (Franz Wagner assists)
- Terence Davis misses 25-foot step back jumpshot
- Franz Wagner makes 2-foot two point shot (Wendell Carter Jr. assists)
- Domantas Sabonis makes 6-foot two point shot
- Chuma Okeke misses 10-foot pullup jump shot
- Domantas Sabonis makes layup (Terence Davis assists)
- Wendell Carter Jr. makes free throw 1 of 2
- Wendell Carter Jr. makes free throw 2 of 2
- Domantas Sabonis misses 9-foot hook shot
- Chuma Okeke misses 23-foot three point jumper
- Kevin Huerter makes 27-foot three point jumper (Domantas Sabonis assists)
- Domantas Sabonis makes two point shot
- Domantas Sabonis misses free throw 1 of 1
- Jalen Suggs misses 23-foot three point jumper
- Paolo Banchero makes dunk (Jalen Suggs assists)
- Harrison Barnes misses 24-foot three point jumper
- Paolo Banchero makes alley oop dunk shot (Jalen Suggs assists)
- De'Aaron Fox misses 15-foot pullup jump shot
- Paolo Banchero misses three point pullup jump shot
- De'Aaron Fox misses 26-foot three point jumper
- Paolo Banchero makes 8-foot driving floating jump shot
- De'Aaron Fox misses layup
- Domantas Sabonis makes two point shot
- Paolo Banchero makes 11-foot pullup jump shot
- Kevin Huerter misses free throw 1 of 2
- Kevin Huerter misses free throw 2 of 2
- Paolo Banchero misses 25-foot three point pullup jump shot
- R.J. Hampton misses 26-foot three point jumper
- Kevin Huerter misses 18-foot pullup jump shot
- Paolo Banchero makes driving dunk
- Domantas Sabonis misses 26-foot three point jumper
- Bol Bol makes 26-foot three pointer (Wendell Carter Jr. assists)
- Bol Bol makes free throw 1 of 1
- De'Aaron Fox makes 7-foot driving floating jump shot
- Wendell Carter Jr. makes free throw 1 of 2
- Wendell Carter Jr. makes free throw 2 of 2
- Trey Lyles misses 24-foot three point jumper
- De'Aaron Fox makes two point shot
- Jalen Suggs makes 19-foot pullup jump shot
- Chimezie Metu misses 4-foot two point shot
- Harrison Barnes misses two point shot
- Kevin Huerter misses 25-foot three point jumper
- Paolo Banchero makes 8-foot driving floating jump shot (Jalen Suggs assists)
- De'Aaron Fox makes free throw 1 of 2
- De'Aaron Fox makes free throw 2 of 2
- Jalen Suggs misses 14-foot jumper
- De'Aaron Fox misses 26-foot three point pullup jump shot
- Kevin Huerter makes 25-foot three pointer (Domantas Sabonis assists)
- Franz Wagner misses 4-foot two point shot
- Domantas Sabonis makes dunk (Kevin Huerter assists)
- Domantas Sabonis makes layup (Kevin Huerter assists)
- Paolo Banchero makes 4-foot two point shot
- Kevin Huerter makes 22-foot three point jumper (Domantas Sabonis assists)
- Wendell Carter Jr. misses 26-foot three point jumper
- Harrison Barnes makes two point shot
- Franz Wagner makes driving layup (Wendell Carter Jr. assists)
- De'Aaron Fox makes free throw 1 of 2
- De'Aaron Fox makes free throw 2 of 2
- Paolo Banchero misses driving layup
- R.J. Hampton misses 8-foot two point shot
- R.J. Hampton makes two point shot
- Keegan Murray misses driving floating jump shot
- De'Aaron Fox makes driving floating jump shot
- De'Aaron Fox makes technical free throw
- Domantas Sabonis makes 5-foot hook shot
- De'Aaron Fox makes 11-foot pullup jump shot
- Paolo Banchero makes 7-foot pullup jump shot (R.J. Hampton assists)
- De'Aaron Fox makes driving layup
- Kevon Harris misses 27-foot three point jumper
- Trey Lyles misses 26-foot three point jumper
- Paolo Banchero misses 16-foot two point shot
- Trey Lyles misses two point shot
- Terrence Ross misses 5-foot two point shot
- Kevin Huerter misses 26-foot three point shot
- Domantas Sabonis misses free throw 1 of 2
- Domantas Sabonis misses free throw 2 of 2
- Paolo Banchero misses 27-foot three point jumper
- De'Aaron Fox makes 3-foot two point shot (Malik Monk assists)
- Paolo Banchero makes free throw 1 of 2
- Paolo Banchero makes free throw 2 of 2
- Malik Monk misses 25-foot three point jumper
- Harrison Barnes makes tip shot
- Chimezie Metu makes free throw 1 of 2
- Chimezie Metu makes free throw 2 of 2
- Terrence Ross misses two point shot
- Chimezie Metu makes dunk (Terence Davis assists)
- Chuma Okeke misses 25-foot three point jumper
- Trey Lyles makes 27-foot three point jumper (Malik Monk assists)
- Franz Wagner misses 64-foot three point jumper
- Terence Davis makes 26-foot three point jumper (Trey Lyles assists)
- R.J. Hampton makes 5-foot two point shot
- R.J. Hampton makes free throw 1 of 1
- Trey Lyles makes 23-foot three point jumper (Malik Monk assists)
- Franz Wagner makes technical free throw
- Franz Wagner misses free throw 1 of 2
- Franz Wagner makes free throw 2 of 2
- Malik Monk makes 26-foot three pointer
- Terence Davis misses 26-foot three point jumper
- Franz Wagner misses 6-foot two point shot
- Paolo Banchero makes two point shot
- Malik Monk misses 26-foot three point pullup jump shot
- Bol Bol makes 13-foot two point shot (Franz Wagner assists)
- Bol Bol makes driving layup (Jalen Suggs assists)
- Paolo Banchero makes dunk (Jalen Suggs assists)
- Domantas Sabonis misses free throw 1 of 2
- Domantas Sabonis misses free throw 2 of 2
- Franz Wagner misses two point shot
- Paolo Banchero makes 16-foot two point shot (Franz Wagner assists)
- De'Aaron Fox misses 27-foot three point jumper
- Bol Bol makes two point shot
- Trey Lyles makes three point jumper (Domantas Sabonis assists)
- Franz Wagner makes 4-foot two point shot
- Harrison Barnes misses 25-foot three point jumper
- Franz Wagner misses 26-foot step back jumpshot
- De'Aaron Fox misses 12-foot pullup jump shot
- Franz Wagner misses 26-foot three point jumper
- Domantas Sabonis misses free throw 1 of 2
- Domantas Sabonis makes free throw 2 of 2
- Malik Monk makes 3-foot layup (Chimezie Metu assists)
- Paolo Banchero makes free throw 1 of 2
- Paolo Banchero makes free throw 2 of 2
- De'Aaron Fox misses 18-foot step back jumpshot
- Wendell Carter Jr. makes dunk (Paolo Banchero assists)
- Kevin Huerter misses 28-foot three point jumper
- Bol Bol makes 18-foot jumper (Paolo Banchero assists)
- Chimezie Metu makes dunk (Harrison Barnes assists)
- Paolo Banchero makes two point shot
- De'Aaron Fox makes two point shot
- Wendell Carter Jr. makes 2-foot dunk (Bol Bol assists)
- De'Aaron Fox makes free throw 1 of 2
- De'Aaron Fox makes free throw 2 of 2
- Paolo Banchero misses 17-foot pullup jump shot
- De'Aaron Fox makes 12-foot two point shot (Domantas Sabonis assists)
- Franz Wagner misses 26-foot three point jumper
- Jalen Suggs misses 26-foot three point jumper
- De'Aaron Fox makes driving layup
- Franz Wagner makes 9-foot driving floating jump shot (Wendell Carter Jr. assists)
- De'Aaron Fox makes driving layup
- Bol Bol makes 23-foot three point jumper (Paolo Banchero assists)
- De'Aaron Fox makes 15-foot two point shot
- Jalen Suggs misses driving floating jump shot
- Harrison Barnes makes 24-foot three point jumper (De'Aaron Fox assists)
- Domantas Sabonis makes free throw 1 of 1
- Bol Bol misses 28-foot three point jumper
- Jalen Suggs misses 26-foot three point jumper
- Franz Wagner makes 2-foot two point shot
- Trey Lyles misses 24-foot three point jumper
- De'Aaron Fox misses 27-foot three point pullup jump shot
- Paolo Banchero misses 6-foot two point shot
- Malik Monk makes 25-foot three point jumper (Trey Lyles assists)
- Franz Wagner makes 4-foot two point shot
- Franz Wagner makes driving layup (Wendell Carter Jr. assists)
- Domantas Sabonis makes free throw 1 of 2
- Domantas Sabonis makes free throw 2 of 2
- Franz Wagner makes layup (Jalen Suggs assists)
- Malik Monk makes free throw 1 of 2
- Malik Monk makes free throw 2 of 2
- Jalen Suggs makes free throw 1 of 2
- Jalen Suggs makes free throw 2 of 2
- Chuma Okeke makes 2-foot driving dunk
- De'Aaron Fox makes 32-foot three point jumper
Shot Made
Shot Missed
Shot Made
Shot Missed
Data is currently unavailable.
Matchups
2025-26 Standings
Western Conference
| Pacific | W | L | PCT | GB | STRK |
|---|---|---|---|---|---|
| LA Lakers | 53 | 29 | .646 | - | W3 |
| Phoenix | 45 | 37 | .549 | 8 | W1 |
| LA Clippers | 41 | 40 | .506 | 11.5 | L2 |
| Golden State | 37 | 44 | .457 | 15.5 | L2 |
| Sacramento | 22 | 60 | .268 | 31 | L1 |
Eastern Conference
| Southeast | W | L | PCT | GB | STRK |
|---|---|---|---|---|---|
| Atlanta | 46 | 36 | .561 | - | L1 |
| Orlando | 45 | 37 | .549 | 1 | L1 |
| Charlotte | 44 | 38 | .537 | 2 | W1 |
| Miami | 43 | 39 | .524 | 3 | W2 |
| Washington | 17 | 65 | .207 | 29 | L10 |
NBA News
Utah Jazz vs. Los Angeles Lakers: Game Highlights
Utah Jazz vs. Los Angeles Lakers: Game Highlights
7h
LeBron James scores 18 in 1st half, Lakers tune up for playoffs with 131-107 win over Jazz
— LeBron James had 18 points, six assists and four rebounds in the first half, and the Los Angeles Lakers tuned up for the postseason with a 131-107 win over the Utah Jazz on Sunday night.
7h

Jamaree Bouyea leads Suns reserves to 135-103 win over Thunder in meaningless season finale
— Jamaree Bouyea had career highs of 27 points and nine assists, Ryan Dunn added 20 points and 11 rebounds, and the Phoenix Suns routed the Oklahoma City Thunder 135-103 on Sunday night in a meaningless regular-season finale for both teams.
7h