
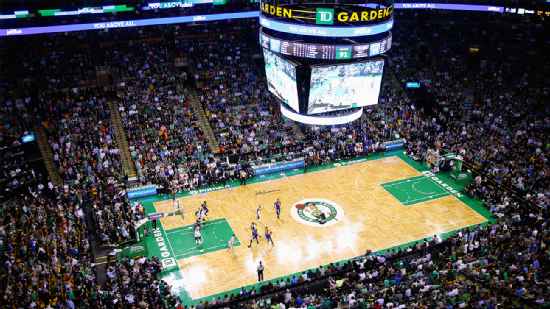
Orlando Magic @ Boston Celtics

11-20, 3-11 Away
95
11-20, 3-11 Away

22-9, 11-4 Home
92
22-9, 11-4 Home
Game Leaders


Team Stats


38% (33-86)
Field Goal %
35% (31-89)
41% (12-29)
Three Point %
26% (12-47)
89% (17-19)
Free Throw %
86% (18-21)
13
Turnovers
17
46
Rebounds
54
10
Largest Lead
4
Game Information
Boston, MA
Referee:Ed Malloy
Referee:Marat Kogut
Referee:Dannica Baroody
Probabilities & Game Flow

100%
--ORL
0%
--BOS
According to ESPN Analytics
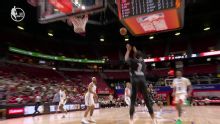
Shot Chart

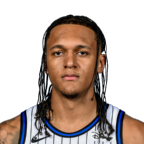
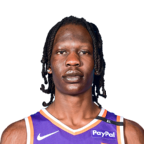
- Bol Bol makes layup (Markelle Fultz assists)
- Jaylen Brown misses driving floating jump shot
- Jaylen Brown makes 7-foot two point shot (Al Horford assists)
- Franz Wagner misses 18-foot pullup jump shot
- Moritz Wagner makes 4-foot layup (Markelle Fultz assists)
- Grant Williams makes free throw 1 of 2
- Grant Williams misses free throw 2 of 2
- Markelle Fultz misses 16-foot two point shot
- Marcus Smart misses 27-foot three point jumper
- Bol Bol misses 11-foot two point shot
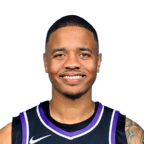
- Marcus Smart makes 24-foot three point jumper (Derrick White assists)
- Franz Wagner makes driving layup
- Al Horford makes 7-foot two point shot
- Franz Wagner makes free throw 1 of 1
- Markelle Fultz misses 20-foot two point shot
- Grant Williams misses 28-foot three point jumper
- Moritz Wagner misses 26-foot three point jumper
- Grant Williams misses 7-foot two point shot
- Paolo Banchero misses free throw 1 of 2
- Paolo Banchero makes free throw 2 of 2
- Robert Williams III misses alley oop layup
- Paolo Banchero makes 27-foot three pointer
- Jaylen Brown misses 26-foot three point jumper
- Marcus Smart misses 25-foot three point jumper
- Moritz Wagner makes 27-foot three point jumper (Markelle Fultz assists)
- Robert Williams III makes dunk (Marcus Smart assists)
- Paolo Banchero misses 14-foot two point shot
- Jaylen Brown misses 26-foot three point jumper
- Derrick White makes free throw 1 of 2
- Derrick White makes free throw 2 of 2
- Paolo Banchero makes 25-foot three point jumper (Markelle Fultz assists)
- Al Horford misses 27-foot three point jumper
- Moritz Wagner misses 13-foot two point shot
- Jaylen Brown makes 1-foot dunk (Marcus Smart assists)
- Paolo Banchero makes 19-foot pullup jump shot
- Marcus Smart makes 6-foot driving floating jump shot
- Paolo Banchero makes 12-foot two point shot
- Derrick White makes 9-foot driving floating jump shot
- Terrence Ross misses 27-foot three point pullup jump shot
- Derrick White misses running pullup jump shot
- Marcus Smart misses 23-foot three point jumper
- Paolo Banchero misses two point shot
- Cole Anthony makes 17-foot pullup jump shot (Franz Wagner assists)
- Derrick White misses 12-foot two point shot
- Cole Anthony makes 24-foot three point shot (Terrence Ross assists)
- Malcolm Brogdon makes 28-foot three pointer (Grant Williams assists)
- Admiral Schofield misses 26-foot three point jumper
- Mo Bamba misses 28-foot three point jumper
- Grant Williams makes free throw 1 of 2
- Grant Williams makes free throw 2 of 2
- Cole Anthony misses 22-foot pullup jump shot
- Grant Williams misses 24-foot three point jumper
- Payton Pritchard misses 24-foot three point jumper
- Terrence Ross makes 16-foot pullup jump shot (Franz Wagner assists)
- Grant Williams misses 22-foot step back jumpshot
- Malcolm Brogdon misses free throw 1 of 2
- Malcolm Brogdon makes free throw 2 of 2
- Terrence Ross misses 16-foot two point shot
- Malcolm Brogdon misses 20-foot pullup jump shot
- Mo Bamba misses 25-foot three point shot
- Malcolm Brogdon misses 28-foot three point pullup jump shot
- Terrence Ross misses 27-foot three point jumper
- Grant Williams misses 27-foot three point jumper
- Cole Anthony misses 22-foot step back jumpshot
- Payton Pritchard misses 32-foot three point jumper
- Terrence Ross misses two point shot
- Marcus Smart makes 24-foot three point shot (Sam Hauser assists)
- Terrence Ross misses 27-foot three point jumper
- Jaylen Brown misses layup
- Admiral Schofield makes two point shot (Cole Anthony assists)
- Sam Hauser misses 26-foot three point jumper
- Cole Anthony misses 20-foot step back jumpshot
- Marcus Smart misses driving layup
- Paolo Banchero misses driving layup
- Derrick White makes free throw 1 of 2
- Derrick White makes free throw 2 of 2
- Markelle Fultz misses driving layup
- Al Horford misses 26-foot three point jumper
- Jaylen Brown makes layup (Derrick White assists)
- Paolo Banchero makes 27-foot three point jumper (Mo Bamba assists)
- Paolo Banchero makes free throw 1 of 2
- Paolo Banchero makes free throw 2 of 2
- Jaylen Brown makes free throw 1 of 2
- Jaylen Brown makes free throw 2 of 2
- Paolo Banchero makes 27-foot step back jumpshot
- Derrick White makes free throw 1 of 2
- Derrick White makes free throw 2 of 2
- Paolo Banchero misses 18-foot step back jumpshot
- Bol Bol misses driving floating jump shot
- Bol Bol makes tip shot
- Jaylen Brown misses 27-foot three point pullup jump shot
- Bol Bol makes two point shot (Paolo Banchero assists)
- Bol Bol makes free throw 1 of 1
- Jaylen Brown misses 24-foot three point jumper
- Markelle Fultz makes free throw 1 of 2
- Markelle Fultz makes free throw 2 of 2
- Al Horford misses 9-foot two point shot
- Bol Bol misses driving layup
- Malcolm Brogdon makes 27-foot three point shot (Marcus Smart assists)
- Malcolm Brogdon misses 26-foot three point jumper
- Marcus Smart misses tip shot
- Paolo Banchero misses 16-foot two point shot
- Moritz Wagner misses 24-foot three point jumper
- Bol Bol makes dunk
- Al Horford makes 25-foot step back jumpshot (Marcus Smart assists)
- Paolo Banchero makes 16-foot two point shot
- Paolo Banchero makes free throw 1 of 1
- Jaylen Brown misses 15-foot two point shot
- Grant Williams makes 24-foot three point jumper (Derrick White assists)
- Paolo Banchero misses 16-foot pullup jump shot
- Jaylen Brown misses 27-foot three point pullup jump shot
- Markelle Fultz makes two point shot
- Marcus Smart misses driving layup
- Paolo Banchero misses 23-foot three point jumper
- Al Horford makes 25-foot three point shot (Derrick White assists)
- Franz Wagner misses 27-foot three point pullup jump shot
- Moritz Wagner makes free throw 1 of 2
- Moritz Wagner makes free throw 2 of 2
- Grant Williams makes driving layup (Al Horford assists)
- Franz Wagner makes 3-foot layup (Moritz Wagner assists)
- Al Horford misses 27-foot three point jumper
- Paolo Banchero misses driving layup
- Marcus Smart makes free throw 1 of 2
- Marcus Smart makes free throw 2 of 2
- Franz Wagner misses driving layup
- Marcus Smart makes 26-foot three point shot (Jaylen Brown assists)
- Bol Bol misses 24-foot three point jumper
- Jaylen Brown makes 27-foot three point jumper (Marcus Smart assists)
- Moritz Wagner misses 24-foot three point jumper
- Franz Wagner misses layup
- Paolo Banchero misses free throw 1 of 2
- Paolo Banchero makes free throw 2 of 2
- Markelle Fultz misses 18-foot pullup jump shot
- Derrick White misses driving layup
- Robert Williams III makes tip shot
- Markelle Fultz makes 2-foot layup (Paolo Banchero assists)
- Derrick White misses driving floating jump shot
- Robert Williams III misses layup
- Markelle Fultz misses driving layup
- Derrick White misses 28-foot three point jumper
- Malcolm Brogdon misses 27-foot three point shot
- Bol Bol makes alley oop dunk shot (Terrence Ross assists)
- Jaylen Brown makes driving layup
- Moritz Wagner makes free throw 1 of 2
- Moritz Wagner makes free throw 2 of 2
- Sam Hauser misses 26-foot three point jumper
- Cole Anthony makes 11-foot running pullup jump shot
- Robert Williams III makes alley oop dunk shot (Grant Williams assists)
- Paolo Banchero makes 26-foot three point jumper (Moritz Wagner assists)
- Grant Williams makes driving layup (Malcolm Brogdon assists)
- Jaylen Brown misses 25-foot three point jumper
- Sam Hauser makes tip shot
- Franz Wagner misses driving layup
- Jaylen Brown makes dunk (Grant Williams assists)
- Jaylen Brown makes dunk
- Admiral Schofield makes 25-foot three point jumper (Cole Anthony assists)
- Derrick White misses 27-foot three point jumper
- Malcolm Brogdon misses 22-foot pullup jump shot
- Franz Wagner makes two point shot
- Grant Williams misses 24-foot three point jumper
- Franz Wagner misses 9-foot two point shot
- Sam Hauser makes 27-foot three point jumper (Robert Williams III assists)
- Admiral Schofield makes 27-foot three point jumper (Cole Anthony assists)
- Malcolm Brogdon misses driving floating jump shot
- Admiral Schofield misses 24-foot three point jumper
- Grant Williams makes free throw 1 of 2
- Grant Williams misses free throw 2 of 2
- Franz Wagner makes driving layup
- Jaylen Brown misses 26-foot three point jumper
- Admiral Schofield makes driving layup (Franz Wagner assists)
- Jaylen Brown makes 27-foot three point jumper (Sam Hauser assists)
- Jaylen Brown makes 18-foot pullup jump shot
- Cole Anthony misses driving layup
- Jaylen Brown misses 26-foot three point shot
- Marcus Smart misses 23-foot three point jumper
- Paolo Banchero misses 14-foot two point shot
- Malcolm Brogdon makes free throw 1 of 2
- Malcolm Brogdon makes free throw 2 of 2
- Marcus Smart makes 4-foot layup (Jaylen Brown assists)
- Admiral Schofield makes 28-foot three point jumper (Paolo Banchero assists)
- Al Horford misses 27-foot three point jumper
- Markelle Fultz makes driving layup
- Jaylen Brown misses 16-foot two point shot
- Kevon Harris misses 29-foot three point jumper
- Al Horford misses 25-foot three point jumper
- Grant Williams makes two point shot
- Grant Williams makes free throw 1 of 1
- Paolo Banchero makes 27-foot three pointer (Moritz Wagner assists)
- Al Horford misses 28-foot three point jumper
- Jaylen Brown misses driving floating jump shot
- Paolo Banchero makes free throw 1 of 2
- Paolo Banchero makes free throw 2 of 2
- Jaylen Brown makes 17-foot two point shot (Marcus Smart assists)
- Paolo Banchero misses driving layup
- Franz Wagner makes 27-foot three point jumper (Markelle Fultz assists)
- Al Horford misses 27-foot three point jumper
- Franz Wagner misses 25-foot three point jumper
- Jaylen Brown misses driving layup
- Jaylen Brown misses 14-foot two point shot
- Malcolm Brogdon makes 24-foot three point jumper (Marcus Smart assists)
- Franz Wagner misses 27-foot three point pullup jump shot
- Paolo Banchero misses driving floating jump shot
- Moritz Wagner makes free throw 1 of 2
- Moritz Wagner makes free throw 2 of 2
- Grant Williams misses 26-foot three point jumper
Shot Made
Shot Missed
Shot Made
Shot Missed
Data is currently unavailable.
Matchups
2025-26 Standings
Eastern Conference
| Southeast | W | L | PCT | GB | STRK |
|---|---|---|---|---|---|
| Atlanta | 46 | 36 | .561 | - | L1 |
| Orlando | 45 | 37 | .549 | 1 | L1 |
| Charlotte | 44 | 38 | .537 | 2 | W1 |
| Miami | 43 | 39 | .524 | 3 | W2 |
| Washington | 17 | 65 | .207 | 29 | L10 |
| Atlantic | W | L | PCT | GB | STRK |
|---|---|---|---|---|---|
| Boston | 56 | 26 | .683 | - | W2 |
| New York | 53 | 29 | .646 | 3 | L1 |
| Toronto | 46 | 36 | .561 | 10 | W1 |
| Philadelphia | 45 | 37 | .549 | 11 | W2 |
| Brooklyn | 20 | 62 | .244 | 36 | L3 |
NBA News
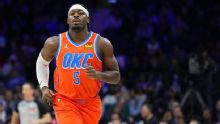
Brooklyn Nets vs. Oklahoma City Thunder: Game Highlights
Brooklyn Nets vs. Oklahoma City Thunder: Game Highlights
6h
2026 NBA offseason trade grades: Lu Dort, Kessler and more deals
We're grading the biggest NBA trades of the offseason, including the deal that sent Lu Dort to the Hawks in a three-team deal.
11h
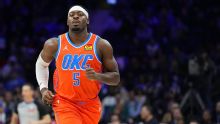
Thunder send Dort to Hawks in 3-team trade; Mavericks get Risacher
The Thunder traded All-Defensive wing Luguentz Dort to the Hawks in a three-team deal that sent three second-round picks to Oklahoma City, former No. 1 pick Zaccharie Risacher to the Mavericks and Ryan Nembhard to Atlanta.
7h