
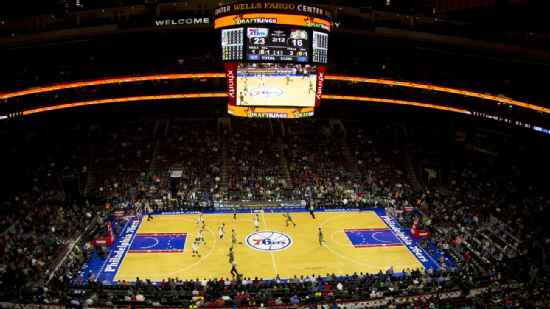
Sacramento Kings @ Philadelphia 76ers

23-15, 10-8 Away
93
23-15, 10-8 Away

24-13, 14-6 Home
112
24-13, 14-6 Home
Game Leaders


Team Stats


34% (32-95)
Field Goal %
43% (40-93)
21% (8-38)
Three Point %
43% (15-35)
81% (21-26)
Free Throw %
94% (17-18)
17
Turnovers
14
54
Rebounds
46
2
Largest Lead
25
Game Information
Philadelphia, PA
Referee:Scott Wall
Referee:Mitchell Ervin
Referee:Tyler Ford
Probabilities & Game Flow

0%
--SAC
100%
--PHI
According to ESPN Analytics
Shot Chart

- Nicolas Batum makes 26-foot step back jumpshot (Tyrese Maxey assists)
- Tobias Harris misses 18-foot pullup jump shot
- Keegan Murray makes 26-foot three point shot (De'Aaron Fox assists)
- Tobias Harris misses 9-foot two point shot
- Keegan Murray makes 6-foot two point shot (Domantas Sabonis assists)
- Tyrese Maxey makes 27-foot three pointer (De'Anthony Melton assists)
- Keegan Murray misses 24-foot three point jumper
- Paul Reed misses 4-foot hook shot
- Chris Duarte misses 26-foot three point jumper
- Tyrese Maxey misses 26-foot step back jumpshot
- De'Aaron Fox makes two point shot
- De'Anthony Melton misses 22-foot step back jumpshot
- Paul Reed misses driving layup
- De'Anthony Melton misses 27-foot three point jumper
- Paul Reed misses 23-foot three point jumper
- De'Aaron Fox misses 25-foot step back jumpshot
- Tyrese Maxey misses two point shot
- Tobias Harris makes 2-foot two point shot
- Tobias Harris makes free throw 1 of 1
- Keegan Murray misses 26-foot three point jumper
- Harrison Barnes misses 28-foot three point jumper
- Chris Duarte misses free throw 1 of 2
- Chris Duarte makes free throw 2 of 2
- Tyrese Maxey misses two point shot
- De'Aaron Fox misses 26-foot step back jumpshot
- Tobias Harris makes driving dunk
- Tobias Harris makes free throw 1 of 1
- De'Aaron Fox misses 22-foot three point jumper
- Tobias Harris makes free throw 1 of 2
- Tobias Harris makes free throw 2 of 2
- Alex Len makes 1-foot dunk (Malik Monk assists)
- Tyrese Maxey makes free throw 1 of 2
- Tyrese Maxey makes free throw 2 of 2
- Malik Monk makes 9-foot pullup jump shot (Alex Len assists)
- Tyrese Maxey makes free throw 1 of 2
- Tyrese Maxey makes free throw 2 of 2
- Malik Monk misses two point shot
- Patrick Beverley misses 24-foot three point jumper
- Malik Monk makes driving layup (Colby Jones assists)
- Tyrese Maxey misses 28-foot step back jumpshot
- Malik Monk misses 26-foot three point pullup jump shot
- Colby Jones misses 22-foot three point jumper
- Trey Lyles makes 8-foot two point shot
- Mo Bamba misses free throw 1 of 2
- Mo Bamba makes free throw 2 of 2
- Marcus Morris Sr. misses 10-foot two point shot
- Tobias Harris makes 19-foot pullup jump shot
- Trey Lyles misses 27-foot three point jumper
- Tobias Harris makes 4-foot two point shot
- Juan Toscano-Anderson makes 23-foot three point jumper (Malik Monk assists)
- Tobias Harris makes free throw 1 of 2
- Tobias Harris makes free throw 2 of 2
- Patrick Beverley makes 3-foot two point shot
- Patrick Beverley makes 3-foot two point shot
- De'Aaron Fox makes free throw 1 of 2
- De'Aaron Fox makes free throw 2 of 2
- Sasha Vezenkov misses 28-foot three point jumper
- Marcus Morris Sr. misses two point shot
- Mo Bamba misses tip shot
- Trey Lyles misses 27-foot three point shot
- Malik Monk misses 28-foot three point jumper
- De'Aaron Fox misses 4-foot two point shot
- Trey Lyles makes 26-foot three point jumper (Domantas Sabonis assists)
- Mo Bamba makes 25-foot three point jumper (Tyrese Maxey assists)
- Malik Monk misses 27-foot three point pullup jump shot
- Sasha Vezenkov misses two point shot
- Tyrese Maxey misses driving layup
- Trey Lyles misses 23-foot three point shot
- Tyrese Maxey makes two point shot
- Tyrese Maxey makes 25-foot three point shot (Patrick Beverley assists)
- Tobias Harris makes 27-foot three point shot (Patrick Beverley assists)
- De'Aaron Fox makes 7-foot pullup jump shot
- Patrick Beverley misses 26-foot three point jumper
- Paul Reed misses tip shot
- Marcus Morris Sr. misses 12-foot two point shot
- Tobias Harris makes two point shot
- De'Aaron Fox makes driving layup
- Keegan Murray misses 27-foot three point jumper
- Patrick Beverley misses driving floating jump shot
- Paul Reed makes two point shot
- Keegan Murray makes 26-foot three point jumper (De'Aaron Fox assists)
- Paul Reed makes jumper (Patrick Beverley assists)
- Malik Monk misses 26-foot step back jumpshot
- Domantas Sabonis makes dunk (De'Aaron Fox assists)
- Tobias Harris misses 8-foot two point shot
- Tobias Harris makes dunk (Patrick Beverley assists)
- Keon Ellis makes 26-foot three point jumper (De'Aaron Fox assists)
- Tobias Harris makes driving dunk (Nicolas Batum assists)
- De'Aaron Fox misses 26-foot three point jumper
- Harrison Barnes misses 23-foot three point jumper
- Nicolas Batum makes alley oop layup (Paul Reed assists)
- Keegan Murray misses 17-foot pullup jump shot
- Nicolas Batum makes 23-foot three point jumper (Tobias Harris assists)
- Nicolas Batum makes 23-foot three point jumper (Tobias Harris assists)
- De'Aaron Fox misses 2-foot two point shot
- Harrison Barnes makes tip shot
- Keegan Murray makes 26-foot three pointer
- De'Anthony Melton misses 26-foot step back jumpshot
- Tyrese Maxey makes 3-foot driving floating jump shot
- Harrison Barnes makes free throw 1 of 2
- Harrison Barnes makes free throw 2 of 2
- Tyrese Maxey makes 26-foot step back jumpshot
- De'Aaron Fox makes 26-foot three pointer
- Paul Reed makes dunk (Nicolas Batum assists)
- Keon Ellis misses 23-foot three point jumper
- Domantas Sabonis makes 11-foot two point shot
- Keegan Murray makes dunk (Domantas Sabonis assists)
- Tyrese Maxey misses driving floating jump shot
- Paul Reed misses tip shot
- Tyrese Maxey misses 25-foot three point jumper
- De'Anthony Melton makes 25-foot three point jumper (Tobias Harris assists)
- Harrison Barnes misses 24-foot three point jumper
- De'Anthony Melton makes 29-foot three point jumper (Tyrese Maxey assists)
- Keegan Murray makes layup (Domantas Sabonis assists)
- Keegan Murray misses free throw 1 of 1
- Tobias Harris misses 28-foot three point jumper
- Chris Duarte misses two point shot
- Nicolas Batum makes 26-foot three point jumper (Paul Reed assists)
- Domantas Sabonis makes 4-foot two point shot (Malik Monk assists)
- Domantas Sabonis makes free throw 1 of 1
- De'Anthony Melton misses 26-foot three point jumper
- Tobias Harris makes 27-foot three point jumper (Nicolas Batum assists)
- De'Aaron Fox makes 27-foot three point jumper (Keegan Murray assists)
- Tobias Harris makes 11-foot two point shot
- De'Aaron Fox misses 25-foot three point jumper
- Harrison Barnes misses 23-foot three point jumper
- Malik Monk makes two point shot (Keegan Murray assists)
- Tyrese Maxey makes 8-foot two point shot
- Domantas Sabonis makes dunk (Malik Monk assists)
- Domantas Sabonis makes free throw 1 of 1
- Tyrese Maxey misses two point shot
- Paul Reed misses driving layup
- Malik Monk makes free throw 1 of 2
- Malik Monk makes free throw 2 of 2
- Marcus Morris Sr. misses 9-foot pullup jump shot
- Paul Reed makes free throw 1 of 2
- Paul Reed makes free throw 2 of 2
- Malik Monk makes free throw 1 of 2
- Malik Monk makes free throw 2 of 2
- Marcus Morris Sr. misses 15-foot pullup jump shot
- Malik Monk makes 16-foot pullup jump shot (Domantas Sabonis assists)
- Mo Bamba makes layup (Patrick Beverley assists)
- Domantas Sabonis misses layup
- Domantas Sabonis misses 1-foot tip shot
- Domantas Sabonis misses tip shot
- Malik Monk misses running pullup jump shot
- Trey Lyles misses tip shot
- Trey Lyles misses tip shot
- Patrick Beverley misses 26-foot three point jumper
- Danuel House Jr. misses 24-foot three point jumper
- Keegan Murray misses driving floating jump shot
- Malik Monk misses 28-foot three point jumper
- Malik Monk makes 21-foot pullup jump shot
- Patrick Beverley misses driving floating jump shot
- Malik Monk misses 17-foot pullup jump shot
- Patrick Beverley misses 25-foot three point jumper
- De'Aaron Fox makes free throw 1 of 2
- De'Aaron Fox makes free throw 2 of 2
- Danuel House Jr. makes 19-foot step back jumpshot (Tyrese Maxey assists)
- De'Aaron Fox misses 18-foot two point shot
- Tyrese Maxey misses driving layup
- Trey Lyles misses 24-foot three point shot
- Tobias Harris makes layup (Patrick Beverley assists)
- De'Aaron Fox misses free throw 1 of 2
- De'Aaron Fox makes free throw 2 of 2
- Tobias Harris makes 25-foot three pointer
- Malik Monk misses two point shot
- De'Aaron Fox misses free throw 1 of 2
- De'Aaron Fox makes free throw 2 of 2
- Tyrese Maxey makes free throw 1 of 2
- Tyrese Maxey makes free throw 2 of 2
- De'Anthony Melton misses 26-foot three point jumper
- Tobias Harris makes two point shot
- De'Aaron Fox misses 8-foot pullup jump shot
- Tobias Harris misses 18-foot jumper
- Keegan Murray misses 27-foot three point jumper
- De'Anthony Melton misses 24-foot three point jumper
- Tobias Harris misses tip shot
- Domantas Sabonis makes 1-foot two point shot (Keegan Murray assists)
- Mo Bamba makes 4-foot two point shot (De'Anthony Melton assists)
- Malik Monk misses free throw 1 of 2
- Malik Monk makes free throw 2 of 2
- Keegan Murray misses 11-foot two point shot
- Tyrese Maxey misses 19-foot pullup jump shot
- Tobias Harris makes driving layup
- Malik Monk misses 28-foot step back jumpshot
- Mo Bamba makes 26-foot three point jumper (De'Anthony Melton assists)
- De'Aaron Fox makes free throw 1 of 3
- De'Aaron Fox makes free throw 2 of 3
- De'Aaron Fox makes free throw 3 of 3
- Tobias Harris misses 27-foot three point jumper
- Tobias Harris misses 15-foot step back jumpshot
- Domantas Sabonis makes 2-foot dunk (Colby Jones assists)
- Colby Jones misses driving floating jump shot
- Tobias Harris misses 26-foot three point pullup jump shot
- Davion Mitchell makes two point shot (Colby Jones assists)
- Tobias Harris misses 26-foot three point pullup jump shot
- Kessler Edwards misses 19-foot jumper
- Furkan Korkmaz misses 26-foot three point jumper
- Kessler Edwards misses 24-foot three point shot
- JaVale McGee misses 27-foot three point jumper
- Jaden Springer misses 17-foot two point shot
- Furkan Korkmaz misses driving layup
- Davion Mitchell makes two point shot
- Danuel House Jr. makes free throw 1 of 2
- Danuel House Jr. makes free throw 2 of 2
- Colby Jones misses 14-foot two point shot
- JaVale McGee misses tip shot
- KJ Martin makes 1-foot dunk (Patrick Beverley assists)
- Davion Mitchell misses two point shot
- Sasha Vezenkov misses tip shot
- Sasha Vezenkov makes two point shot
- Furkan Korkmaz makes 27-foot three point jumper (Danuel House Jr. assists)
- JaVale McGee makes free throw 1 of 2
- JaVale McGee makes free throw 2 of 2
- Jaden Springer misses two point shot
- Jaden Springer makes two point shot
- JaVale McGee misses 16-foot two point shot
- Kessler Edwards makes 22-foot jumper
Shot Made
Shot Missed
Shot Made
Shot Missed
Data is currently unavailable.
Matchups
2025-26 Standings
Western Conference
| Pacific | W | L | PCT | GB | STRK |
|---|---|---|---|---|---|
| LA Lakers | 35 | 24 | .593 | - | W1 |
| Phoenix | 34 | 26 | .567 | 1.5 | W1 |
| Golden State | 31 | 29 | .517 | 4.5 | L1 |
| LA Clippers | 27 | 31 | .466 | 7.5 | L3 |
| Sacramento | 14 | 47 | .230 | 22 | W1 |
Eastern Conference
| Atlantic | W | L | PCT | GB | STRK |
|---|---|---|---|---|---|
| Boston | 39 | 20 | .661 | - | W1 |
| New York | 38 | 22 | .633 | 1.5 | W1 |
| Toronto | 35 | 25 | .583 | 4.5 | W1 |
| Philadelphia | 33 | 26 | .559 | 6 | W3 |
| Brooklyn | 15 | 44 | .254 | 24 | L7 |
NBA News

Washington takes on Houston, looks to break 4-game slide
Houston Rockets (37-22, third in the Western Conference) vs. Washington Wizards (16-43, 13th in the Eastern Conference)
6h

Pelicans face the Clippers, aim for 5th straight victory
New Orleans Pelicans (19-42, 13th in the Western Conference) vs. Los Angeles Clippers (27-31, 10th in the Western Conference)
6h

Atlanta faces Portland, aims for 4th straight home win
Portland Trail Blazers (29-32, ninth in the Western Conference) vs. Atlanta Hawks (30-31, 10th in the Eastern Conference)
6h