
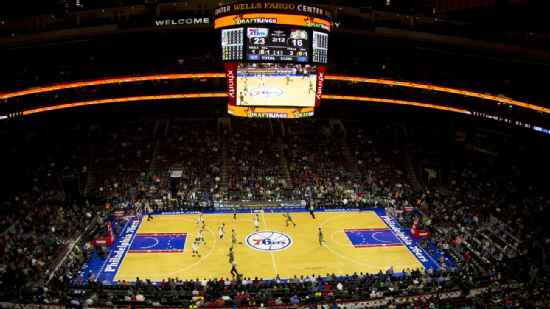
Atlanta Hawks @ Philadelphia 76ers

23-29, 11-15 Away
127
23-29, 11-15 Away

30-21, 17-10 Home
121
30-21, 17-10 Home
Game Leaders


Team Stats


52% (42-81)
Field Goal %
43% (42-98)
44% (16-36)
Three Point %
33% (15-45)
82% (27-33)
Free Throw %
76% (22-29)
13
Turnovers
10
40
Rebounds
49
22
Largest Lead
0
Game Information
Philadelphia, PA
Referee:Ed Malloy
Referee:Dedric Taylor
Referee:Che Flores
Referee:Che Flores
Probabilities & Game Flow

100%
--ATL
0%
--PHI
According to ESPN Analytics
Shot Chart

- Onyeka Okongwu makes 7-foot two point shot (Jalen Johnson assists)
- Cameron Payne misses 26-foot three point jumper
- Jalen Johnson makes two point shot
- Buddy Hield misses 14-foot pullup jump shot
- Bogdan Bogdanovic misses two point shot
- Saddiq Bey makes two point shot (Trae Young assists)
- Trae Young misses 31-foot step back jumpshot
- Tobias Harris makes two point shot
- Onyeka Okongwu makes driving layup (Trae Young assists)
- Buddy Hield makes 25-foot step back jumpshot
- Jalen Johnson misses 26-foot three point jumper
- Buddy Hield makes 2-foot two point shot (Cameron Payne assists)
- Jalen Johnson makes 26-foot three point jumper (Trae Young assists)
- Cameron Payne misses 24-foot three point jumper
- Saddiq Bey misses 26-foot three point shot
- Kelly Oubre Jr. makes two point shot
- Onyeka Okongwu misses layup
- Trae Young makes 27-foot three pointer (Jalen Johnson assists)
- Paul Reed misses 14-foot jumper
- Bogdan Bogdanovic misses 23-foot three point jumper
- Tobias Harris misses 26-foot three point jumper
- Paul Reed makes 11-foot jumper (Cameron Payne assists)
- Paul Reed makes free throw 1 of 1
- Bogdan Bogdanovic misses driving floating jump shot
- Onyeka Okongwu makes tip shot
- Tobias Harris makes 23-foot three point jumper (Paul Reed assists)
- Onyeka Okongwu makes alley oop dunk shot (Jalen Johnson assists)
- Tobias Harris misses driving layup
- Buddy Hield misses 26-foot three point jumper
- Cameron Payne makes tip shot
- Saddiq Bey misses two point shot
- Saddiq Bey misses tip shot
- Cameron Payne misses driving floating jump shot
- De'Andre Hunter misses driving layup
- Saddiq Bey makes two point shot
- Paul Reed makes 16-foot jumper
- Saddiq Bey makes free throw 1 of 2
- Saddiq Bey makes free throw 2 of 2
- De'Andre Hunter misses 27-foot three point pullup jump shot
- Garrison Mathews makes 26-foot three point jumper (Trent Forrest assists)
- Terquavion Smith misses 25-foot three point jumper
- Onyeka Okongwu makes 9-foot two point shot (Trent Forrest assists)
- Kelly Oubre Jr. misses 23-foot three point jumper
- Kelly Oubre Jr. makes free throw 1 of 2
- Kelly Oubre Jr. misses free throw 2 of 2
- De'Andre Hunter makes free throw 1 of 2
- De'Andre Hunter makes free throw 2 of 2
- Terquavion Smith makes 28-foot three point jumper (Buddy Hield assists)
- Trae Young misses 28-foot step back jumpshot
- Buddy Hield misses 27-foot three point pullup jump shot
- Trae Young makes 12-foot two point shot (Jalen Johnson assists)
- Trae Young makes free throw 1 of 1
- Kelly Oubre Jr. misses 26-foot three point pullup jump shot
- De'Andre Hunter makes 24-foot three point jumper (Jalen Johnson assists)
- Terquavion Smith misses 25-foot three point pullup jump shot
- Bruno Fernando makes layup (Trae Young assists)
- Jalen Johnson misses two point shot
- Buddy Hield misses two point shot
- Paul Reed makes tip shot
- Paul Reed makes free throw 1 of 1
- Ricky Council IV makes 16-foot pullup jump shot (Buddy Hield assists)
- Trae Young makes 27-foot three point jumper (Garrison Mathews assists)
- Cameron Payne makes 7-foot two point shot
- Trae Young makes free throw 1 of 3
- Trae Young makes free throw 2 of 3
- Trae Young makes free throw 3 of 3
- Cameron Payne misses driving floating jump shot
- Ricky Council IV makes free throw 1 of 2
- Ricky Council IV makes free throw 2 of 2
- Bruno Fernando makes dunk (De'Andre Hunter assists)
- Ricky Council IV misses 25-foot three point jumper
- Buddy Hield misses 27-foot three point jumper
- Trae Young misses two point shot
- Cameron Payne misses running pullup jump shot
- Bruno Fernando makes 1-foot layup (Trae Young assists)
- Tobias Harris makes 11-foot pullup jump shot
- Garrison Mathews makes 2-foot driving floating jump shot (Trae Young assists)
- Paul Reed makes 1-foot layup (Tobias Harris assists)
- Paul Reed misses free throw 1 of 1
- De'Andre Hunter misses 10-foot two point shot
- Jalen Johnson misses driving floating jump shot
- Buddy Hield misses 26-foot three point shot
- Paul Reed misses two point shot
- Cameron Payne makes free throw 1 of 2
- Cameron Payne makes free throw 2 of 2
- De'Andre Hunter makes 23-foot three point jumper (Trae Young assists)
- Kelly Oubre Jr. misses driving layup
- Kelly Oubre Jr. makes free throw 1 of 2
- Kelly Oubre Jr. makes free throw 2 of 2
- Trae Young makes 29-foot three pointer
- Cameron Payne makes 20-foot pullup jump shot
- KJ Martin misses free throw 1 of 2
- KJ Martin makes free throw 2 of 2
- Bogdan Bogdanovic makes 4-foot two point shot
- Buddy Hield makes driving layup (Kelly Oubre Jr. assists)
- Onyeka Okongwu makes dunk (Bogdan Bogdanovic assists)
- Kelly Oubre Jr. misses 27-foot three point jumper
- KJ Martin makes driving layup (Mo Bamba assists)
- Saddiq Bey misses 24-foot three point jumper
- Onyeka Okongwu makes 23-foot three point jumper (Jalen Johnson assists)
- Tobias Harris misses 5-foot pullup jump shot
- Bogdan Bogdanovic misses 24-foot three point jumper
- Bogdan Bogdanovic makes 23-foot three point jumper (Saddiq Bey assists)
- Terquavion Smith misses 26-foot three point pullup jump shot
- Onyeka Okongwu makes 3-foot two point shot (Bogdan Bogdanovic assists)
- Kelly Oubre Jr. makes driving layup
- Saddiq Bey makes 23-foot three point jumper (Trae Young assists)
- Kelly Oubre Jr. misses driving layup
- Terquavion Smith makes 22-foot three point jumper (Mo Bamba assists)
- Mo Bamba misses driving floating jump shot
- KJ Martin makes tip shot
- Mo Bamba misses 26-foot three point jumper
- Terquavion Smith makes 1-foot driving dunk
- Trae Young makes 23-foot three point jumper (Bogdan Bogdanovic assists)
- Kelly Oubre Jr. misses 8-foot pullup jump shot
- Kelly Oubre Jr. makes two point shot
- Trae Young misses 26-foot three point pullup jump shot
- Bogdan Bogdanovic makes 22-foot step back jumpshot (Onyeka Okongwu assists)
- Buddy Hield makes 26-foot three point jumper (Cameron Payne assists)
- Jalen Johnson misses 25-foot three point jumper
- Saddiq Bey makes 27-foot three point jumper
- Trae Young makes 17-foot pullup jump shot
- Cameron Payne misses 28-foot three point pullup jump shot
- Cameron Payne makes 26-foot step back jumpshot
- Buddy Hield makes 26-foot three point jumper (Tobias Harris assists)
- Buddy Hield misses 28-foot three point shot
- Saddiq Bey makes free throw 1 of 2
- Saddiq Bey makes free throw 2 of 2
- Tobias Harris makes free throw 1 of 2
- Tobias Harris misses free throw 2 of 2
- Trae Young misses 26-foot step back jumpshot
- Onyeka Okongwu misses 24-foot three point jumper
- Saddiq Bey makes free throw 1 of 2
- Saddiq Bey makes free throw 2 of 2
- Jalen Johnson makes 2-foot layup (Trae Young assists)
- Paul Reed makes 1-foot dunk (Buddy Hield assists)
- Trae Young makes 27-foot three pointer
- Tobias Harris misses 12-foot two point shot
- Onyeka Okongwu makes 12-foot two point shot (Trent Forrest assists)
- Tobias Harris makes 27-foot three point jumper (Cameron Payne assists)
- Bogdan Bogdanovic makes 26-foot three point jumper (Trent Forrest assists)
- Cameron Payne makes 27-foot three point jumper (Tobias Harris assists)
- Buddy Hield misses 26-foot three point jumper
- Tobias Harris makes 7-foot driving floating jump shot
- Bogdan Bogdanovic makes driving layup (Onyeka Okongwu assists)
- Tobias Harris misses 14-foot step back jumpshot
- Jalen Johnson misses 22-foot three point jumper
- Terquavion Smith misses 26-foot three point jumper
- Mo Bamba makes 26-foot three point jumper (Buddy Hield assists)
- Jalen Johnson makes driving dunk (Trae Young assists)
- Kelly Oubre Jr. makes dunk (Buddy Hield assists)
- Garrison Mathews misses 24-foot three point jumper
- Kelly Oubre Jr. makes 28-foot three point jumper (Mo Bamba assists)
- De'Andre Hunter makes 22-foot three point jumper (Trae Young assists)
- KJ Martin misses 26-foot three point jumper
- Trae Young misses 27-foot three point pullup jump shot
- Buddy Hield misses 26-foot three point shot
- Trae Young makes free throw 1 of 2
- Trae Young misses free throw 2 of 2
- Trae Young misses 18-foot pullup jump shot
- Tobias Harris misses 8-foot pullup jump shot
- Kelly Oubre Jr. misses free throw 1 of 2
- Kelly Oubre Jr. makes free throw 2 of 2
- Bruno Fernando makes layup (De'Andre Hunter assists)
- Kelly Oubre Jr. makes 11-foot pullup jump shot (Cameron Payne assists)
- Kelly Oubre Jr. makes free throw 1 of 2
- Kelly Oubre Jr. makes free throw 2 of 2
- Garrison Mathews makes free throw 1 of 3
- Garrison Mathews makes free throw 2 of 3
- Garrison Mathews makes free throw 3 of 3
- Kelly Oubre Jr. misses free throw 1 of 2
- Kelly Oubre Jr. makes free throw 2 of 2
- Trae Young misses free throw 1 of 2
- Trae Young makes free throw 2 of 2
- Cameron Payne makes 26-foot three point jumper (Tobias Harris assists)
- Trae Young misses 28-foot three point pullup jump shot
- Kelly Oubre Jr. makes free throw 1 of 2
- Kelly Oubre Jr. makes free throw 2 of 2
- Cameron Payne makes 27-foot running pullup jump shot (Buddy Hield assists)
- Kelly Oubre Jr. misses running pullup jump shot
- Saddiq Bey misses 25-foot three point jumper
- Tobias Harris makes 4-foot driving floating jump shot
- Bogdan Bogdanovic misses 26-foot three point jumper
- Tobias Harris misses 10-foot step back jumpshot
- Trae Young makes 15-foot driving floating jump shot
- Tobias Harris makes free throw 1 of 2
- Tobias Harris makes free throw 2 of 2
- Trae Young makes 2-foot two point shot
- Buddy Hield misses 28-foot three point jumper
- Trae Young makes 21-foot step back jumpshot
- Tobias Harris makes free throw 1 of 2
- Tobias Harris makes free throw 2 of 2
- Onyeka Okongwu makes free throw 1 of 2
- Onyeka Okongwu makes free throw 2 of 2
- Kelly Oubre Jr. misses 25-foot step back jumpshot
- Trae Young misses 28-foot three point pullup jump shot
- Buddy Hield makes 24-foot three point shot (Tobias Harris assists)
- Bogdan Bogdanovic misses 23-foot three point jumper
- Tobias Harris makes two point shot
- Trae Young makes free throw 1 of 2
- Trae Young misses free throw 2 of 2
- Cameron Payne misses driving layup
- Onyeka Okongwu misses 9-foot two point shot
- Kelly Oubre Jr. misses 26-foot three point jumper
- Kelly Oubre Jr. misses two point shot
- Kelly Oubre Jr. misses free throw 1 of 2
- Kelly Oubre Jr. makes free throw 2 of 2
- Jalen Johnson makes 1-foot driving dunk (Trae Young assists)
- Paul Reed misses 25-foot three point jumper
- Trae Young misses 22-foot step back jumpshot
- Buddy Hield makes two point shot (Tobias Harris assists)
- Trae Young makes free throw 1 of 2
- Trae Young makes free throw 2 of 2
- Cameron Payne misses 26-foot three point jumper
- Jalen Johnson misses free throw 1 of 2
- Jalen Johnson misses free throw 2 of 2
- Kelly Oubre Jr. makes 4-foot pullup jump shot (Tobias Harris assists)
- Trae Young misses free throw 1 of 2
- Trae Young makes free throw 2 of 2
- Paul Reed misses 29-foot step back jumpshot
- Kelly Oubre Jr. makes 27-foot three point jumper (Cameron Payne assists)
- Trae Young makes free throw 1 of 2
- Trae Young makes free throw 2 of 2
- Buddy Hield makes two point shot
- Saddiq Bey makes free throw 1 of 2
- Saddiq Bey makes free throw 2 of 2
Shot Made
Shot Missed
Shot Made
Shot Missed
Data is currently unavailable.
Matchups
2025-26 Standings
Eastern Conference
| Southeast | W | L | PCT | GB | STRK |
|---|---|---|---|---|---|
| Atlanta | 43 | 33 | .566 | - | W2 |
| Orlando | 40 | 35 | .533 | 2.5 | W1 |
| Miami | 40 | 36 | .526 | 3 | W1 |
| Charlotte | 40 | 36 | .526 | 3 | W1 |
| Washington | 17 | 58 | .227 | 25.5 | L3 |
| Atlantic | W | L | PCT | GB | STRK |
|---|---|---|---|---|---|
| Boston | 50 | 25 | .667 | - | L1 |
| New York | 48 | 28 | .632 | 2.5 | L3 |
| Toronto | 42 | 33 | .560 | 8 | L1 |
| Philadelphia | 41 | 34 | .547 | 9 | L1 |
| Brooklyn | 18 | 58 | .237 | 32.5 | L1 |
NBA News

'A game of moments': Uluc
We are heading to a game 5 in the 2026 NBL Championship series after a nail biting finish in Adelaide. ESPN Basketball Insider Olgun Uluc breaks down the game.
1h

Draymond Green reflects on his future amid uncertainty
As the Warriors face another season lost to injuries, Green confronts an uncertain future.
7m

NBA Power Rankings: What to watch over the final two weeks for all 30 teams
With just a handful of matchups left for each team in the regular season, where do all 30 teams land in this week's Power Rankings?
2h