
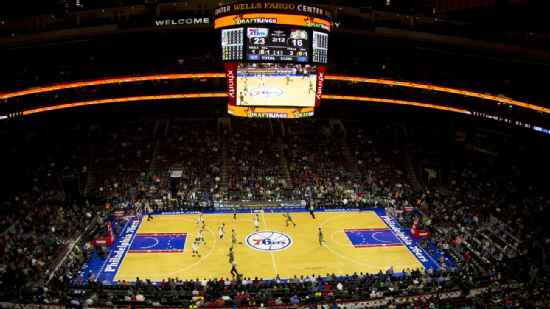
Brooklyn Nets @ Philadelphia 76ers

32-50, 12-29 Away
86
32-50, 12-29 Away

47-35, 25-16 Home
107
47-35, 25-16 Home
Game Leaders


Team Stats


39% (32-83)
Field Goal %
43% (41-96)
26% (9-34)
Three Point %
32% (14-44)
76% (13-17)
Free Throw %
73% (11-15)
13
Turnovers
14
42
Rebounds
57
3
Largest Lead
28
Game Information
Philadelphia, PA
Referee:Josh Tiven
Referee:Gediminas Petraitis
Referee:Andy Nagy
Probabilities & Game Flow

0%
--BKN
100%
--PHI
According to ESPN Analytics
Shot Chart

- Tyrese Maxey misses 28-foot three point jumper
- Cam Thomas misses 28-foot three point jumper
- Kyle Lowry misses running pullup jump shot
- Mikal Bridges misses 26-foot three point jumper
- Tobias Harris misses 19-foot pullup jump shot
- Trendon Watford misses driving floating jump shot
- Tyrese Maxey makes 4-foot two point shot (Kyle Lowry assists)
- Tyrese Maxey makes 27-foot running pullup jump shot (Tobias Harris assists)
- Tobias Harris makes 4-foot driving floating jump shot (Kyle Lowry assists)
- Mikal Bridges makes 26-foot three point jumper (Cam Thomas assists)
- Tobias Harris makes 3-foot hook shot (Tyrese Maxey assists)
- Cam Thomas makes free throw 1 of 2
- Cam Thomas makes free throw 2 of 2
- Kelly Oubre Jr. makes two point shot
- Noah Clowney makes 22-foot three point jumper (Cam Thomas assists)
- Tyrese Maxey makes 19-foot pullup jump shot
- Tobias Harris misses 25-foot three point jumper
- Trendon Watford makes two point shot
- Tyrese Maxey makes free throw 1 of 2
- Tyrese Maxey misses free throw 2 of 2
- Tyrese Maxey misses 27-foot step back jumpshot
- Noah Clowney misses layup
- Tyrese Maxey makes two point shot
- Trendon Watford misses free throw 1 of 2
- Trendon Watford makes free throw 2 of 2
- Kelly Oubre Jr. misses driving floating jump shot
- Nic Claxton makes two point shot
- Tyrese Maxey misses 10-foot two point shot
- Trendon Watford misses 28-foot three point jumper
- Mikal Bridges makes 26-foot three point jumper (Trendon Watford assists)
- Kelly Oubre Jr. misses 26-foot step back jumpshot
- Mikal Bridges misses 23-foot three point jumper
- Tyrese Maxey misses two point shot
- Jalen Wilson misses 23-foot three point jumper
- Tobias Harris makes 10-foot step back jumpshot
- Jalen Wilson misses two point shot
- Tyrese Maxey makes 8-foot driving floating jump shot (Buddy Hield assists)
- Noah Clowney misses 2-foot two point shot
- Paul Reed makes two point shot (Tobias Harris assists)
- Lonnie Walker IV makes 11-foot pullup jump shot (Noah Clowney assists)
- Tobias Harris misses 10-foot pullup jump shot
- Jacob Gilyard misses 27-foot three point pullup jump shot
- Buddy Hield misses 26-foot three point jumper
- Noah Clowney makes two point shot (Lonnie Walker IV assists)
- Buddy Hield misses two point shot
- Paul Reed misses 7-foot tip shot
- Lonnie Walker IV misses driving layup
- Noah Clowney makes 24-foot three point jumper (Lonnie Walker IV assists)
- Cam Thomas misses 13-foot step back jumpshot
- Nicolas Batum misses 26-foot three point jumper
- Lonnie Walker IV makes two point shot
- Buddy Hield makes layup (Paul Reed assists)
- Lonnie Walker IV misses 26-foot three point pullup jump shot
- Tobias Harris makes 1-foot layup (Nicolas Batum assists)
- Jacob Gilyard misses 26-foot three point pullup jump shot
- Cameron Payne misses running pullup jump shot
- Buddy Hield makes 25-foot three point jumper (Nicolas Batum assists)
- Buddy Hield makes free throw 1 of 3
- Buddy Hield makes free throw 2 of 3
- Buddy Hield makes free throw 3 of 3
- Trendon Watford makes 5-foot driving floating jump shot
- Buddy Hield misses 26-foot three point jumper
- Trendon Watford misses driving floating jump shot
- Jalen Wilson misses 5-foot tip shot
- Cam Thomas makes 25-foot step back jumpshot
- Paul Reed makes layup (Cameron Payne assists)
- Trendon Watford misses 9-foot two point shot
- Tobias Harris makes two point shot (Cameron Payne assists)
- Lonnie Walker IV makes 17-foot pullup jump shot (Noah Clowney assists)
- Paul Reed misses 26-foot three point jumper
- Lonnie Walker IV misses 27-foot three point pullup jump shot
- Cameron Payne makes 27-foot three point jumper (Buddy Hield assists)
- Buddy Hield misses 26-foot three point jumper
- Lonnie Walker IV makes two point shot (Trendon Watford assists)
- Jalen Wilson misses 26-foot three point jumper
- Tobias Harris misses driving floating jump shot
- Tyrese Maxey makes 27-foot three point shot (Kyle Lowry assists)
- Lonnie Walker IV misses 27-foot three point jumper
- Tobias Harris makes 23-foot three point jumper (Kyle Lowry assists)
- Mikal Bridges makes dunk (Lonnie Walker IV assists)
- Lonnie Walker IV misses 16-foot pullup jump shot
- Trendon Watford makes 1-foot dunk (Lonnie Walker IV assists)
- Tobias Harris makes free throw 1 of 2
- Tobias Harris makes free throw 2 of 2
- Trendon Watford misses 6-foot two point shot
- Tyrese Maxey misses 27-foot three point shot
- Tyrese Maxey makes 24-foot three point jumper (Kyle Lowry assists)
- Nic Claxton makes 4-foot two point shot
- Tobias Harris misses 26-foot three point pullup jump shot
- Mikal Bridges misses 10-foot two point shot
- Tyrese Maxey misses 12-foot two point shot
- Lonnie Walker IV makes two point shot (Mikal Bridges assists)
- Kelly Oubre Jr. makes 24-foot three point jumper (Kyle Lowry assists)
- Lonnie Walker IV misses 26-foot three point jumper
- Tyrese Maxey makes free throw 1 of 2
- Tyrese Maxey makes free throw 2 of 2
- Cam Thomas makes 8-foot driving floating jump shot
- Nicolas Batum misses 22-foot three point jumper
- Trendon Watford makes 7-foot two point shot (Nic Claxton assists)
- Kyle Lowry misses 26-foot three point jumper
- Cam Thomas makes 24-foot step back jumpshot
- Kelly Oubre Jr. misses two point shot
- Mo Bamba makes dunk
- Kelly Oubre Jr. misses 24-foot three point jumper
- Cam Thomas makes 25-foot running pullup jump shot
- Cam Thomas misses 24-foot three point pullup jump shot
- Tobias Harris misses 23-foot three point jumper
- Mo Bamba makes two point shot
- Tyrese Maxey makes two point shot (Kyle Lowry assists)
- Tyrese Maxey misses 10-foot two point shot
- Tyrese Maxey misses 24-foot three point jumper
- Mo Bamba misses 26-foot three point jumper
- Kelly Oubre Jr. makes free throw 1 of 2
- Kelly Oubre Jr. misses free throw 2 of 2
- Nic Claxton misses 8-foot two point shot
- Cam Thomas misses running pullup jump shot
- Nic Claxton makes dunk
- Tobias Harris makes 26-foot three point jumper (Tyrese Maxey assists)
- Cam Thomas misses 8-foot two point shot
- Kelly Oubre Jr. makes two point shot
- Kelly Oubre Jr. misses 9-foot pullup jump shot
- Mikal Bridges misses 25-foot three point jumper
- Trendon Watford misses two point shot
- Kelly Oubre Jr. misses 26-foot three point jumper
- Noah Clowney makes free throw 1 of 2
- Noah Clowney makes free throw 2 of 2
- Paul Reed misses layup
- Tobias Harris makes 24-foot three pointer (Buddy Hield assists)
- Mikal Bridges misses two point shot
- Jalen Wilson misses driving floating jump shot
- Buddy Hield misses 19-foot pullup jump shot
- Lonnie Walker IV misses 23-foot three point jumper
- Tyrese Maxey misses 18-foot step back jumpshot
- Cam Thomas misses free throw 1 of 2
- Cam Thomas makes free throw 2 of 2
- Buddy Hield misses 13-foot pullup jump shot
- Noah Clowney makes layup (Lonnie Walker IV assists)
- Noah Clowney makes free throw 1 of 1
- Paul Reed misses 10-foot jumper
- Cam Thomas makes 7-foot two point shot
- Tyrese Maxey makes 3-foot two point shot
- Buddy Hield makes 26-foot three point jumper (Nicolas Batum assists)
- Buddy Hield makes 23-foot three point shot (Tyrese Maxey assists)
- Lonnie Walker IV makes 17-foot pullup jump shot
- Buddy Hield makes 23-foot three point jumper (Nicolas Batum assists)
- Buddy Hield misses 26-foot three point pullup jump shot
- Lonnie Walker IV misses driving floating jump shot
- Cameron Payne misses 25-foot three point jumper
- Cam Thomas misses 25-foot three point shot
- Tyrese Maxey makes 3-foot two point shot
- Cam Thomas makes free throw 1 of 2
- Cam Thomas makes free throw 2 of 2
- Cameron Payne makes 9-foot driving floating jump shot (Kyle Lowry assists)
- Jalen Wilson misses driving floating jump shot
- Cameron Payne misses 26-foot step back jumpshot
- Jalen Wilson makes two point shot
- Paul Reed makes dunk (Cameron Payne assists)
- Jalen Wilson misses 24-foot three point jumper
- Cameron Payne makes 14-foot driving floating jump shot (Buddy Hield assists)
- Jacob Gilyard misses 26-foot three point jumper
- Paul Reed makes 6-foot two point shot (Nicolas Batum assists)
- Buddy Hield misses 26-foot three point shot
- Noah Clowney misses 25-foot three point jumper
- Buddy Hield makes two point shot (Paul Reed assists)
- Jacob Gilyard misses 25-foot three point jumper
- Paul Reed makes two point shot (Buddy Hield assists)
- Buddy Hield misses 26-foot three point jumper
- Trendon Watford makes free throw 1 of 2
- Trendon Watford makes free throw 2 of 2
- Paul Reed misses 7-foot two point shot
- Lonnie Walker IV misses 25-foot three point jumper
- Paul Reed misses free throw 1 of 2
- Paul Reed makes free throw 2 of 2
- Keon Johnson makes free throw 1 of 2
- Keon Johnson misses free throw 2 of 2
- Cameron Payne makes 26-foot three pointer (Paul Reed assists)
- Jalen Wilson makes 23-foot three point jumper (Jacob Gilyard assists)
- Terquavion Smith misses 26-foot three point jumper
- Cameron Payne misses 27-foot three point jumper
- Jalen Wilson makes 2-foot two point shot (Trendon Watford assists)
- Noah Clowney misses 25-foot three point jumper
- Noah Clowney makes two point shot (Trendon Watford assists)
- Terquavion Smith makes free throw 1 of 2
- Terquavion Smith misses free throw 2 of 2
- Trendon Watford makes 25-foot three point jumper (Jacob Gilyard assists)
- Jalen Wilson makes two point shot (Trendon Watford assists)
- Jeff Dowtin Jr. misses 26-foot three point jumper
- Terquavion Smith misses 26-foot three point jumper
- Keon Johnson makes 1-foot two point shot (Jalen Wilson assists)
- Ricky Council IV makes 25-foot three point jumper (Jeff Dowtin Jr. assists)
- Jalen Wilson misses 25-foot three point jumper
- Jeff Dowtin Jr. makes 10-foot running pullup jump shot
- Noah Clowney makes free throw 1 of 2
- Noah Clowney misses free throw 2 of 2
- Terquavion Smith misses two point shot
- Paul Reed makes tip shot
- Jalen Wilson misses two point shot
- Cameron Payne misses running pullup jump shot
- Keon Johnson misses 25-foot three point pullup jump shot
Shot Made
Shot Missed
Shot Made
Shot Missed
Data is currently unavailable.
Matchups
2025-26 Standings
Eastern Conference
| Atlantic | W | L | PCT | GB | STRK |
|---|---|---|---|---|---|
| Boston | 39 | 20 | .661 | - | W1 |
| New York | 39 | 22 | .639 | 1 | W2 |
| Toronto | 35 | 25 | .583 | 4.5 | W1 |
| Philadelphia | 33 | 26 | .559 | 6 | W3 |
| Brooklyn | 15 | 45 | .250 | 24.5 | L8 |
NBA News

James Harden, still dealing with broken thumb, returns in win
James Harden, still dealing from a broken thumb in his non-shooting hand, made a successful return for the Cleveland Cavaliers on Sunday.
3h
Cunningham, Harris help NBA-leading Pistons beat Magic for 6th straight road victory
— Cade Cunningham had 29 points and 11 assists, Tobias Harris scored 23 points and the NBA-leading Detroit Pistons beat the Orlando Magic 106-92 on Sunday night for their sixth straight road victory.
4h
Hawks score 44 points in the 1st quarter and rout the Trail Blazers 135-101
— Onyeka Okongwu scored 25 points, CJ McCollum added 19 and the Atlanta Hawks rode a huge first quarter to an easy 135-101 win over the Portland Trail Blazers on Sunday night.
4h