
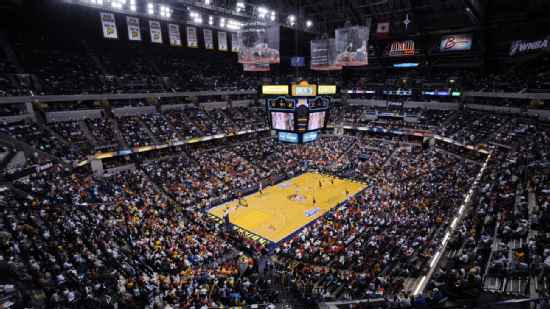
Phoenix Mercury @ Indiana Fever

16-10, 7-6 Away
101
16-10, 7-6 Away

15-12, 9-6 Home
107
15-12, 9-6 Home
Game Leaders


Team Stats


49% (36-73)
Field Goal %
52% (32-62)
33% (7-21)
Three Point %
46% (11-24)
85% (22-26)
Free Throw %
84% (32-38)
19
Turnovers
17
31
Rebounds
33
12
Largest Lead
12
Game Information
Indianapolis, IN
Referee:Angel Kent
Referee:Blanca Burns
Referee:Gerda Gatling
Probabilities & Game Flow

0%
--PHX
100%
--IND
According to ESPN Analytics
Shot Chart

- Kahleah Copper makes 12-foot two point shot
- Natasha Howard makes 5-foot two point shot
- Monique Akoa Makani misses 17-foot step back jumpshot
- Sophie Cunningham misses running pullup jump shot
- Satou Sabally misses 27-foot three point step back jumpshot
- Aliyah Boston misses driving layup
- Satou Sabally misses driving floating jump shot
- Satou Sabally misses driving layup
- Satou Sabally makes two point shot
- Satou Sabally makes free throw 1 of 1
- Aliyah Boston makes layup (Natasha Howard assists)
- Alyssa Thomas makes 11-foot two point shot
- Satou Sabally misses driving layup
- DeWanna Bonner makes free throw 1 of 3
- DeWanna Bonner makes free throw 2 of 3
- DeWanna Bonner misses free throw 3 of 3
- Alyssa Thomas misses layup
- Aari McDonald makes free throw 1 of 2
- Aari McDonald makes free throw 2 of 2
- Satou Sabally makes 6-foot two point shot (Alyssa Thomas assists)
- Kelsey Mitchell misses 23-foot three point jumper
- Alyssa Thomas misses 7-foot two point shot
- Aari McDonald makes 26-foot three point jumper (Kelsey Mitchell assists)
- Kahleah Copper makes free throw 1 of 2
- Kahleah Copper makes free throw 2 of 2
- Kelsey Mitchell makes 1-foot layup (Aari McDonald assists)
- Kathryn Westbeld makes 26-foot three point jumper (Alyssa Thomas assists)
- Aliyah Boston misses layup
- Alyssa Thomas makes two point shot
- Kahleah Copper makes 23-foot three point jumper (Kathryn Westbeld assists)
- Lexie Hull makes free throw 1 of 2
- Lexie Hull makes free throw 2 of 2
- Alyssa Thomas makes 16-foot pullup jump shot
- Alyssa Thomas makes driving layup
- Aari McDonald misses driving layup
- Kathryn Westbeld misses driving layup
- Kelsey Mitchell misses 19-foot jumper
- Sami Whitcomb misses 34-foot three point jumper
- Natasha Mack misses layup
- Damiris Dantas makes 25-foot three point jumper (Sydney Colson assists)
- Satou Sabally misses 26-foot three point pullup jump shot
- Damiris Dantas misses 29-foot three point jumper
- Sophie Cunningham makes technical free throw
- Satou Sabally makes free throw 1 of 2
- Satou Sabally misses free throw 2 of 2
- Chloe Bibby makes 25-foot three point shot (Sydney Colson assists)
- Lexi Held makes free throw 1 of 2
- Lexi Held makes free throw 2 of 2
- Chloe Bibby misses 25-foot three point jumper
- Natasha Mack makes 15-foot jumper (Lexi Held assists)
- Sydney Colson misses 22-foot three point jumper
- Aari McDonald makes 25-foot three point jumper (Kelsey Mitchell assists)
- Kahleah Copper makes 12-foot pullup jump shot
- Chloe Bibby makes free throw 1 of 3
- Chloe Bibby makes free throw 2 of 3
- Chloe Bibby makes free throw 3 of 3
- Satou Sabally makes free throw 1 of 2
- Satou Sabally misses free throw 2 of 2
- Lexie Hull misses 26-foot three point jumper
- Aliyah Boston misses layup
- Alyssa Thomas makes two point shot
- Lexie Hull misses 26-foot three point jumper
- Aliyah Boston makes free throw 1 of 2
- Aliyah Boston misses free throw 2 of 2
- Aliyah Boston makes layup
- Aari McDonald makes driving layup
- Aari McDonald makes two point shot (Lexie Hull assists)
- Kitija Laksa misses 27-foot three point jumper
- Aliyah Boston misses driving layup
- Kelsey Mitchell makes 17-foot jump bank shot (Aari McDonald assists)
- Alyssa Thomas misses driving layup
- Aari McDonald makes 26-foot three point jumper (Kelsey Mitchell assists)
- Kathryn Westbeld makes 28-foot three point jumper (Monique Akoa Makani assists)
- Kelsey Mitchell misses free throw 1 of 2
- Kelsey Mitchell makes free throw 2 of 2
- Alyssa Thomas makes 2-foot two point shot
- Monique Akoa Makani makes two point shot (Alyssa Thomas assists)
- Sydney Colson makes 25-foot three pointer
- Kelsey Mitchell makes 24-foot three point shot (Natasha Howard assists)
- Kahleah Copper makes 2-foot two point shot
- Kahleah Copper makes free throw 1 of 1
- Aari McDonald makes 2-foot two point shot (Damiris Dantas assists)
- Kahleah Copper misses driving layup
- Sydney Colson makes 2-foot two point shot
- Satou Sabally misses two point shot
- Alyssa Thomas makes free throw 1 of 2
- Alyssa Thomas makes free throw 2 of 2
- Sydney Colson makes 25-foot three pointer
- Sydney Colson misses 26-foot three point jumper
- Sophie Cunningham makes 10-foot jumper
- Alyssa Thomas misses layup
- Chloe Bibby misses free throw 1 of 2
- Chloe Bibby makes free throw 2 of 2
- Satou Sabally misses 26-foot three point step back jumpshot
- Chloe Bibby misses 26-foot three point jumper
- Sami Whitcomb makes 37-foot three pointer
- Aari McDonald makes free throw 1 of 2
- Aari McDonald makes free throw 2 of 2
- Alyssa Thomas misses 19-foot jumper
- Kelsey Mitchell misses 21-foot pullup jump shot
- Natasha Howard makes two point shot
- Satou Sabally misses driving layup
- Kelsey Mitchell misses two point shot
- Kelsey Mitchell misses 18-foot jumper
- Kahleah Copper makes 23-foot three point jumper (Alyssa Thomas assists)
- Aari McDonald misses 28-foot three point step back jumpshot
- Alyssa Thomas makes 17-foot jumper (Sami Whitcomb assists)
- Aari McDonald makes free throw 1 of 2
- Aari McDonald makes free throw 2 of 2
- Sami Whitcomb makes 25-foot three point step back jumpshot (Alyssa Thomas assists)
- Aari McDonald makes 2-foot two point shot
- Sami Whitcomb misses 25-foot three point pullup jump shot
- Kelsey Mitchell misses 24-foot three point jumper
- Kahleah Copper misses two point shot
- Natasha Howard misses two point shot
- Alyssa Thomas makes layup (Satou Sabally assists)
- Natasha Howard makes 2-foot two point shot (Aari McDonald assists)
- Alyssa Thomas misses 2-foot two point shot
- DeWanna Bonner misses 11-foot two point shot
- Damiris Dantas makes 25-foot three point jumper (Sydney Colson assists)
- Kahleah Copper makes free throw 1 of 2
- Kahleah Copper makes free throw 2 of 2
- Damiris Dantas makes 13-foot two point shot
- Kahleah Copper misses two point shot
- Damiris Dantas makes 1-foot layup (Sydney Colson assists)
- Alyssa Thomas makes 18-foot jumper (Kathryn Westbeld assists)
- Sydney Colson misses 26-foot three point pullup jump shot
- Sami Whitcomb makes driving layup
- Damiris Dantas makes free throw 1 of 2
- Damiris Dantas makes free throw 2 of 2
- Sami Whitcomb makes driving layup (Alyssa Thomas assists)
- Sami Whitcomb makes driving layup (Natasha Mack assists)
- Damiris Dantas misses driving layup
- Natasha Mack misses layup
- Lexi Held makes 14-foot pullup jump shot
- Lexi Held misses 31-foot three point pullup jump shot
- Natasha Mack makes 9-foot jumper (Sami Whitcomb assists)
- Aliyah Boston makes layup (Natasha Howard assists)
- Kahleah Copper makes driving layup
- Kahleah Copper makes free throw 1 of 1
- Natasha Howard misses driving floating jump shot
- Aliyah Boston makes two point shot
- Aliyah Boston makes free throw 1 of 2
- Aliyah Boston makes free throw 2 of 2
- Alyssa Thomas misses driving layup
- Aari McDonald misses two point shot
- Sami Whitcomb misses 27-foot three point shot
- Aliyah Boston makes two point shot (Aari McDonald assists)
- Alyssa Thomas misses 28-foot three point jumper
- Aliyah Boston makes driving layup
- Aliyah Boston misses free throw 1 of 1
- Aari McDonald misses two point shot
- Aliyah Boston makes free throw 1 of 2
- Aliyah Boston makes free throw 2 of 2
- Alyssa Thomas makes 6-foot two point shot
- Aliyah Boston makes free throw 1 of 2
- Aliyah Boston makes free throw 2 of 2
- Satou Sabally makes two point shot (Alyssa Thomas assists)
- DeWanna Bonner makes 8-foot driving floating jump shot
- Chloe Bibby makes 22-foot three point jumper (Sophie Cunningham assists)
- Kahleah Copper misses driving layup
- Alyssa Thomas makes tip shot
- Sophie Cunningham misses 28-foot three point jumper
- Aliyah Boston makes free throw 1 of 2
- Aliyah Boston misses free throw 2 of 2
- DeWanna Bonner misses 31-foot three point jumper
- Sophie Cunningham makes 30-foot three point jumper (Aliyah Boston assists)
- Sophie Cunningham makes free throw 1 of 1
- Natasha Howard misses 7-foot two point shot
- Alyssa Thomas makes free throw 1 of 2
- Alyssa Thomas misses free throw 2 of 2
- Sami Whitcomb misses 25-foot three point jumper
- Aliyah Boston makes free throw 1 of 2
- Aliyah Boston makes free throw 2 of 2
- Kahleah Copper makes free throw 1 of 2
- Kahleah Copper makes free throw 2 of 2
- Aari McDonald makes free throw 1 of 2
- Aari McDonald makes free throw 2 of 2
- Alyssa Thomas makes 1-foot layup (Sami Whitcomb assists)
- Alyssa Thomas makes free throw 1 of 1
- Sami Whitcomb makes 33-foot three point jumper (Kahleah Copper assists)
- Sophie Cunningham makes layup (Chloe Bibby assists)
- Satou Sabally misses 25-foot three point jumper
- Aliyah Boston misses layup
- Satou Sabally misses running pullup jump shot
- Aari McDonald makes free throw 1 of 2
- Aari McDonald makes free throw 2 of 2
- Sami Whitcomb makes technical free throw
- Sami Whitcomb makes free throw 1 of 2
- Sami Whitcomb makes free throw 2 of 2
- Lexi Held misses 28-foot three point pullup jump shot
- Sophie Cunningham makes free throw 1 of 2
- Sophie Cunningham misses free throw 2 of 2
- Alyssa Thomas makes two point shot
- Sophie Cunningham makes driving layup
- Alyssa Thomas makes 5-foot layup (Lexi Held assists)
Shot Made
Shot Missed
Shot Made
Shot Missed
Data is currently unavailable.
Matchups
2024-25 Standings
Women's National Basketball Assoc.
| Western Conference | W | L | PCT | GB | STRK |
|---|---|---|---|---|---|
| Minnesota | 34 | 10 | .773 | - | W1 |
| Las Vegas | 30 | 14 | .682 | 4 | W16 |
| Phoenix | 27 | 17 | .614 | 7 | L3 |
| Seattle | 23 | 21 | .523 | 11 | W1 |
| Golden State | 23 | 21 | .523 | 11 | L3 |
| Los Angeles | 21 | 23 | .477 | 13 | L1 |
| Dallas | 10 | 34 | .227 | 24 | W1 |
| Eastern Conference | W | L | PCT | GB | STRK |
|---|---|---|---|---|---|
| Atlanta | 30 | 14 | .682 | - | W6 |
| New York | 27 | 17 | .614 | 3 | W3 |
| Indiana | 24 | 20 | .545 | 6 | W3 |
| Washington | 16 | 28 | .364 | 14 | L10 |
| Connecticut | 11 | 33 | .250 | 19 | L2 |
| Chicago | 10 | 34 | .227 | 20 | L4 |
WNBA News

Minnesota Lynx to play Nigeria WNT in WNBA pre-season friendly
The Minnesota Lynx announced that Nigeria's women's national basketball team will play the WNBA franchise in a historic pre-season friendly at the T-Mobile Center on April 27.
16h

Unrivaled playoff teams set after Vinyl's win vs. Lunar Owls
The Vinyl beat the Lunar Owls 75-68 on Monday night to complete the six-team Unrivaled playoff field, with coach Teresa Weatherspoon saying, "They knew what was at stake."
20h

Sources: WNBA sets CBA target date to keep '26 schedule intact
The WNBA told the union and its teams on Monday that a new CBA should be agreed to by March 10 for the 2026 schedule not to be impacted, sources told ESPN.
20h