
Golden State Warriors @ Portland Trail Blazers

10-28, 4-20 Away
100
10-28, 4-20 Away
Final
| 1 | 2 | 3 | 4 | T | |
|---|---|---|---|---|---|
GS | 25 | 24 | 21 | 30 | 100 |
| 16 | 39 | 28 | 30 | 113 |

22-14, 14-4 Home
113
22-14, 14-4 Home
Game Leaders


Team Stats


51% (38-75)
Field Goal %
48% (41-85)
38% (6-16)
Three Point %
29% (5-17)
82% (18-22)
Free Throw %
84% (26-31)
34
Turnovers
24
38
Rebounds
52
12
Largest Lead
18
Game Information
Portland, OR
Referee:Dick Bavetta
Referee:Ed Malloy
Referee:Sean Wright
Game Flow

--GS
--POR
Shot Chart

- Marco Belinelli misses 24-foot three point jumper
- Jamal Crawford misses 14-foot jumper
- Anthony Randolph misses 16-foot jumper
- LaMarcus Aldridge misses two point shot
- Kelenna Azubuike misses 20-foot jumper
- LaMarcus Aldridge makes two point shot (Steve Blake assists)
- Andris Biedrins makes free throw 1 of 2
- Andris Biedrins misses free throw 2 of 2
- Greg Oden makes driving dunk (Steve Blake assists)
- Kelenna Azubuike makes 18-foot jumper (Andris Biedrins assists)
- Brandon Roy misses 23-foot jumper
- Andris Biedrins makes 6-foot jumper
- Greg Oden misses hook shot
- Steve Blake misses 18-foot jumper
- Jamal Crawford makes two point shot (Andris Biedrins assists)
- LaMarcus Aldridge misses 19-foot jumper
- Brandon Roy misses free throw 1 of 2
- Brandon Roy misses free throw 2 of 2
- LaMarcus Aldridge misses two point shot
- Jamal Crawford makes 18-foot two point shot
- Brandon Roy misses 16-foot jumper
- LaMarcus Aldridge makes 4-foot jumper (Nicolas Batum assists)
- Andris Biedrins makes dunk (Marco Belinelli assists)
- Kelenna Azubuike misses driving layup
- Greg Oden misses hook shot
- LaMarcus Aldridge makes layup
- Jamal Crawford makes 19-foot jumper
- Steve Blake makes 23-foot jumper (LaMarcus Aldridge assists)
- Kelenna Azubuike makes 8-foot running jumper (Marco Belinelli assists)
- Rudy Fernandez makes two point shot
- Andris Biedrins makes free throw 1 of 2
- Andris Biedrins misses free throw 2 of 2
- LaMarcus Aldridge misses 14-foot jumper
- Steve Blake misses three point jumper
- Jamal Crawford misses 25-foot three point jumper
- LaMarcus Aldridge misses hook shot
- Travis Outlaw misses 21-foot jumper
- Corey Maggette makes 11-foot two point shot (Ronny Turiaf assists)
- Sergio Rodriguez makes free throw 1 of 2
- Sergio Rodriguez makes free throw 2 of 2
- Marco Belinelli misses 20-foot jumper
- Ronny Turiaf misses tip shot
- Sergio Rodriguez makes two point shot
- Corey Maggette makes 25-foot three point jumper (C.J. Watson assists)
- Ronny Turiaf makes 19-foot jumper (Corey Maggette assists)
- Rudy Fernandez misses 24-foot three point jumper
- C.J. Watson makes layup (Ronny Turiaf assists)
- Rudy Fernandez misses 8-foot running jumper
- Travis Outlaw makes 22-foot jumper (Sergio Rodriguez assists)
- Corey Maggette makes two point shot
- Corey Maggette misses 20-foot jumper
- Jerryd Bayless makes free throw 1 of 2
- Jerryd Bayless makes free throw 2 of 2
- Jerryd Bayless misses 24-foot three point jumper
- Sergio Rodriguez misses layup
- Travis Outlaw makes two point shot
- C.J. Watson makes 22-foot jumper (Ronny Turiaf assists)
- Travis Outlaw misses 13-foot jumper
- Kelenna Azubuike makes 23-foot three point jumper (Anthony Morrow assists)
- Corey Maggette makes free throw 1 of 2
- Corey Maggette makes free throw 2 of 2
- Greg Oden misses free throw 1 of 2
- Greg Oden makes free throw 2 of 2
- Steve Blake makes free throw 1 of 2
- Steve Blake makes free throw 2 of 2
- Jamal Crawford makes technical free throw
- Brandon Roy makes driving layup (LaMarcus Aldridge assists)
- Steve Blake makes 25-foot three point jumper (Brandon Roy assists)
- Marco Belinelli makes driving layup (Jamal Crawford assists)
- Travis Outlaw misses driving layup
- Greg Oden makes driving layup
- Jamal Crawford makes 22-foot jumper
- Travis Outlaw misses 25-foot three point jumper
- Greg Oden makes layup
- Greg Oden makes free throw 1 of 1
- Brandon Roy makes 15-foot jumper
- Andris Biedrins makes free throw 1 of 2
- Andris Biedrins makes free throw 2 of 2
- LaMarcus Aldridge makes free throw 1 of 2
- LaMarcus Aldridge makes free throw 2 of 2
- Corey Maggette misses 20-foot jumper
- Travis Outlaw misses 23-foot three point jumper
- Brandon Roy makes dunk (Steve Blake assists)
- Steve Blake makes technical free throw
- LaMarcus Aldridge makes two point shot
- Marco Belinelli makes 8-foot two point shot
- Steve Blake misses 16-foot jumper
- Jamal Crawford makes free throw 1 of 3
- Jamal Crawford makes free throw 2 of 3
- Jamal Crawford makes free throw 3 of 3
- Travis Outlaw misses 9-foot jumper
- LaMarcus Aldridge makes two point shot (Rudy Fernandez assists)
- Jamal Crawford makes 26-foot three point jumper (Ronny Turiaf assists)
- LaMarcus Aldridge makes two point shot (Rudy Fernandez assists)
- Jamal Crawford misses two point shot
- Jamal Crawford misses 23-foot three point jumper
- Travis Outlaw makes free throw 1 of 2
- Travis Outlaw makes free throw 2 of 2
- Rob Kurz misses 19-foot jumper
- Travis Outlaw makes 24-foot three point jumper (LaMarcus Aldridge assists)
- Jamal Crawford misses driving layup
- Travis Outlaw makes slam dunk (Rudy Fernandez assists)
- Jamal Crawford misses 26-foot three point jumper
- Steve Blake makes 23-foot three point jumper (Greg Oden assists)
- Greg Oden misses 3-foot jumper
- Kelenna Azubuike makes free throw 1 of 2
- Kelenna Azubuike makes free throw 2 of 2
- Kelenna Azubuike makes 21-foot jumper
- LaMarcus Aldridge makes 17-foot jumper (Brandon Roy assists)
- Andris Biedrins makes layup (Marco Belinelli assists)
- Brandon Roy misses 20-foot jumper
- Marco Belinelli misses 26-foot three point jumper
- Andris Biedrins misses layup
- Nicolas Batum misses 23-foot three point jumper
- Brandon Roy misses 19-foot jumper
- Nicolas Batum makes 18-foot jumper (LaMarcus Aldridge assists)
- Marco Belinelli misses two point shot
- Kelenna Azubuike misses 24-foot three point jumper
- Nicolas Batum makes dunk (Brandon Roy assists)
- Marco Belinelli misses 23-foot jumper
- Brandon Roy makes 13-foot two point shot
- Brandon Roy makes 16-foot jumper (Steve Blake assists)
- Jamal Crawford misses 23-foot three point jumper
- LaMarcus Aldridge makes free throw 1 of 2
- LaMarcus Aldridge makes free throw 2 of 2
- Kelenna Azubuike makes 4-foot jumper (Jamal Crawford assists)
- Steve Blake makes two point shot
- Steve Blake misses driving layup
- LaMarcus Aldridge makes two point shot
- C.J. Watson misses 21-foot jumper
- Nicolas Batum makes free throw 1 of 2
- Nicolas Batum misses free throw 2 of 2
- Ronny Turiaf makes 9-foot jumper
- Nicolas Batum misses 23-foot three point jumper
- Corey Maggette makes free throw 1 of 2
- Corey Maggette makes free throw 2 of 2
- Steve Blake makes 21-foot jumper (Rudy Fernandez assists)
- Corey Maggette makes 8-foot two point shot
- Corey Maggette makes free throw 1 of 1
- Steve Blake misses 16-foot jumper
- Jamal Crawford misses 10-foot running jumper
- Corey Maggette makes driving layup
- Rudy Fernandez misses 25-foot three point jumper
- Sergio Rodriguez misses 22-foot three point jumper
- Joel Przybilla misses free throw 1 of 2
- Joel Przybilla makes free throw 2 of 2
- Jermareo Davidson misses 14-foot two point shot
- Anthony Morrow misses 14-foot jumper
- Rudy Fernandez makes two point shot
- Ronny Turiaf makes 10-foot two point shot
- LaMarcus Aldridge misses 20-foot jumper
- Corey Maggette misses 25-foot three point jumper
- Travis Outlaw makes three point jumper (LaMarcus Aldridge assists)
- Ronny Turiaf makes 19-foot jumper (Corey Maggette assists)
- Travis Outlaw misses 59-foot three point jumper
- C.J. Watson makes 20-foot jumper (Andris Biedrins assists)
- Travis Outlaw misses jumper
- C.J. Watson makes 25-foot three point jumper (Anthony Morrow assists)
- Rudy Fernandez makes driving layup
- Rudy Fernandez makes free throw 1 of 1
- Corey Maggette misses free throw 1 of 2
- Corey Maggette makes free throw 2 of 2
- Sergio Rodriguez misses driving layup
- Brandon Roy makes two point shot (Rudy Fernandez assists)
- C.J. Watson misses 23-foot jumper
- Travis Outlaw makes driving layup (Rudy Fernandez assists)
- Kelenna Azubuike makes 21-foot two point shot
- Steve Blake misses two point shot
- Greg Oden makes two point shot
- Jamal Crawford makes 25-foot three point jumper
- Rudy Fernandez makes three point jumper (Brandon Roy assists)
- Corey Maggette misses 25-foot three point jumper
- Kelenna Azubuike makes driving layup (Corey Maggette assists)
- Brandon Roy misses jumper
- Jamal Crawford misses free throw 1 of 2
- Jamal Crawford makes free throw 2 of 2
- Rudy Fernandez makes free throw 1 of 2
- Rudy Fernandez makes free throw 2 of 2
- Corey Maggette makes layup (Ronny Turiaf assists)
- Corey Maggette makes free throw 1 of 1
- Ronny Turiaf makes dunk (Jamal Crawford assists)
- LaMarcus Aldridge makes 20-foot jumper (Brandon Roy assists)
- Corey Maggette makes 24-foot three point jumper (Ronny Turiaf assists)
- Steve Blake misses layup
- Brandon Roy misses 25-foot three point jumper
- Kelenna Azubuike makes jumper (Jamal Crawford assists)
- LaMarcus Aldridge misses 9-foot two point shot
- Jamal Crawford misses 19-foot jumper
- Brandon Roy makes driving layup (Greg Oden assists)
- Brandon Roy makes free throw 1 of 1
- Corey Maggette misses 10-foot two point shot
- Brandon Roy makes free throw 1 of 2
- Brandon Roy makes free throw 2 of 2
- Corey Maggette makes driving layup
- Brandon Roy misses 9-foot two point shot
- LaMarcus Aldridge makes layup
- Ronny Turiaf makes 20-foot jumper (Kelenna Azubuike assists)
- LaMarcus Aldridge makes 6-foot two point shot
- Kelenna Azubuike makes 21-foot two point shot (Ronny Turiaf assists)
- Travis Outlaw makes free throw 1 of 3
- Travis Outlaw makes free throw 2 of 3
- Travis Outlaw makes free throw 3 of 3
- Corey Maggette misses 10-foot two point shot
- Steve Blake misses 22-foot three point jumper
- Brandon Roy makes 21-foot jumper
Shot Made
Shot Missed
Shot Made
Shot Missed
Data is currently unavailable.
Matchups
2025-26 Standings
Western Conference
| Pacific | W | L | PCT | GB | STRK |
|---|---|---|---|---|---|
| LA Lakers | 34 | 22 | .607 | - | L1 |
| Phoenix | 33 | 25 | .569 | 2 | L1 |
| Golden State | 30 | 27 | .526 | 4.5 | W1 |
| LA Clippers | 27 | 30 | .474 | 7.5 | L2 |
| Sacramento | 12 | 46 | .207 | 23 | L16 |
| Northwest | W | L | PCT | GB | STRK |
|---|---|---|---|---|---|
| Oklahoma City | 44 | 14 | .759 | - | W2 |
| Denver | 36 | 22 | .621 | 8 | L1 |
| Minnesota | 35 | 23 | .603 | 9 | L1 |
| Portland | 28 | 30 | .483 | 16 | W1 |
| Utah | 18 | 39 | .316 | 25.5 | L2 |
NBA News

Fantasy basketball pickups: Look to Melton, Wallace and Raynaud for the homestretch
Every week in fantasy basketball, there are available players who can help fill holes in your roster. Here are the ones to add for the week ahead.
1h
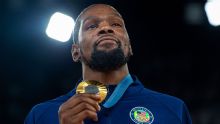
Kevin Durant says he plans to play in 2028 Olympics in Los Angeles
Kevin Durant told ESPN that he plans to play in the 2028 Summer Games in Los Angeles.
2h

Sources: Suns to be without Dillon Brooks for 4-6 weeks
The Suns will be without Dillon Brooks for four to six weeks, sources told ESPN's Shams Charania, as the guard recovers from a broken left hand.
3h