
Portland Trail Blazers @ San Antonio Spurs
WESTERN CONFERENCE SEMIFINALS - GAME 1 • SA leads series 1-0

54-28, 23-18 Away
92
54-28, 23-18 Away
Final
| 1 | 2 | 3 | 4 | T | |
|---|---|---|---|---|---|
| 16 | 23 | 26 | 27 | 92 | |
SA | 29 | 36 | 25 | 26 | 116 |

62-20, 32-9 Home
116
62-20, 32-9 Home
Game Leaders


Team Stats


38% (31-82)
Field Goal %
51% (44-87)
25% (4-16)
Three Point %
44% (7-16)
84% (26-31)
Free Throw %
84% (21-25)
20
Turnovers
12
53
Rebounds
50
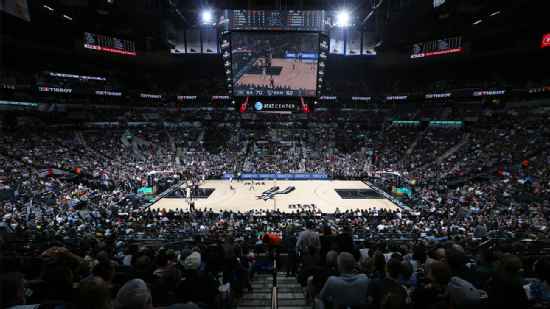
Game Information
San Antonio, TX
Referee:Tony Brown
Referee:Tom Washington
Referee:Tony Brothers
Game Flow

--POR
--SA
Shot Chart

- Tiago Splitter misses jumper
- Damian Lillard misses 8-foot jumper
- Nicolas Batum misses two point shot
- Kawhi Leonard misses free throw 1 of 1
- Kawhi Leonard makes 8-foot two point shot
- Tim Duncan makes layup
- Robin Lopez misses two point shot
- Tony Parker makes 11-foot two point shot
- Tony Parker misses 13-foot two point jumper
- LaMarcus Aldridge misses 16-foot jumper
- Danny Green misses 16-foot jumper
- Wesley Matthews misses three point jumper
- Damian Lillard misses two point jumper
- Tony Parker makes driving layup
- LaMarcus Aldridge makes 15-foot two point shot
- Tony Parker makes 17-foot two point shot
- Damian Lillard misses 8-foot jumper
- Damian Lillard misses layup
- Damian Lillard makes driving layup
- Tony Parker misses 18-foot two point jumper
- Kawhi Leonard misses 18-foot two point jumper
- LaMarcus Aldridge misses 8-foot Running Jumper
- Tony Parker misses 7-foot two point shot
- Wesley Matthews makes free throw 1 of 2
- Wesley Matthews misses free throw 2 of 2
- Manu Ginobili misses 25-foot three point jumper
- Robin Lopez misses two point shot
- Tim Duncan makes two point shot (Tony Parker assists)
- LaMarcus Aldridge misses 14-foot two point shot
- Kawhi Leonard makes 19-foot two point shot
- Mo Williams makes 19-foot two point shot
- Tony Parker makes free throw 1 of 2
- Tony Parker makes free throw 2 of 2
- Mo Williams misses 25-foot three point jumper
- Kawhi Leonard makes two point shot
- Nicolas Batum misses 26-foot three point jumper
- Thomas Robinson makes free throw 1 of 2
- Thomas Robinson makes free throw 2 of 2
- Mo Williams misses 21-foot jumper
- Tony Parker makes two point shot (Boris Diaw assists)
- LaMarcus Aldridge misses Running Jumper
- Tony Parker misses 17-foot jumper
- Aron Baynes makes layup
- Mo Williams misses driving layup
- Mo Williams misses layup
- Boris Diaw makes layup
- Wesley Matthews makes technical free throw
- Nicolas Batum makes 20-foot two point shot
- Boris Diaw misses 4-foot two point shot
- Tony Parker makes three point jumper (Boris Diaw assists)
- Wesley Matthews misses 25-foot three point jumper
- Robin Lopez makes free throw 1 of 2
- Robin Lopez makes free throw 2 of 2
- Manu Ginobili misses driving layup
- Aron Baynes makes two point shot
- Mo Williams makes driving layup
- Mo Williams makes 19-foot jumper
- Robin Lopez makes layup (Mo Williams assists)
- Patty Mills makes three point jumper (Manu Ginobili assists)
- Mo Williams misses 21-foot jumper
- Dorell Wright makes free throw 1 of 2
- Dorell Wright misses free throw 2 of 2
- Aron Baynes makes two point shot (Boris Diaw assists)
- Nicolas Batum misses 18-foot jumper
- Marco Belinelli makes 25-foot three point jumper (Manu Ginobili assists)
- LaMarcus Aldridge makes 18-foot jumper (Wesley Matthews assists)
- Aron Baynes makes layup (Manu Ginobili assists)
- LaMarcus Aldridge misses 16-foot jumper
- LaMarcus Aldridge misses 6-foot Running Jumper
- Patty Mills makes free throw 1 of 3
- Patty Mills makes free throw 2 of 3
- Patty Mills makes free throw 3 of 3
- Patty Mills makes 19-foot two point shot
- LaMarcus Aldridge misses 5-foot jumper
- LaMarcus Aldridge makes two point shot
- Patty Mills misses 17-foot jumper
- Robin Lopez makes layup (Mo Williams assists)
- Robin Lopez makes free throw 1 of 1
- Tim Duncan makes 13-foot jumper (Marco Belinelli assists)
- Damian Lillard misses 9-foot two point shot
- Tony Parker makes 13-foot two point shot (Tim Duncan assists)
- Wesley Matthews makes driving layup
- Tony Parker makes 16-foot two point shot
- LaMarcus Aldridge misses 7-foot jump bank shot
- LaMarcus Aldridge makes two point shot
- Tony Parker misses 17-foot two point jumper
- Kawhi Leonard makes free throw 1 of 2
- Kawhi Leonard misses free throw 2 of 2
- Kawhi Leonard misses three point jumper
- Marco Belinelli makes 26-foot three point jumper (Tony Parker assists)
- Kawhi Leonard makes dunk (Tony Parker assists)
- LaMarcus Aldridge misses 10-foot two point shot
- Tim Duncan misses 18-foot jumper
- Nicolas Batum misses 25-foot three point jumper
- Kawhi Leonard makes 8-foot two point shot
- LaMarcus Aldridge makes two point shot (Mo Williams assists)
- Kawhi Leonard misses two point jumper
- Tim Duncan makes 17-foot jumper (Tony Parker assists)
- LaMarcus Aldridge makes 11-foot two point shot
- LaMarcus Aldridge makes free throw 1 of 1
- Tim Duncan makes 17-foot jumper (Tony Parker assists)
- LaMarcus Aldridge misses Running Jumper
- Damian Lillard makes 22-foot jumper
- Marco Belinelli makes 26-foot three point jumper (Tony Parker assists)
- LaMarcus Aldridge misses layup
- Tony Parker misses layup
- Damian Lillard misses jumper
- Robin Lopez misses free throw 1 of 2
- Robin Lopez makes free throw 2 of 2
- Danny Green misses three point jumper
- Nicolas Batum misses 18-foot jumper
- Kawhi Leonard misses 17-foot two point jumper
- Damian Lillard makes free throw 1 of 2
- Damian Lillard makes free throw 2 of 2
- Tim Duncan misses 17-foot jumper
- Wesley Matthews makes 19-foot two point shot
- Tony Parker makes 18-foot two point shot
- Nicolas Batum misses three point jumper
- Tony Parker makes 16-foot jumper
- Nicolas Batum misses layup
- Tony Parker misses layup
- Danny Green misses driving layup
- Tiago Splitter makes two point shot
- Tony Parker misses 15-foot two point jumper
- Wesley Matthews misses 26-foot three point jumper
- Nicolas Batum makes two point shot
- Kawhi Leonard misses layup
- Tim Duncan makes free throw 1 of 2
- Tim Duncan makes free throw 2 of 2
- Tony Parker makes layup (Kawhi Leonard assists)
- LaMarcus Aldridge misses 16-foot jumper
- Kawhi Leonard misses 26-foot three point jumper
- Wesley Matthews misses 9-foot jumper
- Tim Duncan misses 14-foot jump bank shot
- Damian Lillard makes free throw 1 of 3
- Damian Lillard makes free throw 2 of 3
- Damian Lillard makes free throw 3 of 3
- Tony Parker misses 20-foot jumper
- Robin Lopez makes free throw 1 of 2
- Robin Lopez makes free throw 2 of 2
- Damian Lillard misses 17-foot step back jumpshot
- LaMarcus Aldridge makes free throw 1 of 2
- LaMarcus Aldridge makes free throw 2 of 2
- Kawhi Leonard makes 25-foot three point jumper (Manu Ginobili assists)
- LaMarcus Aldridge misses free throw 1 of 2
- LaMarcus Aldridge makes free throw 2 of 2
- Manu Ginobili misses driving layup
- Damian Lillard makes driving layup
- Manu Ginobili misses layup
- Tiago Splitter misses jumper
- Nicolas Batum misses 7-foot jumper
- Tony Parker makes driving layup
- Tony Parker makes free throw 1 of 1
- LaMarcus Aldridge makes free throw 1 of 2
- LaMarcus Aldridge makes free throw 2 of 2
- Boris Diaw makes free throw 1 of 2
- Boris Diaw misses free throw 2 of 2
- Tiago Splitter misses two point shot
- Will Barton misses layup
- Tony Parker makes free throw 1 of 2
- Tony Parker misses free throw 2 of 2
- Damian Lillard makes driving layup
- Manu Ginobili makes free throw 1 of 2
- Manu Ginobili makes free throw 2 of 2
- LaMarcus Aldridge makes 6-foot two point shot
- LaMarcus Aldridge makes free throw 1 of 1
- Boris Diaw makes three point jumper (Manu Ginobili assists)
- LaMarcus Aldridge makes layup (Damian Lillard assists)
- Manu Ginobili misses driving layup
- Aron Baynes makes two point shot
- Mo Williams misses 28-foot three point running jumper
- Patty Mills makes 20-foot two point shot
- Patty Mills misses 15-foot Running Jumper
- Will Barton makes 24-foot three point jumper (Damian Lillard assists)
- Aron Baynes misses running hook shot
- Damian Lillard misses 4-foot two point shot
- Marco Belinelli makes layup
- Damian Lillard makes driving layup
- Damian Lillard misses free throw 1 of 1
- Marco Belinelli misses 25-foot three point jumper
- Damian Lillard makes driving layup
- Manu Ginobili misses 24-foot three point jumper
- LaMarcus Aldridge makes two point shot (Damian Lillard assists)
- Tony Parker makes layup
- Marco Belinelli makes 21-foot jumper (Tony Parker assists)
- Marco Belinelli misses 27-foot three point shot
- Wesley Matthews makes free throw 1 of 2
- Wesley Matthews makes free throw 2 of 2
- Tony Parker misses 17-foot two point jumper
- LaMarcus Aldridge misses layup
- LaMarcus Aldridge makes two point shot
- Kawhi Leonard misses 26-foot three point jumper
- Tiago Splitter makes layup (Tony Parker assists)
- Tiago Splitter makes free throw 1 of 1
- Nicolas Batum makes 26-foot three point jumper (Mo Williams assists)
- Marco Belinelli makes free throw 1 of 2
- Marco Belinelli makes free throw 2 of 2
- Nicolas Batum misses 25-foot three point jumper
- Kawhi Leonard makes free throw 1 of 2
- Kawhi Leonard makes free throw 2 of 2
- LaMarcus Aldridge makes layup
- LaMarcus Aldridge makes free throw 1 of 1
- Tony Parker makes free throw 1 of 2
- Tony Parker makes free throw 2 of 2
- LaMarcus Aldridge makes 13-foot two point shot
- Tony Parker makes 11-foot two point shot
- Damian Lillard misses 26-foot three point jumper
- Tiago Splitter misses 4-foot jumper
- Mo Williams misses three point jumper
- Marco Belinelli makes 20-foot jumper (Tony Parker assists)
- Meyers Leonard misses 9-foot jumper
- Aron Baynes misses 24-foot three point jumper
- Will Barton makes three point jumper (Earl Watson assists)
- Marco Belinelli makes 19-foot jumper (Jeff Ayres assists)
- Will Barton makes 26-foot three point jumper
- Cory Joseph makes 12-foot two point shot
- Cory Joseph makes free throw 1 of 1
- Joel Freeland misses jumper
- C.J. McCollum misses 25-foot three point jumper
- Cory Joseph misses 4-foot Running Jumper
- Meyers Leonard misses 19-foot jumper
Shot Made
Shot Missed
Shot Made
Shot Missed
Data is currently unavailable.
Matchups
2025-26 Standings
Western Conference
| Northwest | W | L | PCT | GB | STRK |
|---|---|---|---|---|---|
| Oklahoma City | 42 | 14 | .750 | - | L1 |
| Denver | 35 | 20 | .636 | 6.5 | W1 |
| Minnesota | 34 | 22 | .607 | 8 | W2 |
| Portland | 27 | 29 | .482 | 15 | W1 |
| Utah | 18 | 38 | .321 | 24 | L1 |
| Southwest | W | L | PCT | GB | STRK |
|---|---|---|---|---|---|
| San Antonio | 38 | 16 | .704 | - | W6 |
| Houston | 33 | 20 | .623 | 4.5 | L1 |
| Memphis | 20 | 33 | .377 | 17.5 | L4 |
| Dallas | 19 | 35 | .352 | 19 | L9 |
| New Orleans | 15 | 41 | .268 | 24 | L1 |
NBA News
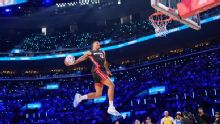
2026 NBA All-Star Weekend takeaways: Dunks, stars and more
Our experts break down what to watch over the 2026 NBA All-Star Weekend and their picks for contests, competitions and more.
11h
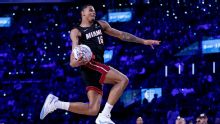
NBA All-Star 2026: Live updates, highlights through the weekend
All of the live updates, top moments and results from NBA All-Star Weekend in Inglewood, California.
11h
Adam Silver 'paying attention' to tanking teams
NBA commissioner Adam Silver addresses the tanking issue in the NBA.
11h