
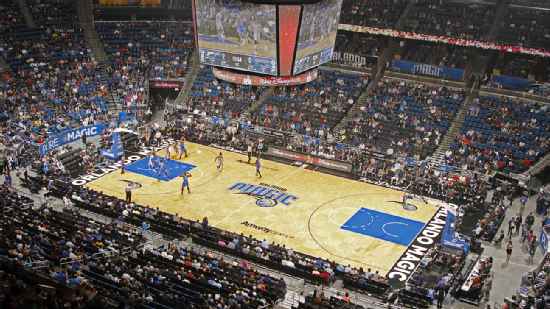
Atlanta Hawks @ Orlando Magic

14-21, 9-12 Away
110
14-21, 9-12 Away

21-15, 13-4 Home
117
21-15, 13-4 Home
Game Leaders


Team Stats


46% (42-91)
Field Goal %
44% (43-98)
30% (9-30)
Three Point %
41% (17-41)
59% (17-29)
Free Throw %
64% (14-22)
13
Turnovers
13
50
Rebounds
57
9
Largest Lead
14
Game Information
Orlando, FL
Referee:Rodney Mott
Referee:Kevin Scott
Referee:Evan Scott
Probabilities & Game Flow

0%
--ATL
100%
--ORL
According to ESPN Analytics
Shot Chart

- Trae Young misses driving floating jump shot
- Chuma Okeke makes 23-foot three point shot (Jalen Suggs assists)
- Dejounte Murray misses 27-foot three point jumper
- Caleb Houstan misses 23-foot three point jumper
- Paolo Banchero makes two point shot
- Jalen Johnson misses 25-foot three point jumper
- Paolo Banchero misses 17-foot pullup jump shot
- Dejounte Murray misses driving layup
- Caleb Houstan misses 25-foot three point shot
- Trae Young misses 24-foot three point jumper
- Paolo Banchero makes free throw 1 of 2
- Paolo Banchero makes free throw 2 of 2
- Saddiq Bey makes 23-foot three point jumper (Trae Young assists)
- Jalen Suggs makes 25-foot step back jumpshot
- Dejounte Murray misses driving floating jump shot
- Caleb Houstan makes 23-foot three point jumper (Paolo Banchero assists)
- Saddiq Bey misses 24-foot three point jumper
- Caleb Houstan makes 25-foot three point jumper (Chuma Okeke assists)
- Trae Young makes 2-foot two point shot
- Jalen Suggs makes 27-foot three point jumper (Goga Bitadze assists)
- Dejounte Murray makes driving layup
- Paolo Banchero misses 26-foot step back jumpshot
- Saddiq Bey makes driving layup (Bogdan Bogdanovic assists)
- Jalen Suggs misses 15-foot two point shot
- Dejounte Murray makes driving layup
- Paolo Banchero misses 12-foot two point shot
- Dejounte Murray makes driving layup
- Dejounte Murray makes free throw 1 of 1
- Paolo Banchero makes 15-foot pullup jump shot
- Clint Capela makes 4-foot hook shot (Dejounte Murray assists)
- Goga Bitadze makes dunk (Markelle Fultz assists)
- Saddiq Bey makes driving layup
- Saddiq Bey makes free throw 1 of 1
- Goga Bitadze makes two point shot
- Dejounte Murray misses free throw 2 of 2
- Dejounte Murray misses free throw 1 of 2
- Dejounte Murray makes 12-foot pullup jump shot (Onyeka Okongwu assists)
- Paolo Banchero makes two point shot (Markelle Fultz assists)
- Bogdan Bogdanovic makes 27-foot three point jumper (Trae Young assists)
- Paolo Banchero makes 25-foot three point jumper (Markelle Fultz assists)
- Bogdan Bogdanovic makes two point shot (Trae Young assists)
- Trae Young misses driving floating jump shot
- Markelle Fultz misses free throw 1 of 2
- Markelle Fultz misses free throw 2 of 2
- Dejounte Murray makes two point shot
- Dejounte Murray misses free throw 1 of 1
- Moritz Wagner makes 1-foot layup (Cole Anthony assists)
- Trae Young misses 14-foot two point shot
- Anthony Black misses 26-foot three point jumper
- Bogdan Bogdanovic misses 23-foot three point jumper
- Cole Anthony misses 25-foot three point jumper
- Trae Young makes 9-foot two point shot (Onyeka Okongwu assists)
- Moritz Wagner misses two point shot
- Jalen Johnson misses 25-foot three point jumper
- Cole Anthony makes 15-foot pullup jump shot
- Trae Young misses layup
- Trae Young makes 21-foot step back jumpshot
- Markelle Fultz misses free throw 1 of 2
- Markelle Fultz misses free throw 2 of 2
- Jalen Johnson makes 17-foot two point shot
- Caleb Houstan misses 25-foot three point jumper
- Bogdan Bogdanovic makes 26-foot three point shot (Jalen Johnson assists)
- Caleb Houstan misses 27-foot three point jumper
- Bogdan Bogdanovic makes 13-foot driving floating jump shot (Dejounte Murray assists)
- Cole Anthony makes 2-foot driving dunk
- Bogdan Bogdanovic misses 22-foot three point jumper
- Paolo Banchero makes 14-foot pullup jump shot
- Dejounte Murray makes driving layup
- Onyeka Okongwu makes 2-foot dunk (Saddiq Bey assists)
- Cole Anthony misses 12-foot two point shot
- Caleb Houstan makes 25-foot three point jumper (Paolo Banchero assists)
- Bogdan Bogdanovic misses 22-foot jumper
- Moritz Wagner misses 24-foot three point jumper
- Dejounte Murray misses driving layup
- Saddiq Bey misses layup
- Caleb Houstan makes free throw 1 of 2
- Caleb Houstan misses free throw 2 of 2
- Saddiq Bey misses layup
- Moritz Wagner makes free throw 1 of 2
- Moritz Wagner makes free throw 2 of 2
- Jalen Johnson makes 1-foot dunk (Trae Young assists)
- Paolo Banchero makes 15-foot step back jumpshot
- Jalen Johnson makes 7-foot two point shot (Saddiq Bey assists)
- Moritz Wagner misses 25-foot three point jumper
- Caleb Houstan makes technical free throw
- Cole Anthony makes 11-foot two point shot
- Onyeka Okongwu makes 22-foot three point jumper (Trae Young assists)
- Paolo Banchero misses two point shot
- Saddiq Bey misses 23-foot three point jumper
- Jalen Suggs misses 27-foot three point jumper
- Trae Young makes 11-foot driving floating jump shot
- Paolo Banchero misses 18-foot step back jumpshot
- Dejounte Murray makes two point shot
- Dejounte Murray makes free throw 1 of 1
- Moritz Wagner misses 12-foot jumper
- Trae Young makes two point shot
- Trae Young makes free throw 1 of 1
- Paolo Banchero misses 26-foot three point pullup jump shot
- Moritz Wagner makes layup
- Trae Young misses 30-foot three point jumper
- Paolo Banchero misses 10-foot two point shot
- Trae Young makes free throw 1 of 2
- Trae Young makes free throw 2 of 2
- Cole Anthony misses 15-foot two point shot
- Caleb Houstan makes 22-foot three point jumper (Jalen Suggs assists)
- Dejounte Murray misses 13-foot pullup jump shot
- Chuma Okeke misses 23-foot three point jumper
- Caleb Houstan makes two point shot
- Trae Young makes driving layup
- Caleb Houstan makes 24-foot three point jumper (Chuma Okeke assists)
- Trae Young misses technical free throw
- Paolo Banchero misses two point shot
- Goga Bitadze misses free throw 1 of 2
- Goga Bitadze makes free throw 2 of 2
- Saddiq Bey makes 25-foot step back jumpshot (Trae Young assists)
- Chuma Okeke misses 25-foot three point jumper
- Dejounte Murray misses 2-foot pullup jump shot
- Trae Young misses running pullup jump shot
- Caleb Houstan misses 26-foot three point jumper
- Jalen Suggs makes 23-foot three point jumper (Caleb Houstan assists)
- Jalen Suggs makes two point shot
- Saddiq Bey misses free throw 1 of 2
- Saddiq Bey makes free throw 2 of 2
- Goga Bitadze makes 3-foot two point shot (Jalen Suggs assists)
- Dejounte Murray misses 10-foot two point shot
- Clint Capela makes tip shot
- Paolo Banchero makes 26-foot three pointer (Caleb Houstan assists)
- Clint Capela misses layup
- Dejounte Murray misses 23-foot three point jumper
- Chuma Okeke misses 23-foot three point jumper
- Paolo Banchero misses driving layup
- Goga Bitadze makes tip shot
- Dejounte Murray makes free throw 1 of 2
- Dejounte Murray makes free throw 2 of 2
- Jalen Suggs misses 15-foot pullup jump shot
- Moritz Wagner makes alley oop layup (Caleb Houstan assists)
- Onyeka Okongwu misses 24-foot three point jumper
- Jalen Suggs makes driving layup (Caleb Houstan assists)
- Dejounte Murray makes driving layup
- Bogdan Bogdanovic misses 26-foot three point jumper
- Moritz Wagner misses 25-foot three point jumper
- Jalen Johnson makes 1-foot two point shot (Trae Young assists)
- Moritz Wagner makes two point shot
- Bogdan Bogdanovic misses 25-foot three point jumper
- Paolo Banchero makes 23-foot three point jumper (Cole Anthony assists)
- Trae Young makes 5-foot layup (Jalen Johnson assists)
- Paolo Banchero makes pullup jump shot (Markelle Fultz assists)
- Cole Anthony misses 26-foot three point jumper
- Bogdan Bogdanovic misses 18-foot jumper
- Jalen Johnson misses 8-foot jumper
- Moritz Wagner makes two point shot (Paolo Banchero assists)
- Trae Young misses 29-foot three point jumper
- Bogdan Bogdanovic misses 25-foot step back jumpshot
- Jalen Johnson makes tip shot
- Bogdan Bogdanovic misses driving floating jump shot
- Chuma Okeke misses 25-foot three point jumper
- Trevelin Queen makes tip shot
- Bogdan Bogdanovic makes 28-foot step back jumpshot (Onyeka Okongwu assists)
- Cole Anthony makes free throw 1 of 2
- Cole Anthony makes free throw 2 of 2
- Trae Young makes free throw 1 of 3
- Trae Young misses free throw 2 of 3
- Trae Young makes free throw 3 of 3
- Trae Young misses driving layup
- Cole Anthony misses 23-foot three point jumper
- Bogdan Bogdanovic misses 17-foot step back jumpshot
- Trae Young misses 24-foot three point pullup jump shot
- Bogdan Bogdanovic makes 23-foot three point shot (Trae Young assists)
- Cole Anthony misses 12-foot pullup jump shot
- Bogdan Bogdanovic misses two point shot
- Dejounte Murray misses 9-foot jumper
- Paolo Banchero makes 8-foot two point shot
- Bogdan Bogdanovic makes 6-foot driving floating jump shot
- Moritz Wagner makes 23-foot three point jumper (Cole Anthony assists)
- Saddiq Bey makes free throw 1 of 2
- Saddiq Bey makes free throw 2 of 2
- Trae Young makes 27-foot step back jumpshot
- Caleb Houstan makes 26-foot three point jumper (Paolo Banchero assists)
- Paolo Banchero misses 14-foot pullup jump shot
- Jalen Suggs misses 22-foot three point jumper
- Onyeka Okongwu misses free throw 1 of 2
- Onyeka Okongwu misses free throw 2 of 2
- Paolo Banchero misses 28-foot three point pullup jump shot
- Jalen Suggs makes 26-foot three point jumper (Goga Bitadze assists)
- Trae Young makes 11-foot two point shot (Jalen Johnson assists)
- Trae Young misses free throw 1 of 1
- Paolo Banchero misses driving layup
- Jalen Johnson misses 23-foot three point jumper
- Jalen Suggs misses 27-foot three point jumper
- Dejounte Murray makes free throw 1 of 2
- Dejounte Murray misses free throw 2 of 2
- Jalen Suggs misses 9-foot two point shot
- Clint Capela misses 1-foot two point shot
- Paolo Banchero makes free throw 1 of 2
- Paolo Banchero makes free throw 2 of 2
- Trae Young makes free throw 1 of 2
- Trae Young makes free throw 2 of 2
- Caleb Houstan misses 26-foot three point jumper
- Dejounte Murray makes 6-foot two point shot
- Dejounte Murray makes free throw 1 of 1
- Caleb Houstan makes 24-foot three point jumper (Cole Anthony assists)
- Trae Young misses 26-foot step back jumpshot
- Trae Young makes driving layup
- Saddiq Bey makes 2-foot dunk (Jalen Johnson assists)
- Caleb Houstan misses 26-foot three point jumper
- Cole Anthony misses 18-foot step back jumpshot
- Dejounte Murray misses 10-foot pullup jump shot
- Clint Capela misses tip shot
- Paolo Banchero misses 11-foot two point shot
- Paolo Banchero makes 26-foot three point jumper (Goga Bitadze assists)
- Jalen Johnson misses 24-foot three point jumper
- Paolo Banchero makes layup (Cole Anthony assists)
- Paolo Banchero misses free throw 1 of 1
- Jalen Johnson makes 3-foot layup (Trae Young assists)
- Paolo Banchero misses free throw 1 of 2
- Paolo Banchero makes free throw 2 of 2
- Clint Capela misses free throw 1 of 2
- Clint Capela misses free throw 2 of 2
- Cole Anthony misses 12-foot pullup jump shot
- Goga Bitadze makes tip shot
- Trae Young makes 24-foot step back jumpshot
- Paolo Banchero makes 10-foot two point shot
- Paolo Banchero misses 10-foot pullup jump shot
- Dejounte Murray misses two point shot
- Cole Anthony makes free throw 1 of 2
- Cole Anthony makes free throw 2 of 2
- Trae Young misses 24-foot step back jumpshot
Shot Made
Shot Missed
Shot Made
Shot Missed
Data is currently unavailable.
Matchups
2025-26 Standings
Eastern Conference
| Southeast | W | L | PCT | GB | STRK |
|---|---|---|---|---|---|
| Atlanta | 45 | 33 | .577 | - | W4 |
| Charlotte | 43 | 36 | .544 | 2.5 | W4 |
| Orlando | 42 | 36 | .538 | 3 | W2 |
| Miami | 41 | 37 | .526 | 4 | W1 |
| Washington | 17 | 61 | .218 | 28 | L6 |
NBA News

Los Angeles Lakers vs. Dallas Mavericks: Game Highlights
Los Angeles Lakers vs. Dallas Mavericks: Game Highlights
19m
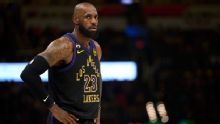
Cooper Flagg scores 45 points and Mavs beat LeBron James and injury-depleted Lakers 134-128
— Cooper Flagg scored 45 points and the Dallas Mavericks ended their longest home losing streak in 32 years at 14 games with a 134-128 victory over the
30m
Bucks reference LeBron James' Milwaukee, Memphis comments after win
The Los Angeles Lakers star said Saturday that the two cities he doesn't like playing in right now are Milwaukee and Memphis.
30m