
Chicago Bulls @ Sacramento Kings

29-32, 13-17 Away
113
29-32, 13-17 Away

34-26, 16-11 Home
109
34-26, 16-11 Home
Game Leaders


Team Stats


50% (42-84)
Field Goal %
45% (41-92)
34% (11-32)
Three Point %
30% (11-37)
82% (18-22)
Free Throw %
89% (16-18)
10
Turnovers
18
32
Rebounds
51
4
Largest Lead
22
Game Information
Sacramento, CA

Referee:Bill Kennedy
Referee:Gediminas Petraitis
Referee:Mousa Dagher
Probabilities & Game Flow

100%
--CHI
0%
--SAC
According to ESPN Analytics
Shot Chart

- Ayo Dosunmu makes driving layup (DeMar DeRozan assists)
- Harrison Barnes makes 5-foot two point shot
- Ayo Dosunmu makes 23-foot three point jumper (Nikola Vucevic assists)
- Keegan Murray makes free throw 1 of 2
- Keegan Murray makes free throw 2 of 2
- Alex Caruso misses 22-foot three point jumper
- Kevin Huerter misses driving floating jump shot
- Kevin Huerter misses 11-foot two point shot
- Domantas Sabonis misses tip shot
- Nikola Vucevic misses 7-foot two point shot
- De'Aaron Fox makes two point shot
- DeMar DeRozan makes free throw 1 of 2
- DeMar DeRozan makes free throw 2 of 2
- Keegan Murray misses 25-foot three point jumper
- Ayo Dosunmu makes driving layup
- Domantas Sabonis misses driving layup
- Domantas Sabonis misses driving floating jump shot
- Harrison Barnes misses 23-foot three point shot
- Domantas Sabonis misses two point shot
- Keegan Murray misses 22-foot three point jumper
- Kevin Huerter makes 1-foot two point shot
- Nikola Vucevic makes 24-foot three point jumper (Coby White assists)
- De'Aaron Fox makes 26-foot three point jumper (Domantas Sabonis assists)
- Nikola Vucevic makes 24-foot three point jumper (Coby White assists)
- De'Aaron Fox makes driving layup
- Keegan Murray makes driving layup (Domantas Sabonis assists)
- DeMar DeRozan makes 5-foot two point shot (Nikola Vucevic assists)
- Harrison Barnes makes free throw 1 of 2
- Harrison Barnes makes free throw 2 of 2
- Ayo Dosunmu misses 3-foot two point shot
- Onuralp Bitim misses 25-foot three point jumper
- Ayo Dosunmu makes two point shot
- Davion Mitchell makes 21-foot pullup jump shot (Malik Monk assists)
- Jevon Carter misses driving floating jump shot
- Nikola Vucevic misses tip shot
- Malik Monk misses 26-foot three point shot
- Nikola Vucevic makes 7-foot two point shot (Alex Caruso assists)
- Trey Lyles makes 23-foot three point jumper (De'Aaron Fox assists)
- Malik Monk makes 19-foot pullup jump shot
- Malik Monk makes free throw 1 of 1
- Alex Caruso misses 23-foot three point jumper
- Malik Monk makes 10-foot pullup jump shot
- DeMar DeRozan makes free throw 1 of 2
- DeMar DeRozan misses free throw 2 of 2
- Alex Len makes 1-foot dunk (Trey Lyles assists)
- De'Aaron Fox misses 25-foot three point jumper
- Alex Caruso misses two point shot
- Malik Monk makes 26-foot three pointer (De'Aaron Fox assists)
- Alex Caruso misses 25-foot three point jumper
- Keegan Murray makes free throw 1 of 2
- Keegan Murray makes free throw 2 of 2
- Alex Caruso misses 24-foot three point jumper
- De'Aaron Fox makes 4-foot two point shot (Malik Monk assists)
- Malik Monk misses 26-foot three point jumper
- Coby White makes driving layup (Ayo Dosunmu assists)
- Alex Len misses 6-foot two point shot
- Andre Drummond makes 4-foot two point shot
- Harrison Barnes misses two point shot
- Coby White makes 25-foot three point shot (Ayo Dosunmu assists)
- Coby White makes 1-foot driving dunk
- Domantas Sabonis misses 25-foot three point jumper
- Andre Drummond misses 3-foot two point shot
- Chris Duarte makes 23-foot three point jumper (Malik Monk assists)
- Ayo Dosunmu makes 10-foot driving floating jump shot (Coby White assists)
- Onuralp Bitim misses 24-foot three point jumper
- Andre Drummond makes 4-foot hook shot (DeMar DeRozan assists)
- Davion Mitchell misses 23-foot three point jumper
- Trey Lyles misses 23-foot three point jumper
- Ayo Dosunmu misses 23-foot three point jumper
- Trey Lyles misses 23-foot three point shot
- Kevin Huerter misses 9-foot pullup jump shot
- Nikola Vucevic misses 26-foot three point jumper
- Chris Duarte makes 7-foot two point shot (Keegan Murray assists)
- Ayo Dosunmu makes driving layup (Alex Caruso assists)
- Domantas Sabonis misses 4-foot two point shot
- Nikola Vucevic makes 2-foot layup (Alex Caruso assists)
- Ayo Dosunmu makes driving layup (Alex Caruso assists)
- Alex Caruso misses 25-foot three point jumper
- Keegan Murray misses 25-foot three point jumper
- Jevon Carter misses 19-foot pullup jump shot
- Coby White makes 22-foot three point shot (Jevon Carter assists)
- Domantas Sabonis makes driving layup
- Nikola Vucevic misses 5-foot two point shot
- Alex Caruso makes two point shot
- Alex Caruso misses free throw 1 of 1
- De'Aaron Fox makes driving layup
- Coby White misses 24-foot three point pullup jump shot
- De'Aaron Fox misses running pullup jump shot
- Keegan Murray makes 25-foot three point jumper (De'Aaron Fox assists)
- Nikola Vucevic misses 25-foot three point jumper
- Domantas Sabonis misses driving layup
- Domantas Sabonis misses layup
- Coby White makes 23-foot three pointer (Ayo Dosunmu assists)
- De'Aaron Fox misses 12-foot pullup jump shot
- Malik Monk makes 22-foot three point jumper (De'Aaron Fox assists)
- Ayo Dosunmu misses 25-foot three point jumper
- De'Aaron Fox makes driving layup
- Keegan Murray misses two point shot
- Chris Duarte makes 27-foot three point jumper
- Nikola Vucevic misses 22-foot three point jumper
- Harrison Barnes makes driving layup (Kevin Huerter assists)
- Ayo Dosunmu makes 2-foot two point shot
- Harrison Barnes misses 24-foot three point jumper
- De'Aaron Fox makes 22-foot three point jumper (Kevin Huerter assists)
- De'Aaron Fox makes free throw 1 of 1
- Domantas Sabonis makes driving layup (De'Aaron Fox assists)
- DeMar DeRozan makes free throw 1 of 2
- DeMar DeRozan makes free throw 2 of 2
- Domantas Sabonis makes free throw 1 of 2
- Domantas Sabonis makes free throw 2 of 2
- DeMar DeRozan misses 25-foot three point jumper
- Harrison Barnes makes 24-foot three point jumper (De'Aaron Fox assists)
- Coby White makes 24-foot three point jumper (DeMar DeRozan assists)
- De'Aaron Fox misses 15-foot two point shot
- DeMar DeRozan misses two point shot
- Coby White makes 3-foot two point shot (DeMar DeRozan assists)
- Kevin Huerter makes 23-foot three point shot (Keegan Murray assists)
- Coby White misses 26-foot three point jumper
- Kevin Huerter makes 25-foot three point jumper (Domantas Sabonis assists)
- Ayo Dosunmu misses driving floating jump shot
- Domantas Sabonis makes 1-foot dunk (De'Aaron Fox assists)
- Domantas Sabonis makes 1-foot dunk (De'Aaron Fox assists)
- DeMar DeRozan makes 26-foot three point jumper (Coby White assists)
- Domantas Sabonis makes 1-foot dunk (De'Aaron Fox assists)
- Coby White makes driving dunk (Ayo Dosunmu assists)
- Kevin Huerter misses 25-foot three point jumper
- Julian Phillips misses 23-foot three point jumper
- De'Aaron Fox makes 8-foot driving floating jump shot
- DeMar DeRozan makes driving layup
- Malik Monk misses 23-foot three point jumper
- Domantas Sabonis makes 1-foot dunk (Malik Monk assists)
- DeMar DeRozan makes free throw 1 of 2
- DeMar DeRozan makes free throw 2 of 2
- Malik Monk misses 23-foot three point jumper
- Davion Mitchell makes 15-foot step back jumpshot (Harrison Barnes assists)
- Ayo Dosunmu misses 24-foot three point jumper
- Alex Len makes 1-foot dunk (Davion Mitchell assists)
- Coby White makes 26-foot three point jumper (Onuralp Bitim assists)
- Davion Mitchell makes 16-foot step back jumpshot
- Coby White makes 8-foot driving floating jump shot
- Coby White makes technical free throw
- Onuralp Bitim misses 11-foot pullup jump shot
- Malik Monk misses 24-foot three point jumper
- Chris Duarte misses 23-foot three point jumper
- Jevon Carter misses 22-foot three point pullup jump shot
- Trey Lyles misses 22-foot three point jumper
- Coby White makes driving layup
- Coby White makes free throw 1 of 1
- Coby White misses two point shot
- Malik Monk misses 18-foot step back jumpshot
- Onuralp Bitim misses free throw 1 of 2
- Onuralp Bitim makes free throw 2 of 2
- Malik Monk misses two point shot
- Coby White misses 25-foot three point pullup jump shot
- Julian Phillips makes 21-foot jumper (Jevon Carter assists)
- Trey Lyles misses 23-foot three point jumper
- Keegan Murray misses 25-foot three point shot
- Coby White makes free throw 1 of 2
- Coby White misses free throw 2 of 2
- Trey Lyles makes free throw 1 of 2
- Trey Lyles makes free throw 2 of 2
- DeMar DeRozan makes 18-foot jumper (Coby White assists)
- Trey Lyles makes two point shot (Keegan Murray assists)
- DeMar DeRozan makes 25-foot three point jumper (Ayo Dosunmu assists)
- Andre Drummond misses 4-foot two point shot
- Trey Lyles makes 2-foot layup (Malik Monk assists)
- DeMar DeRozan makes driving layup
- De'Aaron Fox makes free throw 1 of 2
- De'Aaron Fox misses free throw 2 of 2
- Trey Lyles misses 2-foot tip shot
- De'Aaron Fox misses 26-foot three point pullup jump shot
- DeMar DeRozan makes 3-foot two point shot
- Harrison Barnes misses 25-foot three point jumper
- Keegan Murray makes driving layup (Malik Monk assists)
- DeMar DeRozan makes 6-foot driving floating jump shot
- Domantas Sabonis misses layup
- Kevin Huerter makes 12-foot driving floating jump shot (Keegan Murray assists)
- Julian Phillips makes free throw 1 of 2
- Julian Phillips makes free throw 2 of 2
- Malik Monk misses 8-foot two point shot
- Julian Phillips makes layup (Alex Caruso assists)
- Domantas Sabonis misses driving layup
- Domantas Sabonis makes free throw 1 of 2
- Domantas Sabonis makes free throw 2 of 2
- DeMar DeRozan makes 19-foot step back jumpshot (Coby White assists)
- De'Aaron Fox misses driving layup
- Ayo Dosunmu makes 23-foot three point shot (Coby White assists)
- Domantas Sabonis makes 1-foot layup (De'Aaron Fox assists)
- DeMar DeRozan makes 17-foot two point shot (Alex Caruso assists)
- Domantas Sabonis misses 7-foot two point shot
- Kevin Huerter makes two point shot (Domantas Sabonis assists)
- Coby White makes driving layup
- Coby White makes free throw 1 of 1
- Trey Lyles misses layup
- DeMar DeRozan makes free throw 1 of 2
- DeMar DeRozan makes free throw 2 of 2
- Harrison Barnes misses free throw 1 of 2
- Harrison Barnes makes free throw 2 of 2
- Alex Caruso misses 6-foot two point shot
- Coby White makes driving layup (Alex Caruso assists)
- Coby White misses 27-foot three point jumper
- Coby White makes 5-foot two point shot
- De'Aaron Fox misses 25-foot step back jumpshot
- Ayo Dosunmu misses driving floating jump shot
- Nikola Vucevic misses tip shot
- DeMar DeRozan makes free throw 1 of 2
- DeMar DeRozan makes free throw 2 of 2
- De'Aaron Fox misses 22-foot three point shot
Shot Made
Shot Missed
Shot Made
Shot Missed
Data is currently unavailable.
Matchups
2025-26 Standings
Western Conference
| Pacific | W | L | PCT | GB | STRK |
|---|---|---|---|---|---|
| LA Lakers | 37 | 24 | .607 | - | W3 |
| Phoenix | 35 | 26 | .574 | 2 | W2 |
| Golden State | 31 | 30 | .508 | 6 | L2 |
| LA Clippers | 30 | 31 | .492 | 7 | W3 |
| Sacramento | 14 | 49 | .222 | 24 | L2 |
NBA News
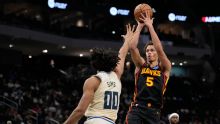
Daniels scores double-double in Hawks win
Dyson Daniels starred with 14 points and 10 rebounds for the Atlanta Hawks' in their win over the Milwaukee Bucks.
3h

Utah faces Washington, seeks to end 7-game skid
Utah Jazz (18-44, 14th in the Western Conference) vs. Washington Wizards (16-45, 13th in the Eastern Conference)
4h

Mike Brown points out that SGA is a tough cover
Mike Brown discusses Shai Gilgeous-Alexander selling contact to the referees.
4h