
Connecticut Sun @ Dallas Wings

21-9, 12-5 Away
81
21-9, 12-5 Away

16-14, 10-6 Home
91
16-14, 10-6 Home
Game Leaders


Team Stats


45% (33-73)
Field Goal %
47% (30-64)
44% (8-18)
Three Point %
40% (6-15)
50% (7-14)
Free Throw %
93% (25-27)
13
Turnovers
13
34
Rebounds
34
4
Largest Lead
13
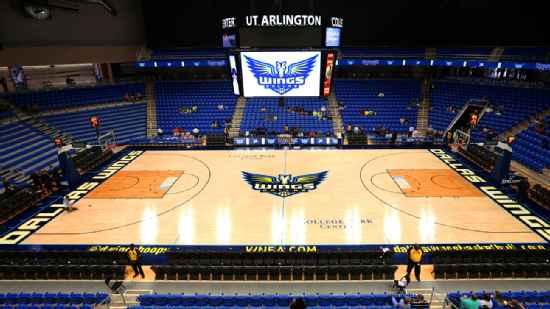
Game Information
Arlington, TX
Referee:Roy Gulbeyan
Referee:Amy Bonner
Referee:Biniam Maru
Probabilities & Game Flow

0%
--CONN
100%
--DAL
According to ESPN Analytics
Shot Chart

- Natisha Hiedeman makes 3-foot two point shot
- Satou Sabally misses 24-foot three point jumper
- DeWanna Bonner misses 21-foot step back jumpshot
- Teaira McCowan makes layup (Natasha Howard assists)
- Tiffany Hayes makes 5-foot layup (Alyssa Thomas assists)
- Rebecca Allen makes two point shot
- Teaira McCowan makes layup (Satou Sabally assists)
- Natisha Hiedeman misses driving layup
- Arike Ogunbowale misses running pullup jump shot
- DeWanna Bonner misses free throw 1 of 2
- DeWanna Bonner makes free throw 2 of 2
- Crystal Dangerfield makes 3-foot layup (Natasha Howard assists)
- Rebecca Allen misses driving layup
- DeWanna Bonner misses 24-foot three point pullup jump shot
- Alyssa Thomas makes driving layup (Natisha Hiedeman assists)
- Satou Sabally makes two point shot (Teaira McCowan assists)
- Tiffany Hayes makes 4-foot layup (DeWanna Bonner assists)
- Crystal Dangerfield misses driving floating jump shot
- Crystal Dangerfield makes 24-foot running pullup jump shot (Teaira McCowan assists)
- Alyssa Thomas makes 11-foot jumper (Tiffany Hayes assists)
- Arike Ogunbowale makes driving layup (Teaira McCowan assists)
- Natisha Hiedeman misses 25-foot step back jumpshot
- Natasha Howard makes driving layup
- Natasha Howard makes 23-foot three point shot (Crystal Dangerfield assists)
- Natisha Hiedeman makes two point shot (Alyssa Thomas assists)
- Satou Sabally misses driving layup
- Teaira McCowan misses two point shot
- Teaira McCowan makes two point shot
- Alyssa Thomas makes 9-foot jumper
- Alyssa Thomas misses free throw 1 of 1
- Arike Ogunbowale makes free throw 1 of 2
- Arike Ogunbowale makes free throw 2 of 2
- Tiffany Hayes makes driving layup
- Satou Sabally misses 13-foot pullup jump shot
- Natisha Hiedeman makes two point shot
- Arike Ogunbowale misses 24-foot step back jumpshot
- DeWanna Bonner misses 19-foot two point shot
- Arike Ogunbowale misses layup
- Satou Sabally makes 24-foot three point jumper (Teaira McCowan assists)
- Odyssey Sims misses driving floating jump shot
- Awak Kuier misses jumper
- DeWanna Bonner makes driving layup
- Veronica Burton makes technical free throw
- Crystal Dangerfield makes 23-foot three point jumper (Teaira McCowan assists)
- DeWanna Bonner misses 13-foot jumper
- Natisha Hiedeman misses driving floating jump shot
- Natisha Hiedeman makes 21-foot pullup jump shot
- Arike Ogunbowale makes 4-foot layup (Satou Sabally assists)
- Alyssa Thomas misses 15-foot jumper
- Olivia Nelson-Ododa makes two point shot
- Arike Ogunbowale misses 24-foot three point jumper
- DiJonai Carrington misses two point shot
- Satou Sabally misses two point shot
- Satou Sabally misses driving layup
- Satou Sabally makes two point shot
- Satou Sabally makes free throw 1 of 1
- Rebecca Allen makes 23-foot three point jumper (Tyasha Harris assists)
- Crystal Dangerfield makes 15-foot pullup jump shot
- Rebecca Allen misses 26-foot three point jumper
- Tiffany Hayes misses 26-foot three point jumper
- Arike Ogunbowale makes driving layup (Natasha Howard assists)
- Alyssa Thomas misses two point shot
- Kalani Brown makes layup (Natasha Howard assists)
- Tyasha Harris misses 20-foot step back jumpshot
- Crystal Dangerfield makes free throw 1 of 2
- Crystal Dangerfield makes free throw 2 of 2
- Natisha Hiedeman misses 19-foot step back jumpshot
- Alyssa Thomas makes 13-foot step back jumpshot
- Satou Sabally makes 9-foot driving floating jump shot (Crystal Dangerfield assists)
- Alyssa Thomas makes 13-foot jumper (Natisha Hiedeman assists)
- Alyssa Thomas misses driving layup
- Arike Ogunbowale misses free throw 1 of 2
- Arike Ogunbowale makes free throw 2 of 2
- Tiffany Hayes makes driving layup (Natisha Hiedeman assists)
- Tiffany Hayes misses free throw 1 of 1
- Crystal Dangerfield misses driving floating jump shot
- Natisha Hiedeman makes 24-foot step back jumpshot (Alyssa Thomas assists)
- Satou Sabally makes 25-foot three point jumper (Crystal Dangerfield assists)
- Alyssa Thomas makes driving layup (Natisha Hiedeman assists)
- Rebecca Allen misses 25-foot three point jumper
- Crystal Dangerfield makes 13-foot running pullup jump shot (Arike Ogunbowale assists)
- Alyssa Thomas makes free throw 1 of 2
- Alyssa Thomas makes free throw 2 of 2
- Arike Ogunbowale misses 19-foot step back jumpshot
- Satou Sabally makes free throw 1 of 2
- Satou Sabally makes free throw 2 of 2
- Alyssa Thomas misses 30-foot three point jumper
- Natasha Howard misses three point jumper
- Tiffany Hayes misses driving layup
- Satou Sabally misses 26-foot three point shot
- Alyssa Thomas makes 13-foot jumper (Natisha Hiedeman assists)
- Tiffany Hayes makes 25-foot three pointer
- Crystal Dangerfield makes 13-foot two point shot
- Natisha Hiedeman misses 15-foot pullup jump shot
- Satou Sabally makes free throw 1 of 2
- Satou Sabally makes free throw 2 of 2
- Alyssa Thomas misses driving floating jump shot
- Satou Sabally makes 27-foot three point jumper (Teaira McCowan assists)
- Alyssa Thomas makes 8-foot two point shot (Tiffany Hayes assists)
- Teaira McCowan makes 3-foot layup (Satou Sabally assists)
- Teaira McCowan misses free throw 1 of 1
- Natisha Hiedeman misses driving floating jump shot
- Alyssa Thomas makes two point shot
- Tiffany Hayes misses driving layup
- Natasha Howard makes driving layup (Arike Ogunbowale assists)
- Alyssa Thomas misses driving layup
- Arike Ogunbowale misses driving layup
- Olivia Nelson-Ododa misses free throw 1 of 2
- Olivia Nelson-Ododa misses free throw 2 of 2
- Satou Sabally makes free throw 1 of 2
- Satou Sabally makes free throw 2 of 2
- Tiffany Hayes makes driving layup
- Arike Ogunbowale makes driving layup (Satou Sabally assists)
- DiJonai Carrington makes free throw 1 of 2
- DiJonai Carrington makes free throw 2 of 2
- Satou Sabally misses 14-foot two point shot
- DiJonai Carrington misses 20-foot jumper
- Natasha Howard misses 16-foot pullup jump shot
- Tiffany Hayes makes 24-foot running pullup jump shot (Alyssa Thomas assists)
- Odyssey Sims misses pullup jump shot
- DiJonai Carrington makes 28-foot three point jumper (Natisha Hiedeman assists)
- Alyssa Thomas makes driving layup
- Arike Ogunbowale misses 15-foot two point shot
- Alyssa Thomas misses 13-foot jumper
- Crystal Dangerfield misses 18-foot pullup jump shot
- Tiffany Hayes misses two point shot
- Satou Sabally makes 12-foot two point shot
- Arike Ogunbowale makes 20-foot jumper (Natasha Howard assists)
- Satou Sabally makes layup (Crystal Dangerfield assists)
- Crystal Dangerfield misses 48-foot three point jumper
- Kalani Brown makes free throw 1 of 2
- Kalani Brown makes free throw 2 of 2
- Natisha Hiedeman misses 25-foot three point jumper
- Arike Ogunbowale misses 25-foot three point pullup jump shot
- Tiffany Hayes makes 26-foot three point jumper (Alyssa Thomas assists)
- DiJonai Carrington misses driving layup
- Natasha Howard misses 26-foot three point jumper
- DiJonai Carrington makes 25-foot three point shot (Tiffany Hayes assists)
- Kalani Brown makes free throw 1 of 2
- Kalani Brown makes free throw 2 of 2
- Alyssa Thomas makes driving floating jump shot (DiJonai Carrington assists)
- Natasha Howard misses hook shot
- DiJonai Carrington misses driving floating jump shot
- Alyssa Thomas misses tip shot
- DiJonai Carrington misses free throw 1 of 2
- DiJonai Carrington misses free throw 2 of 2
- Natasha Howard misses layup
- DiJonai Carrington makes 26-foot three point jumper (Tiffany Hayes assists)
- Arike Ogunbowale makes free throw 1 of 2
- Arike Ogunbowale makes free throw 2 of 2
- Tiffany Hayes misses 25-foot three point pullup jump shot
- Satou Sabally misses 23-foot three point jumper
- Alyssa Thomas makes two point shot
- Arike Ogunbowale makes 19-foot pullup jump shot
- Natisha Hiedeman makes 12-foot pullup jump shot
- Natasha Howard makes layup (Satou Sabally assists)
- DiJonai Carrington misses 15-foot jumper
- Arike Ogunbowale makes free throw 1 of 2
- Arike Ogunbowale makes free throw 2 of 2
- Crystal Dangerfield misses 11-foot two point shot
- DeWanna Bonner misses 26-foot three point shot
- Arike Ogunbowale makes free throw flagrant 1 of 2
- Arike Ogunbowale makes free throw flagrant 2 of 2
- Arike Ogunbowale makes driving layup
- Tiffany Hayes misses 23-foot three point jumper
- Crystal Dangerfield misses 14-foot pullup jump shot
- Arike Ogunbowale misses driving layup
- Satou Sabally makes free throw 1 of 2
- Satou Sabally makes free throw 2 of 2
- Natisha Hiedeman makes free throw 1 of 2
- Natisha Hiedeman makes free throw 2 of 2
Shot Made
Shot Missed
Shot Made
Shot Missed
Data is currently unavailable.
Matchups
2025-26 Standings
Women's National Basketball Assoc.
| Western Conference | W | L | PCT | GB | STRK |
|---|---|---|---|---|---|
| Dallas | 0 | 0 | .000 | - | - |
| Los Angeles | 0 | 0 | .000 | - | - |
| Minnesota | 0 | 0 | .000 | - | - |
| Phoenix | 0 | 0 | .000 | - | - |
| Seattle | 0 | 0 | .000 | - | - |
| Las Vegas | 0 | 0 | .000 | - | - |
| Golden State | 0 | 0 | .000 | - | - |
| Portland | 0 | 0 | .000 | - | - |
WNBA News
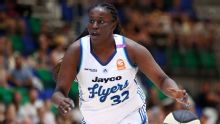
I watched the draft 'just in case': Four rising Aussies taken in WNBA draft
A bonza few days for Australian women's basketball reached new heights on Tuesday when four rising stars were selected in the WNBA draft.
7h
What colleges have the most No. 1 WNBA draft picks?
Here's a look at the college programs that have produced the most No. 1 picks in the history of the WNBA draft; a history that dates back to 1997.
8h

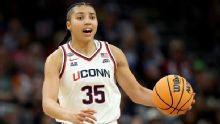
Valkyries flip ex-LSU star Flau'jae Johnson to Storm in stunner
The Valkyries traded Flau'jae Johnson less than an hour after selecting her with the No. 8 pick, sending the LSU standout to the Seattle Storm for Marta Suarez and a future second-round pick.
8h