
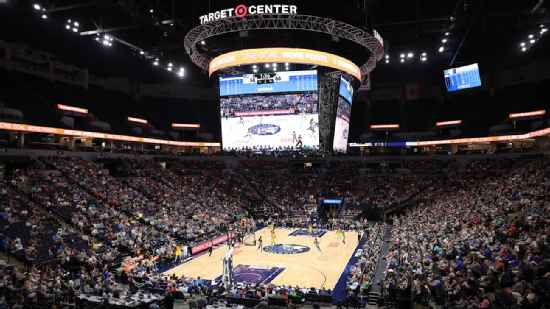
Connecticut Sun @ Minnesota Lynx
First Round - Game 3 • CON wins series 2-1

27-13, 14-6 Away
90
27-13, 14-6 Away

19-21, 9-11 Home
75
19-21, 9-11 Home
Game Leaders


Team Stats


55% (36-65)
Field Goal %
43% (26-60)
45% (9-20)
Three Point %
36% (8-22)
64% (9-14)
Free Throw %
79% (15-19)
10
Turnovers
10
35
Rebounds
27
19
Largest Lead
0
Game Information
Minneapolis, MN
Referee:Michael Price
Referee:Jeff Wooten
Referee:Eric Brewton
Referee:Toni Patillo
Probabilities & Game Flow

100%
--CON
0%
--MIN
According to ESPN Analytics
Shot Chart

- Alyssa Thomas makes 8-foot two point shot (Rebecca Allen assists)
- Napheesa Collier misses 19-foot two point shot
- Natisha Hiedeman makes two point shot
- Napheesa Collier misses layup
- DeWanna Bonner makes driving layup
- Dorka Juhasz makes 4-foot driving floating jump shot (Tiffany Mitchell assists)
- Dorka Juhasz makes free throw 1 of 1
- Alyssa Thomas misses 3-foot two point shot
- Diamond Miller makes 26-foot three point jumper (Kayla McBride assists)
- Rebecca Allen makes 15-foot pullup jump shot (Natisha Hiedeman assists)
- Kayla McBride misses 27-foot three point jumper
- Tiffany Hayes makes 24-foot three point shot (Alyssa Thomas assists)
- DeWanna Bonner makes free throw 1 of 2
- DeWanna Bonner makes free throw 2 of 2
- Kayla McBride misses 25-foot three point jumper
- Alyssa Thomas makes layup (DeWanna Bonner assists)
- Alyssa Thomas makes layup (DeWanna Bonner assists)
- Tiffany Mitchell misses 14-foot pullup jump shot
- DeWanna Bonner makes 24-foot three point jumper (Tiffany Hayes assists)
- Napheesa Collier misses free throw 1 of 2
- Napheesa Collier makes free throw 2 of 2
- Tiffany Hayes misses 25-foot three point jumper
- Bridget Carleton misses 23-foot three point jumper
- DiJonai Carrington misses 5-foot two point shot
- Napheesa Collier makes free throw 1 of 2
- Napheesa Collier makes free throw 2 of 2
- Kayla McBride makes 13-foot driving floating jump shot
- DeWanna Bonner misses two point shot
- Alyssa Thomas makes tip shot
- Rachel Banham misses 14-foot pullup jump shot
- Natisha Hiedeman makes 8-foot driving floating jump shot (Alyssa Thomas assists)
- Napheesa Collier makes driving layup
- DeWanna Bonner makes free throw 1 of 2
- DeWanna Bonner misses free throw 2 of 2
- Napheesa Collier misses 24-foot three point jumper
- Napheesa Collier makes 14-foot jumper (Tiffany Mitchell assists)
- Natisha Hiedeman misses 16-foot pullup jump shot
- Napheesa Collier makes free throw 1 of 2
- Napheesa Collier makes free throw 2 of 2
- Natisha Hiedeman misses free throw 1 of 2
- Natisha Hiedeman makes free throw 2 of 2
- Tiffany Mitchell makes two point shot
- Rebecca Allen misses 17-foot pullup jump shot
- Diamond Miller makes driving layup (Tiffany Mitchell assists)
- Tyasha Harris misses three point jumper
- Alyssa Thomas misses 3-foot hook shot
- Diamond Miller misses three point pullup jump shot
- Alyssa Thomas misses two point shot
- Dorka Juhasz misses free throw 1 of 2
- Dorka Juhasz makes free throw 2 of 2
- Alyssa Thomas misses driving layup
- Bridget Carleton makes 25-foot three point shot (Diamond Miller assists)
- Tyasha Harris misses pullup jump shot
- Tiffany Mitchell misses 8-foot pullup jump shot
- Olivia Nelson-Ododa makes two point shot (Alyssa Thomas assists)
- DeWanna Bonner makes 12-foot two point shot (Tyasha Harris assists)
- Napheesa Collier makes 8-foot two point shot
- Tyasha Harris makes 20-foot jumper (Alyssa Thomas assists)
- Napheesa Collier makes 13-foot pullup jump shot
- Alyssa Thomas makes two point shot
- Dorka Juhasz misses driving floating jump shot
- Tyasha Harris makes 26-foot three point shot (Alyssa Thomas assists)
- Kayla McBride misses 10-foot two point shot
- Tyasha Harris makes two point shot
- Tiffany Hayes makes 2-foot two point shot
- Dorka Juhasz misses 23-foot three point jumper
- Rebecca Allen misses 16-foot pullup jump shot
- Napheesa Collier misses 14-foot two point shot
- DeWanna Bonner makes two point shot (Alyssa Thomas assists)
- Kayla McBride makes 24-foot three point jumper (Tiffany Mitchell assists)
- Alyssa Thomas makes driving layup (DeWanna Bonner assists)
- Napheesa Collier misses 13-foot two point shot
- Rebecca Allen misses 23-foot three point jumper
- Napheesa Collier makes driving floating jump shot (Diamond Miller assists)
- Alyssa Thomas makes two point shot
- Diamond Miller misses 24-foot step back jumpshot
- DeWanna Bonner makes 11-foot pullup jump shot
- Kayla McBride misses 26-foot three point jumper
- DeWanna Bonner makes 25-foot three point jumper (Alyssa Thomas assists)
- Napheesa Collier makes 12-foot pullup jump shot
- Tiffany Hayes misses 24-foot three point jumper
- Tiffany Mitchell makes 12-foot pullup jump shot
- Alyssa Thomas makes layup (Tiffany Hayes assists)
- DeWanna Bonner makes 26-foot three pointer
- Kayla McBride misses 25-foot three point jumper
- Tiffany Mitchell makes 4-foot two point shot
- DeWanna Bonner misses 25-foot three point shot
- Nikolina Milic makes layup (Tiffany Mitchell assists)
- Natisha Hiedeman misses 25-foot step back jumpshot
- Napheesa Collier makes 6-foot two point shot (Kayla McBride assists)
- Alyssa Thomas makes driving layup (DeWanna Bonner assists)
- Tyasha Harris makes three point shot (Alyssa Thomas assists)
- Alyssa Thomas misses free throw 1 of 2
- Alyssa Thomas makes free throw 2 of 2
- Napheesa Collier makes 9-foot two point shot
- DeWanna Bonner misses 27-foot three point jumper
- Rebecca Allen misses 24-foot three point jumper
- Nikolina Milic misses 24-foot three point shot
- Rebecca Allen misses 24-foot three point jumper
- Napheesa Collier misses two point shot
- Tiffany Hayes misses pullup jump shot
- Tiffany Hayes misses driving layup
- Rachel Banham misses 14-foot pullup jump shot
- Rachel Banham misses 12-foot jumper
- Alyssa Thomas misses 9-foot jumper
- DeWanna Bonner misses 30-foot three point jumper
- Napheesa Collier makes 25-foot three point jumper (Bridget Carleton assists)
- Tiffany Hayes makes driving layup (Alyssa Thomas assists)
- Rachel Banham misses three point jumper
- Tyasha Harris misses 24-foot three point pullup jump shot
- Kayla McBride misses driving floating jump shot
- Tyasha Harris makes 12-foot pullup jump shot
- Bridget Carleton makes two point shot (Kayla McBride assists)
- Napheesa Collier makes 26-foot three point jumper (Rachel Banham assists)
- DeWanna Bonner makes 14-foot pullup jump shot (Alyssa Thomas assists)
- Kayla McBride misses two point shot
- Alyssa Thomas misses 10-foot two point shot
- Tyasha Harris makes 25-foot three point jumper (DeWanna Bonner assists)
- Rachel Banham makes 29-foot three point jumper (Diamond Miller assists)
- DeWanna Bonner misses 10-foot two point shot
- Rachel Banham misses 26-foot three point shot
- Napheesa Collier misses 1-foot two point shot
- Napheesa Collier makes free throw 1 of 2
- Napheesa Collier makes free throw 2 of 2
- Tyasha Harris makes 24-foot three point jumper (Alyssa Thomas assists)
- Diamond Miller makes free throw 1 of 2
- Diamond Miller misses free throw 2 of 2
- Kayla McBride makes free throw 1 of 2
- Kayla McBride makes free throw 2 of 2
- DeWanna Bonner makes free throw 1 of 3
- DeWanna Bonner makes free throw 2 of 3
- DeWanna Bonner makes free throw 3 of 3
- Napheesa Collier makes 11-foot two point shot
- Alyssa Thomas makes driving layup
- Bridget Carleton makes free throw 1 of 2
- Bridget Carleton misses free throw 2 of 2
- Natisha Hiedeman makes 23-foot three point jumper (Alyssa Thomas assists)
- Bridget Carleton makes 25-foot three point jumper (Napheesa Collier assists)
- Alyssa Thomas makes 19-foot jumper (Natisha Hiedeman assists)
- Kayla McBride makes 24-foot three point jumper (Napheesa Collier assists)
- Alyssa Thomas makes two point shot
- Alyssa Thomas makes free throw 1 of 1
- Bridget Carleton makes free throw 1 of 2
- Bridget Carleton makes free throw 2 of 2
- Alyssa Thomas makes 3-foot layup (DeWanna Bonner assists)
- Bridget Carleton makes driving layup (Rachel Banham assists)
- DeWanna Bonner misses free throw 1 of 2
- DeWanna Bonner misses free throw 2 of 2
- Kayla McBride misses 25-foot three point pullup jump shot
- Diamond Miller misses 23-foot three point jumper
Shot Made
Shot Missed
Shot Made
Shot Missed
Data is currently unavailable.
Matchups
2025-26 Standings
Women's National Basketball Assoc.
| Eastern Conference | W | L | PCT | GB | STRK |
|---|---|---|---|---|---|
| Indiana | 16 | 10 | .615 | - | W2 |
| Atlanta | 15 | 10 | .600 | 0.5 | W2 |
| New York | 13 | 12 | .520 | 2.5 | L4 |
| Washington | 12 | 12 | .500 | 3 | L2 |
| Toronto | 10 | 15 | .400 | 5.5 | L2 |
| Chicago | 9 | 16 | .360 | 6.5 | W2 |
| Connecticut | 7 | 18 | .280 | 8.5 | W2 |
| Western Conference | W | L | PCT | GB | STRK |
|---|---|---|---|---|---|
| Minnesota | 20 | 6 | .769 | - | W5 |
| Golden State | 19 | 7 | .731 | 1 | W9 |
| Las Vegas | 17 | 7 | .708 | 2 | L1 |
| Dallas | 16 | 8 | .667 | 3 | W5 |
| Portland | 11 | 15 | .423 | 9 | L1 |
| Los Angeles | 10 | 14 | .417 | 9 | L3 |
| Phoenix | 8 | 18 | .308 | 12 | L5 |
| Seattle | 6 | 21 | .222 | 14.5 | L4 |
WNBA News

Golden State puts home win streak on the line against Washington
Washington Mystics (12-12, 8-5 Eastern Conference) at Golden State Valkyries (19-7, 7-5 Western Conference)
4h

Minnesota faces Seattle on 5-game win streak
Minnesota Lynx (20-6, 13-1 Western Conference) at Seattle Storm (6-21, 1-12 Western Conference)
4h
Mitchell posts 10th consecutive 20-point game in Fever's win
Kelsey Mitchell, a four-time WNBA All-Star guard, authored a four-point play en route to a season-high 33-point effort Saturday night, and the Indiana Fever rallied to record a 108-88 victory over the New York Liberty at Gainbridge Fieldhouse.
4h