
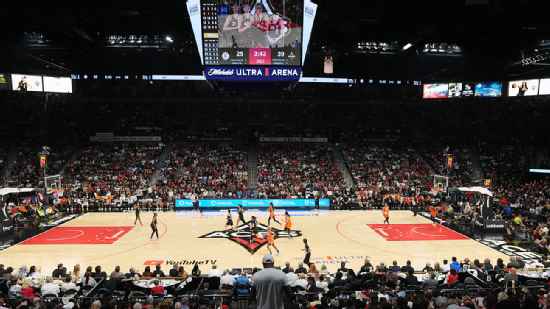
Dallas Wings @ Las Vegas Aces
WNBA Semifinals - Game 2 • LV leads series 2-0

22-18, 11-9 Away
84
22-18, 11-9 Away

34-6, 19-1 Home
91
34-6, 19-1 Home
Game Leaders


Team Stats


38% (33-88)
Field Goal %
46% (30-65)
38% (10-26)
Three Point %
38% (9-24)
62% (8-13)
Free Throw %
88% (22-25)
9
Turnovers
12
40
Rebounds
39
0
Largest Lead
14
Game Information
Las Vegas, NV
Referee:Isaac Barnett
Referee:Randy Richardson
Referee:Toni Patillo
Referee:Blanca Burns
Probabilities & Game Flow

0%
--DAL
100%
--LV
According to ESPN Analytics
Shot Chart

- Teaira McCowan misses two point shot
- Jackie Young misses free throw 1 of 3
- Jackie Young makes free throw 2 of 3
- Jackie Young makes free throw 3 of 3
- Teaira McCowan makes layup (Odyssey Sims assists)
- A'ja Wilson misses 16-foot two point shot
- Natasha Howard misses 17-foot pullup jump shot
- Chelsea Gray makes 18-foot pullup jump shot
- Teaira McCowan misses 6-foot jumper
- Satou Sabally misses 12-foot two point shot
- Chelsea Gray makes 18-foot pullup jump shot
- Satou Sabally makes free throw 1 of 2
- Satou Sabally makes free throw 2 of 2
- Jackie Young makes 18-foot pullup jump shot
- Teaira McCowan makes free throw 1 of 2
- Teaira McCowan makes free throw 2 of 2
- Satou Sabally misses two point shot
- Alysha Clark misses 24-foot three point shot
- A'ja Wilson makes two point shot
- A'ja Wilson makes free throw 1 of 1
- Odyssey Sims misses two point shot
- Kelsey Plum misses 27-foot three point shot
- Odyssey Sims makes two point shot
- Kelsey Plum misses 24-foot three point jumper
- Chelsea Gray misses 8-foot pullup jump shot
- Kalani Brown makes layup (Odyssey Sims assists)
- Chelsea Gray makes 5-foot layup (Kelsey Plum assists)
- Kalani Brown misses driving layup
- Arike Ogunbowale misses 26-foot three point jumper
- Kalani Brown misses layup
- Kalani Brown misses two point shot
- A'ja Wilson makes driving layup
- Kalani Brown makes layup (Satou Sabally assists)
- A'ja Wilson makes 5-foot two point shot (Chelsea Gray assists)
- Natasha Howard misses driving layup
- Kalani Brown misses two point shot
- Kalani Brown makes two point shot
- Chelsea Gray makes 27-foot three point jumper (Jackie Young assists)
- Arike Ogunbowale misses 20-foot pullup jump shot
- A'ja Wilson makes two point shot
- A'ja Wilson makes free throw 1 of 1
- Natasha Howard misses driving layup
- Satou Sabally makes two point shot
- Kelsey Plum misses free throw 1 of 2
- Kelsey Plum makes free throw 2 of 2
- Cayla George misses 23-foot three point jumper
- Odyssey Sims makes two point shot (Arike Ogunbowale assists)
- Kiah Stokes makes 4-foot hook shot (Alysha Clark assists)
- Satou Sabally misses free throw 1 of 3
- Satou Sabally misses free throw 2 of 3
- Satou Sabally misses free throw 3 of 3
- Crystal Dangerfield misses 29-foot three point jumper
- Chelsea Gray makes 16-foot two point shot
- Natasha Howard misses 17-foot pullup jump shot
- Arike Ogunbowale makes driving layup
- Alysha Clark misses 23-foot three point jumper
- Natasha Howard makes driving layup (Satou Sabally assists)
- Alysha Clark makes 26-foot three point jumper (Chelsea Gray assists)
- Arike Ogunbowale misses 26-foot step back jumpshot
- Natasha Howard makes hook shot
- Natasha Howard misses 23-foot three point jumper
- Chelsea Gray makes 15-foot two point shot
- Arike Ogunbowale misses two point shot
- Natasha Howard misses 25-foot three point jumper
- Jackie Young makes 25-foot step back jumpshot
- Satou Sabally misses driving floating jump shot
- Jackie Young misses 25-foot three point jumper
- Maddy Siegrist makes 24-foot three point jumper (Teaira McCowan assists)
- Chelsea Gray misses 16-foot pullup jump shot
- Satou Sabally misses 17-foot two point shot
- Maddy Siegrist misses 7-foot jumper
- A'ja Wilson makes free throw 1 of 2
- A'ja Wilson makes free throw 2 of 2
- Odyssey Sims misses 24-foot three point jumper
- Satou Sabally misses 12-foot pullup jump shot
- A'ja Wilson misses 18-foot pullup jump shot
- A'ja Wilson makes 14-foot jumper (Kelsey Plum assists)
- Teaira McCowan misses layup
- Satou Sabally misses 17-foot step back jumpshot
- A'ja Wilson misses layup
- Maddy Siegrist misses 15-foot pullup jump shot
- Jackie Young misses 25-foot step back jumpshot
- Jackie Young misses 25-foot three point jumper
- Teaira McCowan makes 21-foot jumper (Arike Ogunbowale assists)
- A'ja Wilson makes driving layup (Chelsea Gray assists)
- Arike Ogunbowale makes 25-foot three point jumper (Veronica Burton assists)
- Chelsea Gray misses 15-foot two point shot
- Arike Ogunbowale makes 28-foot three point jumper (Veronica Burton assists)
- Chelsea Gray misses driving layup
- Kalani Brown misses two point shot
- Natasha Howard makes two point shot
- Kiah Stokes makes 5-foot layup (Jackie Young assists)
- Arike Ogunbowale misses 32-foot three point pullup jump shot
- Satou Sabally makes driving layup
- Jackie Young misses driving layup
- Arike Ogunbowale makes driving layup
- Arike Ogunbowale makes two point shot
- Chelsea Gray makes 27-foot three point jumper (Jackie Young assists)
- Natasha Howard makes 24-foot three point jumper (Odyssey Sims assists)
- A'ja Wilson makes free throw 1 of 2
- A'ja Wilson makes free throw 2 of 2
- Satou Sabally makes 24-foot three point jumper (Arike Ogunbowale assists)
- Kelsey Plum misses 7-foot pullup jump shot
- Kelsey Plum makes 27-foot three point jumper (Kiah Stokes assists)
- Odyssey Sims misses driving layup
- Kelsey Plum makes free throw 1 of 2
- Kelsey Plum makes free throw 2 of 2
- Arike Ogunbowale misses two point shot
- Natasha Howard makes two point shot
- Jackie Young misses 26-foot three point jumper
- A'ja Wilson makes two point shot (Chelsea Gray assists)
- Satou Sabally misses 26-foot three point pullup jump shot
- A'ja Wilson makes driving layup (Kelsey Plum assists)
- Arike Ogunbowale misses step back jumpshot
- Chelsea Gray makes 4-foot two point shot
- Natasha Howard makes free throw 1 of 2
- Natasha Howard makes free throw 2 of 2
- Kelsey Plum makes free throw 1 of 2
- Kelsey Plum makes free throw 2 of 2
- Kelsey Plum makes 27-foot running pullup jump shot
- Satou Sabally makes 7-foot two point shot
- Arike Ogunbowale misses driving floating jump shot
- Natasha Howard misses two point shot
- Kelsey Plum misses free throw 1 of 2
- Kelsey Plum makes free throw 2 of 2
- Veronica Burton misses 24-foot three point jumper
- Alysha Clark misses three point jumper
- Kalani Brown misses layup
- A'ja Wilson makes 15-foot jumper (Chelsea Gray assists)
- Satou Sabally misses 12-foot two point shot
- Kalani Brown makes two point shot
- Jackie Young makes free throw 1 of 2
- Jackie Young makes free throw 2 of 2
- Arike Ogunbowale misses 23-foot jump bank shot
- Chelsea Gray misses 15-foot two point shot
- Jackie Young misses 27-foot three point pullup jump shot
- Satou Sabally makes two point shot
- Kelsey Plum makes 26-foot three point jumper (Jackie Young assists)
- Satou Sabally misses 25-foot three point jumper
- Natasha Howard misses 6-foot two point shot
- Teaira McCowan makes two point shot
- Teaira McCowan makes layup (Natasha Howard assists)
- Jackie Young misses 24-foot three point jumper
- Arike Ogunbowale misses 26-foot three point pullup jump shot
- A'ja Wilson misses 7-foot two point shot
- Natasha Howard makes 9-foot two point shot (Satou Sabally assists)
- Kelsey Plum misses 29-foot three point jumper
- Arike Ogunbowale makes 25-foot three point shot (Veronica Burton assists)
- A'ja Wilson misses 9-foot jump bank shot
- Kelsey Plum makes 23-foot three point shot (Chelsea Gray assists)
- Satou Sabally misses 25-foot step back jumpshot
- A'ja Wilson makes 18-foot jumper (Chelsea Gray assists)
- Natasha Howard makes 26-foot three point jumper (Odyssey Sims assists)
- Natasha Howard misses jumper
- Chelsea Gray makes 27-foot three pointer
- Odyssey Sims misses 24-foot three point jumper
- Arike Ogunbowale makes 25-foot three point jumper (Satou Sabally assists)
- Chelsea Gray makes 8-foot two point shot
- Chelsea Gray misses 26-foot step back jumpshot
- Kelsey Plum misses driving layup
- Teaira McCowan makes free throw 1 of 2
- Teaira McCowan makes free throw 2 of 2
- Jackie Young makes 5-foot layup (Chelsea Gray assists)
- Arike Ogunbowale makes 25-foot three point jumper (Teaira McCowan assists)
- Arike Ogunbowale misses running pullup jump shot
- Jackie Young misses 26-foot three point jumper
- Natasha Howard makes two point shot (Arike Ogunbowale assists)
- A'ja Wilson makes free throw 1 of 2
- A'ja Wilson makes free throw 2 of 2
- Odyssey Sims misses driving layup
- Teaira McCowan misses free throw 1 of 2
- Teaira McCowan misses free throw 2 of 2
- Chelsea Gray misses 14-foot two point shot
- A'ja Wilson makes free throw 1 of 2
- A'ja Wilson makes free throw 2 of 2
- Arike Ogunbowale makes 26-foot three point jumper (Odyssey Sims assists)
- Jackie Young makes free throw 1 of 2
- Jackie Young makes free throw 2 of 2
- Arike Ogunbowale misses 26-foot three point jumper
Shot Made
Shot Missed
Shot Made
Shot Missed
Data is currently unavailable.
Matchups
2025-26 Standings
Women's National Basketball Assoc.
| Western Conference | W | L | PCT | GB | STRK |
|---|---|---|---|---|---|
| Minnesota | 18 | 6 | .750 | - | W3 |
| Las Vegas | 17 | 7 | .708 | 1 | L1 |
| Golden State | 17 | 7 | .708 | 1 | W7 |
| Dallas | 16 | 8 | .667 | 2 | W5 |
| Los Angeles | 10 | 12 | .455 | 7 | L1 |
| Portland | 10 | 13 | .435 | 7.5 | W1 |
| Phoenix | 8 | 17 | .320 | 10.5 | L4 |
| Seattle | 6 | 19 | .240 | 12.5 | L2 |
WNBA News
WNBA Power Rankings: The Indiana Fever are running hot
With Kelsey Mitchell posting her sixth straight game with 25 points or more, Indiana moves up to No. 4. Golden State holds on to the top spot.
2m

Chicago hosts Seattle following Hiedeman's 31-point game
Seattle Storm (6-19, 1-12 Western Conference) at Chicago Sky (7-16, 1-7 Eastern Conference)
7h

Golden State takes on Indiana, seeks 5th straight road win
Golden State Valkyries (17-7, 7-5 Western Conference) at Indiana Fever (14-9, 5-4 Eastern Conference)
7h