
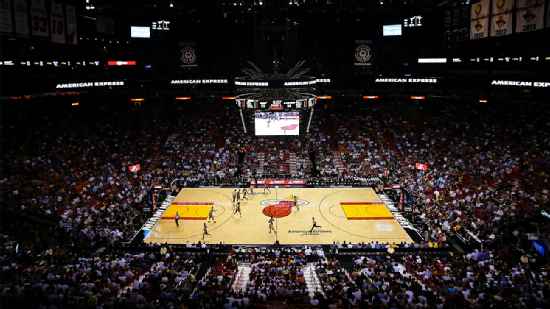
LA Clippers @ Miami Heat

15-17, 3-11 Away
110
15-17, 3-11 Away

13-18, 8-9 Home
95
13-18, 8-9 Home
Game Leaders


Team Stats


61% (46-76)
Field Goal %
44% (38-87)
40% (2-5)
Three Point %
32% (7-22)
76% (16-21)
Free Throw %
75% (12-16)
30
Turnovers
28
44
Rebounds
44
29
Largest Lead
2
Game Information
Miami, FL
Referee:Joe Forte
Referee:Derrick Collins
Referee:Eli Roe
Game Flow

--LAC
--MIA
Shot Chart

- Chris Kaman makes 6-foot hook shot
- Udonis Haslem misses 7-foot jumper
- Shaun Livingston makes 19-foot jumper (Elton Brand assists)
- Jason Williams misses 25-foot three point jumper
- Jason Williams makes free throw 1 of 2
- Jason Williams makes free throw 2 of 2
- Chris Kaman makes hook shot
- Dorell Wright makes 20-foot two point shot
- Elton Brand makes 9-foot jumper
- Jason Williams misses layup
- Chris Kaman makes layup (Shaun Livingston assists)
- Jason Kapono makes 23-foot three point jumper (Jason Williams assists)
- Quinton Ross misses jumper
- Jason Kapono misses 18-foot jumper
- Shaun Livingston misses 4-foot jumper
- Udonis Haslem makes 12-foot jumper (Jason Kapono assists)
- Udonis Haslem makes 16-foot jumper (Jason Williams assists)
- Corey Maggette makes free throw 1 of 2
- Corey Maggette misses free throw 2 of 2
- Alonzo Mourning makes dunk
- Elton Brand makes 7-foot running jumper
- Alonzo Mourning makes 6-foot hook shot (Jason Williams assists)
- Elton Brand makes 5-foot jumper
- Quinton Ross makes driving layup
- Udonis Haslem misses 16-foot jumper
- Chris Kaman makes 11-foot two point shot
- Jason Kapono makes three point jumper (Jason Williams assists)
- Elton Brand makes 9-foot jumper
- Jason Kapono makes 16-foot two point shot
- Chris Kaman makes 4-foot hook shot (Elton Brand assists)
- Jason Williams makes running jumper
- Corey Maggette misses 19-foot jumper
- Elton Brand makes tip shot
- Michael Doleac makes 12-foot jumper (Jason Kapono assists)
- Quinton Ross makes 19-foot jumper (Daniel Ewing assists)
- Jason Kapono misses 16-foot jumper
- Jason Kapono makes 20-foot jumper (Chris Quinn assists)
- Elton Brand makes free throw 1 of 2
- Elton Brand makes free throw 2 of 2
- Earl Barron makes 19-foot jumper (Chris Quinn assists)
- Elton Brand misses jumper
- Gary Payton makes free throw 1 of 2
- Gary Payton misses free throw 2 of 2
- Corey Maggette misses 66-foot three point jumper
- Chris Quinn misses 25-foot three point jumper
- Tim Thomas makes 25-foot three point jumper (Shaun Livingston assists)
- Tim Thomas makes 16-foot jumper (Shaun Livingston assists)
- Earl Barron misses 20-foot jumper
- Quinton Ross makes dunk (Chris Kaman assists)
- Dorell Wright makes 19-foot jumper (Gary Payton assists)
- Shaun Livingston misses 13-foot jumper
- Jason Williams misses 25-foot three point jumper
- Gary Payton misses 8-foot jumper
- Tim Thomas misses free throw 1 of 2
- Tim Thomas makes free throw 2 of 2
- Alonzo Mourning misses layup
- Dorell Wright makes two point shot
- Daniel Ewing makes 18-foot jumper (Shaun Livingston assists)
- Alonzo Mourning misses free throw 1 of 2
- Alonzo Mourning makes free throw 2 of 2
- Jason Williams misses 25-foot three point jumper
- Earl Barron makes 5-foot hook shot
- Daniel Ewing makes 20-foot jumper (Corey Maggette assists)
- Alonzo Mourning makes 7-foot two point shot
- Corey Maggette makes 18-foot jumper (Quinton Ross assists)
- Earl Barron misses 5-foot hook shot
- Corey Maggette misses driving layup
- Earl Barron misses 16-foot jumper
- Corey Maggette makes driving layup
- Corey Maggette misses free throw 1 of 1
- Alonzo Mourning misses dunk
- Elton Brand makes layup (Daniel Ewing assists)
- Elton Brand makes free throw 1 of 1
- Quinton Ross misses free throw 1 of 2
- Quinton Ross makes free throw 2 of 2
- Earl Barron misses two point shot
- Chris Kaman makes hook shot
- Chris Kaman makes free throw 1 of 1
- Jason Kapono makes 9-foot two point shot
- Corey Maggette misses three point jumper
- Daniel Ewing makes dunk
- Jason Kapono misses 14-foot jumper
- Corey Maggette misses 4-foot jumper
- Corey Maggette misses layup
- Corey Maggette makes free throw 1 of 2
- Corey Maggette misses free throw 2 of 2
- Jason Kapono makes 25-foot three point jumper (Jason Williams assists)
- Chris Kaman misses 6-foot hook shot
- Corey Maggette makes 20-foot jumper (Daniel Ewing assists)
- Robert Hite misses 24-foot three point jumper
- Jason Williams makes free throw 1 of 2
- Jason Williams makes free throw 2 of 2
- Elton Brand misses 6-foot jumper
- Alonzo Mourning makes layup
- Elton Brand makes free throw 1 of 2
- Elton Brand makes free throw 2 of 2
- Jason Kapono makes free throw 1 of 2
- Jason Kapono makes free throw 2 of 2
- Robert Hite makes dunk (Jason Kapono assists)
- Elton Brand makes free throw 1 of 2
- Elton Brand makes free throw 2 of 2
- Earl Barron misses jumper
- Alonzo Mourning misses 4-foot hook shot
- Jason Williams makes 20-foot jumper (Udonis Haslem assists)
- Corey Maggette makes 17-foot jumper (Shaun Livingston assists)
- Udonis Haslem misses 16-foot jumper
- Chris Kaman misses 6-foot hook shot
- Chris Kaman makes 4-foot jumper (Quinton Ross assists)
- Chris Kaman makes free throw 1 of 1
- Jason Williams misses 24-foot three point jumper
- Elton Brand makes 10-foot two point shot
- Jason Williams misses 25-foot three point jumper
- Jason Kapono makes 19-foot jumper (Alonzo Mourning assists)
- Shaun Livingston makes 19-foot jumper (Corey Maggette assists)
- Udonis Haslem misses 16-foot jumper
- Corey Maggette misses 18-foot jumper
- Chris Kaman makes layup
- Quinton Ross makes 20-foot jumper
- Jason Williams misses 26-foot three point jumper
- Elton Brand misses 16-foot jumper
- Alonzo Mourning makes 8-foot jumper (Gary Payton assists)
- Shaun Livingston makes two point shot
- Jason Williams misses layup
- Jason Williams makes 23-foot three point jumper (Gary Payton assists)
- Corey Maggette misses 18-foot jumper
- Udonis Haslem misses 5-foot jumper
- Jason Williams makes 19-foot jumper (Udonis Haslem assists)
- Quinton Ross makes dunk (Shaun Livingston assists)
- Jason Williams misses 25-foot three point jumper
- Elton Brand makes layup (Shaun Livingston assists)
- Elton Brand makes free throw 1 of 1
- Gary Payton misses 19-foot jumper
- Elton Brand makes 19-foot jumper
- Shaun Livingston misses 18-foot jumper
- Corey Maggette makes layup
- Robert Hite misses three point jumper
- Daniel Ewing makes 18-foot jumper (Tim Thomas assists)
- Earl Barron misses 6-foot jumper
- Michael Doleac misses jumper
- Robert Hite makes layup
- Elton Brand misses 13-foot two point shot
- Daniel Ewing makes tip shot
- Michael Doleac misses 6-foot jumper
- Shaun Livingston makes 8-foot jumper
- Robert Hite misses 59-foot three point jumper
- Corey Maggette misses 18-foot jumper
- Gary Payton misses 8-foot hook shot
- Corey Maggette makes layup
- Chris Quinn makes 25-foot three point jumper
- Tim Thomas misses 24-foot three point jumper
- Robert Hite misses 25-foot three point jumper
- Corey Maggette makes 17-foot jumper
- Alonzo Mourning makes dunk
- Tim Thomas makes three point jumper (Quinton Ross assists)
- Chris Quinn misses 25-foot three point jumper
- Robert Hite makes 25-foot three point jumper (Gary Payton assists)
- Robert Hite makes 12-foot jumper (Gary Payton assists)
- Robert Hite makes free throw 1 of 1
- Alonzo Mourning makes 7-foot hook shot (Chris Quinn assists)
- Daniel Ewing makes free throw 1 of 2
- Daniel Ewing makes free throw 2 of 2
- Robert Hite makes 25-foot three point jumper (Alonzo Mourning assists)
- Chris Kaman misses 17-foot two point shot
- Robert Hite makes layup (Gary Payton assists)
- Corey Maggette misses 20-foot jumper
- Robert Hite misses three point jumper
- Elton Brand makes 19-foot two point shot (Shaun Livingston assists)
- Quinton Ross misses 19-foot jumper
- Udonis Haslem makes 18-foot jumper (Chris Quinn assists)
- Shaun Livingston makes 19-foot jumper (Quinton Ross assists)
- Alonzo Mourning makes free throw 1 of 2
- Alonzo Mourning misses free throw 2 of 2
- Chris Quinn misses 25-foot three point jumper
- Earl Barron makes 19-foot jumper (Chris Quinn assists)
- Chris Kaman makes 4-foot two point shot (Shaun Livingston assists)
- Udonis Haslem misses 10-foot jumper
- Daniel Ewing misses 19-foot jumper
- Earl Barron misses jumper
- Robert Hite misses free throw 1 of 2
- Robert Hite makes free throw 2 of 2
- Chris Quinn makes driving layup
- Robert Hite misses layup
- Udonis Haslem makes tip shot
- Quinton Ross makes jumper (Daniel Ewing assists)
- Udonis Haslem misses 17-foot jumper
- Daniel Ewing misses 19-foot jumper
- Chris Quinn makes 9-foot jumper
- Chris Quinn makes free throw 1 of 1
- Shaun Livingston makes 21-foot jumper (Daniel Ewing assists)
- Robert Hite misses 19-foot jumper
Shot Made
Shot Missed
Shot Made
Shot Missed
Data is currently unavailable.
Matchups
2025-26 Standings
Western Conference
| Pacific | W | L | PCT | GB | STRK |
|---|---|---|---|---|---|
| LA Lakers | 48 | 26 | .649 | - | W2 |
| Phoenix | 41 | 33 | .554 | 7 | W1 |
| LA Clippers | 39 | 36 | .520 | 9.5 | W5 |
| Golden State | 36 | 39 | .480 | 12.5 | L1 |
| Sacramento | 19 | 57 | .250 | 30 | L4 |
Eastern Conference
| Southeast | W | L | PCT | GB | STRK |
|---|---|---|---|---|---|
| Atlanta | 42 | 33 | .560 | - | W1 |
| Orlando | 39 | 35 | .527 | 2.5 | L1 |
| Miami | 39 | 36 | .520 | 3 | L2 |
| Charlotte | 39 | 36 | .520 | 3 | L2 |
| Washington | 17 | 57 | .230 | 24.5 | L2 |
NBA News
Jokic has 25 points, 15 rebounds, Nuggets beat Warriors 116-93 for their 6th straight win
— Nikola Jokic had 25 points and 15 rebounds, Jamal Murray had 20 points, and the surging Denver Nuggets beat the short-handed Golden State Warriors 116-93 on Sunday night.
9h

Raptors use 31-0 run to pummel sputtering Magic
The Raptors used a 31-0 run in the first half to rout the Magic 139-87 on Sunday, the longest unanswered run in the play-by-play era.
9h

Jaylen Brown pokes fun at doubters as Celtics reach 50 wins
The Celtics are headed back to the playoffs thanks to another 50-win season. Not too bad for a "gap" year, according to Jaylen Brown.
10h