
Sacramento Kings @ New York Knicks

14-11, 6-7 Away
99
14-11, 6-7 Away

14-13, 7-7 Home
112
14-13, 7-7 Home
Game Leaders


Team Stats


40% (33-83)
Field Goal %
45% (40-89)
26% (10-39)
Three Point %
23% (8-35)
66% (23-35)
Free Throw %
89% (24-27)
17
Turnovers
17
41
Rebounds
55
1
Largest Lead
21
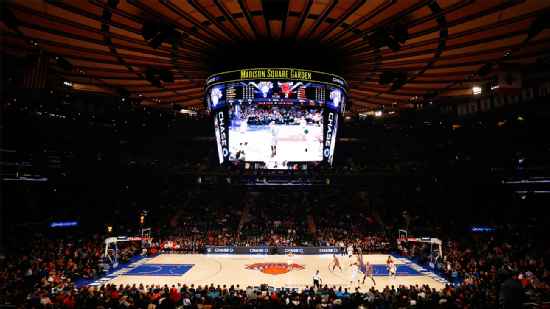
Game Information
New York, NY
Referee:Matt Boland
Referee:Marc Davis
Referee:Robert Hussey
Probabilities & Game Flow

0%
--SAC
100%
--NY
According to ESPN Analytics
Shot Chart

- Keegan Murray misses three point jumper
- Mitchell Robinson makes 1-foot dunk (Jalen Brunson assists)
- Harrison Barnes makes 27-foot three point jumper (Kevin Huerter assists)
- Julius Randle misses 26-foot three point jumper
- Kevin Huerter misses 25-foot three point jumper
- Jalen Brunson misses 18-foot step back jumpshot
- Domantas Sabonis misses two point shot
- RJ Barrett misses 6-foot two point shot
- Keegan Murray misses two point shot
- Julius Randle makes driving layup
- Davion Mitchell makes 2-foot two point shot
- Julius Randle misses 26-foot three point jumper
- Jalen Brunson makes 18-foot pullup jump shot
- Domantas Sabonis makes driving dunk (Harrison Barnes assists)
- Jalen Brunson misses 25-foot three point jumper
- Harrison Barnes misses 25-foot three point jumper
- Julius Randle makes free throw 1 of 2
- Julius Randle makes free throw 2 of 2
- Harrison Barnes makes free throw 1 of 2
- Harrison Barnes makes free throw 2 of 2
- Jalen Brunson makes free throw 1 of 2
- Jalen Brunson makes free throw 2 of 2
- Kevin Huerter misses 26-foot three point jumper
- Quentin Grimes misses 24-foot three point jumper
- Mitchell Robinson makes dunk
- RJ Barrett makes free throw 1 of 2
- RJ Barrett makes free throw 2 of 2
- Domantas Sabonis misses free throw 1 of 2
- Domantas Sabonis makes free throw 2 of 2
- Domantas Sabonis makes 10-foot two point shot (Matthew Dellavedova assists)
- Julius Randle makes 27-foot three point jumper (RJ Barrett assists)
- Domantas Sabonis makes driving layup
- Domantas Sabonis misses free throw 1 of 1
- Jalen Brunson makes 14-foot driving floating jump shot
- Kevin Huerter misses 17-foot pullup jump shot
- Harrison Barnes makes two point shot (Kevin Huerter assists)
- Julius Randle misses 26-foot three point jumper
- Kevin Huerter misses free throw 1 of 2
- Kevin Huerter makes free throw 2 of 2
- Jalen Brunson makes 11-foot pullup jump shot
- Julius Randle misses driving layup
- Malik Monk misses 23-foot three point jumper
- Julius Randle makes 16-foot pullup jump shot
- Julius Randle makes free throw 1 of 1
- Immanuel Quickley makes 22-foot three point jumper (Julius Randle assists)
- Matthew Dellavedova makes 10-foot driving floating jump shot
- Jalen Brunson misses 23-foot three point jumper
- Julius Randle makes 8-foot two point shot
- Malik Monk misses 15-foot pullup jump shot
- Julius Randle makes free throw 1 of 2
- Julius Randle makes free throw 2 of 2
- Terence Davis misses 25-foot three point jumper
- Julius Randle makes two point shot (Immanuel Quickley assists)
- Julius Randle makes free throw 1 of 1
- Miles McBride misses 26-foot three point jumper
- Terence Davis misses 25-foot three point jumper
- Isaiah Hartenstein misses 26-foot three point jumper
- Malik Monk misses 26-foot three point jumper
- Immanuel Quickley makes driving layup
- Trey Lyles makes 24-foot three point jumper (Matthew Dellavedova assists)
- RJ Barrett makes driving layup
- RJ Barrett makes free throw 1 of 1
- Malik Monk misses step back jumpshot
- Malik Monk misses two point shot
- RJ Barrett misses two point shot
- Trey Lyles misses 26-foot three point jumper
- Immanuel Quickley misses driving floating jump shot
- Matthew Dellavedova misses 26-foot three point jumper
- Immanuel Quickley makes 18-foot step back jumpshot
- Keegan Murray misses 25-foot three point jumper
- Davion Mitchell makes 25-foot three point jumper (KZ Okpala assists)
- Miles McBride makes three point jumper (RJ Barrett assists)
- Keegan Murray makes free throw 1 of 2
- Keegan Murray makes free throw 2 of 2
- RJ Barrett misses 3-foot two point shot
- Isaiah Hartenstein misses 26-foot three point jumper
- Domantas Sabonis makes free throw 1 of 2
- Domantas Sabonis misses free throw 2 of 2
- Davion Mitchell makes driving layup
- RJ Barrett makes 26-foot three point jumper (Miles McBride assists)
- Kevin Huerter misses 11-foot two point shot
- Quentin Grimes misses 25-foot three point jumper
- Harrison Barnes makes 2-foot layup (Domantas Sabonis assists)
- Jalen Brunson misses driving layup
- Harrison Barnes misses technical free throw
- Jalen Brunson misses two point shot
- Domantas Sabonis makes 2-foot hook shot
- Julius Randle makes 24-foot step back jumpshot
- Kevin Huerter misses 25-foot three point pullup jump shot
- Julius Randle misses 26-foot three point pullup jump shot
- Domantas Sabonis misses free throw 1 of 2
- Domantas Sabonis makes free throw 2 of 2
- Julius Randle misses two point shot
- RJ Barrett misses 26-foot three point jumper
- Davion Mitchell misses 26-foot three point jumper
- RJ Barrett makes two point shot
- Keegan Murray makes 24-foot three point jumper (Harrison Barnes assists)
- Keegan Murray makes 25-foot three point jumper (Kevin Huerter assists)
- Julius Randle makes driving layup
- Kevin Huerter misses 26-foot three point jumper
- Jalen Brunson makes 8-foot driving floating jump shot (RJ Barrett assists)
- Jalen Brunson makes free throw 1 of 1
- RJ Barrett misses 25-foot three point jumper
- RJ Barrett makes two point shot
- Domantas Sabonis makes free throw 1 of 2
- Domantas Sabonis makes free throw 2 of 2
- RJ Barrett misses driving layup
- Harrison Barnes makes free throw 1 of 2
- Harrison Barnes makes free throw 2 of 2
- Quentin Grimes makes driving layup (Jalen Brunson assists)
- Julius Randle makes 1-foot alley oop dunk shot (Quentin Grimes assists)
- Kevin Huerter makes 26-foot three point jumper (Matthew Dellavedova assists)
- Jalen Brunson misses driving floating jump shot
- Julius Randle makes 25-foot three point jumper
- Harrison Barnes makes free throw 1 of 2
- Harrison Barnes makes free throw 2 of 2
- Julius Randle misses 31-foot three point pullup jump shot
- Kevin Huerter misses 27-foot three point jumper
- Keegan Murray makes layup
- RJ Barrett misses 22-foot three point jumper
- Harrison Barnes misses 26-foot step back jumpshot
- Jalen Brunson makes two point shot
- Jalen Brunson makes free throw 1 of 1
- Harrison Barnes misses driving layup
- Kevin Huerter makes two point shot (Davion Mitchell assists)
- Kevin Huerter misses running pullup jump shot
- Kevin Huerter makes two point shot
- Julius Randle misses 25-foot three point jumper
- Keegan Murray makes 2-foot two point shot (Domantas Sabonis assists)
- Julius Randle misses 23-foot three point jumper
- Mitchell Robinson makes alley oop dunk shot (RJ Barrett assists)
- Domantas Sabonis misses two point shot
- RJ Barrett makes jumper (Julius Randle assists)
- Keegan Murray misses driving layup
- Mitchell Robinson makes alley oop dunk shot (RJ Barrett assists)
- Harrison Barnes misses 25-foot step back jumpshot
- Harrison Barnes makes 9-foot two point shot (Kevin Huerter assists)
- RJ Barrett makes two point shot (Julius Randle assists)
- Keegan Murray makes 26-foot three point jumper (Kevin Huerter assists)
- Mitchell Robinson makes dunk (Quentin Grimes assists)
- Kevin Huerter makes free throw 1 of 2
- Kevin Huerter misses free throw 2 of 2
- Jalen Brunson makes 19-foot two point shot
- RJ Barrett makes free throw 1 of 2
- RJ Barrett makes free throw 2 of 2
- Domantas Sabonis misses driving layup
- Domantas Sabonis makes two point shot
- Isaiah Hartenstein makes 12-foot two point shot (Jalen Brunson assists)
- Domantas Sabonis makes driving layup (Malik Monk assists)
- Julius Randle misses 25-foot three point jumper
- Malik Monk misses driving floating jump shot
- Immanuel Quickley misses running pullup jump shot
- Julius Randle misses layup
- Kevin Huerter makes layup (Domantas Sabonis assists)
- Malik Monk makes technical free throw
- Malik Monk makes technical free throw
- RJ Barrett makes 25-foot three point jumper (Immanuel Quickley assists)
- Jalen Brunson misses 11-foot two point shot
- Harrison Barnes misses free throw 1 of 2
- Harrison Barnes misses free throw 2 of 2
- RJ Barrett misses two point shot
- Malik Monk misses 23-foot three point jumper
- Immanuel Quickley misses free throw 1 of 2
- Immanuel Quickley makes free throw 2 of 2
- Immanuel Quickley makes driving layup (Quentin Grimes assists)
- Malik Monk misses driving layup
- RJ Barrett misses driving floating jump shot
- Isaiah Hartenstein makes tip shot
- Malik Monk makes 23-foot three point jumper (Matthew Dellavedova assists)
- Malik Monk misses 26-foot three point jumper
- Trey Lyles makes two point shot
- Immanuel Quickley misses 25-foot step back jumpshot
- Matthew Dellavedova misses 23-foot three point jumper
- Immanuel Quickley makes free throw 1 of 2
- Immanuel Quickley makes free throw 2 of 2
- Terence Davis misses 33-foot three point jumper
- Trey Lyles makes two point shot
- Trey Lyles makes free throw 1 of 1
- Malik Monk misses 7-foot two point shot
- Miles McBride misses 28-foot three point pullup jump shot
- Trey Lyles misses driving floating jump shot
- Malik Monk makes layup
- RJ Barrett misses driving layup
- Quentin Grimes misses 25-foot three point jumper
- Malik Monk misses 23-foot step back jumpshot
- Jalen Brunson makes 11-foot driving floating jump shot
- RJ Barrett misses 25-foot three point jumper
- Quentin Grimes makes free throw 1 of 2
- Quentin Grimes makes free throw 2 of 2
- Davion Mitchell misses two point shot
- Immanuel Quickley misses 24-foot three point jumper
- Malik Monk makes free throw 1 of 2
- Malik Monk makes free throw 2 of 2
- RJ Barrett misses driving floating jump shot
- Keegan Murray misses layup
- Keegan Murray makes two point shot
- Miles McBride makes driving layup (RJ Barrett assists)
- Kevin Huerter misses 27-foot three point jumper
- Keegan Murray misses 25-foot three point jumper
- Immanuel Quickley misses pullup jump shot
- Kevin Huerter makes free throw 1 of 2
- Kevin Huerter misses free throw 2 of 2
- RJ Barrett makes free throw 1 of 2
- RJ Barrett makes free throw 2 of 2
- Domantas Sabonis makes layup (Kevin Huerter assists)
- Quentin Grimes misses driving layup
- Miles McBride misses 25-foot three point jumper
- Quentin Grimes misses two point shot
- Mitchell Robinson makes free throw 1 of 2
- Mitchell Robinson makes free throw 2 of 2
- Kevin Huerter makes layup (Davion Mitchell assists)
- Immanuel Quickley misses 25-foot three point pullup jump shot
- Quentin Grimes misses 7-foot two point shot
- RJ Barrett makes driving layup
- Keegan Murray misses free throw 1 of 2
- Keegan Murray makes free throw 2 of 2
- Quentin Grimes makes 26-foot three point jumper (Miles McBride assists)
- Kevin Huerter misses driving floating jump shot
- Malik Monk makes 26-foot three point jumper (Domantas Sabonis assists)
- RJ Barrett misses free throw 1 of 2
- RJ Barrett misses free throw 2 of 2
- Miles McBride misses 26-foot three point jumper
- Kevin Huerter makes 29-foot three pointer
- Immanuel Quickley misses 9-foot pullup jump shot
- Domantas Sabonis misses free throw 1 of 2
- Domantas Sabonis makes free throw 2 of 2
- RJ Barrett makes driving layup
- Keegan Murray misses 26-foot three point jumper
- Keegan Murray misses three point jumper
- Harrison Barnes misses 27-foot three point jumper
Shot Made
Shot Missed
Shot Made
Shot Missed
Data is currently unavailable.
Matchups
2025-26 Standings
Western Conference
| Pacific | W | L | PCT | GB | STRK |
|---|---|---|---|---|---|
| LA Lakers | 53 | 29 | .646 | - | W3 |
| Phoenix | 45 | 37 | .549 | 8 | W1 |
| LA Clippers | 42 | 40 | .512 | 11 | W1 |
| Golden State | 37 | 45 | .451 | 16 | L3 |
| Sacramento | 22 | 60 | .268 | 31 | L1 |
Eastern Conference
| Atlantic | W | L | PCT | GB | STRK |
|---|---|---|---|---|---|
| Boston | 56 | 26 | .683 | - | W2 |
| New York | 53 | 29 | .646 | 3 | L1 |
| Toronto | 46 | 36 | .561 | 10 | W1 |
| Philadelphia | 45 | 37 | .549 | 11 | W2 |
| Brooklyn | 20 | 62 | .244 | 36 | L3 |
NBA News

Pelicans star Zion Williamson promises 'different summer'
Despite enjoying one of his healthiest seasons in the NBA, Zion Williamson is aiming for a "different summer" this offseason to help propel him and the Pelicans to the next level.
3h

Raptors nod to Drake's rumored 'Iceman' album with icy seat display
The seats underwent a pregame makeover presumably for the rollout of the Canadian rapper's upcoming album, "Iceman."
5h
Anthony Davis looking to help Wizards 'compete' next season
Anthony Davis isn't sure of his long-term future with the Wizards, but he's committed to helping the franchise win for at least one more season.
5h