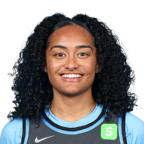
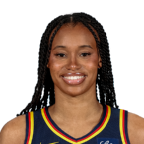
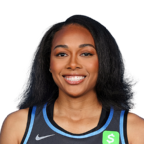
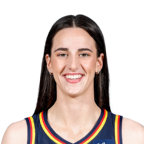
Indiana Fever @ Atlanta Dream
Game Leaders
Team Stats
44% (32-73)
Field Goal %
34% (23-68)
35% (8-23)
Three Point %
30% (12-40)
69% (9-13)
Free Throw %
95% (18-19)
15
Turnovers
13
39
Rebounds
32
14
Largest Lead
4
Game Information
College Park, GA
Referee:Tim Greene
Referee:Blanca Burns
Referee:Sarah Williams
Shot Chart

- Brionna Jones misses 12-foot two point shot
- Aliyah Boston misses 5-foot hook shot
- Kelsey Mitchell misses 24-foot three point jumper
- Caitlin Clark misses 23-foot three point step back jumpshot
- Brittney Griner makes 24-foot three point jumper (Shatori Walker-Kimbrough assists)
- Natasha Howard makes 4-foot two point shot (Kelsey Mitchell assists)
- Brionna Jones misses 7-foot two point shot
- Shatori Walker-Kimbrough makes 25-foot three point jumper (Allisha Gray assists)
- Kelsey Mitchell makes driving layup
- Nia Coffey misses 25-foot three point jumper
- Natasha Howard misses two point shot
- Allisha Gray misses running pullup jump shot
- Aliyah Boston misses free throw 1 of 2
- Aliyah Boston makes free throw 2 of 2
- Brionna Jones misses 15-foot jumper
- Caitlin Clark makes two point shot
- Rhyne Howard misses 24-foot three point pullup jump shot
- Caitlin Clark misses 24-foot three point step back jumpshot
- Te-Hina Paopao makes driving layup (Nia Coffey assists)
- Te-Hina Paopao makes free throw 1 of 1
- Aliyah Boston makes free throw 1 of 2
- Aliyah Boston makes free throw 2 of 2
- Nia Coffey misses 13-foot pullup jump shot
- Aliyah Boston makes layup (Lexie Hull assists)
- Te-Hina Paopao makes driving layup
- Aliyah Boston makes layup (Caitlin Clark assists)
- Aliyah Boston misses free throw 1 of 1
- Brionna Jones makes 25-foot three point jumper (Rhyne Howard assists)
- Maya Caldwell misses 24-foot three point jumper
- Natasha Howard misses 8-foot two point shot
- Maya Caldwell misses 24-foot three point jumper
- Caitlin Clark makes 24-foot running pullup jump shot
- Rhyne Howard misses 24-foot three point jumper
- Allisha Gray misses 24-foot three point jumper
- Kelsey Mitchell misses 23-foot three point shot
- DeWanna Bonner misses driving floating jump shot
- Natasha Howard makes free throw 1 of 2
- Natasha Howard makes free throw 2 of 2
- Allisha Gray makes free throw 1 of 2
- Allisha Gray makes free throw 2 of 2
- Brianna Turner makes 2-foot layup (Sydney Colson assists)
- Allisha Gray misses 25-foot three point jumper
- Rhyne Howard misses 25-foot three point step back jumpshot
- Sydney Colson misses 14-foot step back jumpshot
- DeWanna Bonner misses free throw 1 of 2
- DeWanna Bonner makes free throw 2 of 2
- Caitlin Clark makes 25-foot three point jumper (Sophie Cunningham assists)
- Shatori Walker-Kimbrough misses driving layup
- Sophie Cunningham makes 2-foot layup (Caitlin Clark assists)
- Rhyne Howard misses 24-foot three point jumper
- Brianna Turner misses alley oop layup
- Rhyne Howard makes free throw 1 of 2
- Rhyne Howard makes free throw 2 of 2
- Aliyah Boston misses 5-foot two point shot
- Te-Hina Paopao makes 24-foot three pointer (Rhyne Howard assists)
- DeWanna Bonner misses 10-foot pullup jump shot
- Naz Hillmon makes 1-foot layup (Rhyne Howard assists)
- Sophie Cunningham makes 24-foot three point jumper (Aliyah Boston assists)
- Brionna Jones misses 17-foot jumper
- Kelsey Mitchell misses 24-foot three point step back jumpshot
- Rhyne Howard makes 24-foot three point jumper (Nia Coffey assists)
- Brionna Jones makes two point shot (Te-Hina Paopao assists)
- Te-Hina Paopao misses technical free throw
- Caitlin Clark makes 24-foot three point step back jumpshot
- Shatori Walker-Kimbrough makes 2-foot layup (Brionna Jones assists)
- Caitlin Clark misses 24-foot three point step back jumpshot
- Te-Hina Paopao makes 24-foot three point step back jumpshot
- DeWanna Bonner makes 24-foot three point jumper (Caitlin Clark assists)
- Rhyne Howard misses 23-foot three point jumper
- Rhyne Howard misses 24-foot three point jumper
- Rhyne Howard misses 25-foot three point jumper
- Kelsey Mitchell makes 21-foot step back jumpshot
- Allisha Gray misses driving layup
- Allisha Gray misses two point shot
- Natasha Howard makes 7-foot two point shot
- Naz Hillmon makes 24-foot three point jumper (Allisha Gray assists)
- Sophie Cunningham misses 25-foot three point step back jumpshot
- Natasha Howard makes layup (Lexie Hull assists)
- Rhyne Howard makes free throw 1 of 2
- Rhyne Howard makes free throw 2 of 2
- Nia Coffey makes free throw 1 of 2
- Nia Coffey makes free throw 2 of 2
- Sydney Colson misses driving layup
- Rhyne Howard misses running pullup jump shot
- Sydney Colson makes free throw 1 of 1
- Lexie Hull misses 24-foot three point jumper
- Allisha Gray misses 34-foot three point jumper
- Caitlin Clark makes driving layup (Kelsey Mitchell assists)
- Kelsey Mitchell makes 24-foot three point jumper (Caitlin Clark assists)
- Nia Coffey misses 24-foot three point jumper
- Nia Coffey misses 24-foot three point jumper
- Shatori Walker-Kimbrough makes free throw 1 of 3
- Shatori Walker-Kimbrough makes free throw 2 of 3
- Shatori Walker-Kimbrough makes free throw 3 of 3
- Aliyah Boston misses two point shot
- Allisha Gray misses driving layup
- Kelsey Mitchell misses 21-foot pullup jump shot
- Brionna Jones misses 18-foot jumper
- Aliyah Boston makes 5-foot two point shot (Caitlin Clark assists)
- Brionna Jones makes layup (Allisha Gray assists)
- Kelsey Mitchell makes driving layup
- Rhyne Howard misses 24-foot three point jumper
- Aliyah Boston misses layup
- Brionna Jones makes 2-foot two point shot (Shatori Walker-Kimbrough assists)
- Kelsey Mitchell misses 15-foot step back jumpshot
- Brionna Jones makes layup (Shatori Walker-Kimbrough assists)
- DeWanna Bonner misses 12-foot two point shot
- Kelsey Mitchell makes 23-foot three point jumper (Lexie Hull assists)
- Rhyne Howard makes 25-foot three point jumper (Allisha Gray assists)
- Caitlin Clark misses 25-foot three point jumper
- DeWanna Bonner misses 25-foot three point jumper
- Brionna Jones misses layup
- DeWanna Bonner makes two point shot
- Allisha Gray makes 2-foot layup (Nia Coffey assists)
- Sydney Colson misses 23-foot three point pullup jump shot
- Lexie Hull makes 3-foot two point shot (Caitlin Clark assists)
- Maya Caldwell misses 24-foot three point jumper
- Caitlin Clark misses 25-foot three point pullup jump shot
- Naz Hillmon misses 25-foot three point jumper
- DeWanna Bonner makes two point shot (Caitlin Clark assists)
- Shyanne Sellers misses 25-foot three point jumper
- Jaelyn Brown makes 13-foot pullup jump shot (Brianna Turner assists)
- Te-Hina Paopao makes 24-foot three point jumper (Haley Jones assists)
- Lexie Hull misses free throw 1 of 2
- Lexie Hull makes free throw 2 of 2
- Maya Caldwell misses 23-foot three point step back jumpshot
- Haley Jones makes free throw 1 of 2
- Haley Jones makes free throw 2 of 2
- Jaelyn Brown misses 19-foot pullup jump shot
- Makayla Timpson makes 2-foot driving floating jump shot (Lexie Hull assists)
- Ashley Joens makes free throw 1 of 2
- Ashley Joens makes free throw 2 of 2
- Sydney Colson makes driving layup
- Ashley Joens misses 25-foot three point jumper
- Lexie Hull makes 11-foot pullup jump shot (Jaelyn Brown assists)
- Ashley Joens misses 23-foot three point step back jumpshot
- Jaelyn Brown makes 25-foot three point jumper (Makayla Timpson assists)
- Haley Jones misses 17-foot pullup jump shot
- Sydney Colson misses 24-foot three point pullup jump shot
- Taylor Thierry misses 23-foot three point jumper
- Lexie Hull makes 1-foot two point shot (Brianna Turner assists)
- Lexie Hull makes free throw 1 of 1
- Ashley Joens makes 25-foot three pointer (Naz Hillmon assists)
- Lexie Hull makes 16-foot jumper (Sydney Colson assists)
- Lexie Hull misses driving layup
- Taylor Thierry makes two point shot (Te-Hina Paopao assists)
- Makayla Timpson misses driving floating jump shot
- Te-Hina Paopao misses 24-foot three point jumper
- Makayla Timpson misses 5-foot hook shot
- Haley Jones misses driving layup
- Taylor Thierry makes 23-foot three point jumper (Naz Hillmon assists)
- Sydney Colson misses 24-foot three point jumper
- Haley Jones makes 10-foot two point shot
- Lexie Hull makes driving layup (Brianna Turner assists)
- Taylor Thierry misses driving layup
- Haley Jones misses 24-foot three point jumper
- Shyanne Sellers misses driving floating jump shot
- Lexie Hull makes 12-foot pullup jump shot (Brianna Turner assists)
- Ashley Joens misses driving layup
- Naz Hillmon makes free throw 1 of 2
- Naz Hillmon makes free throw 2 of 2
- Lexie Hull misses 16-foot jumper
- Haley Jones makes 24-foot three point jumper (Ashley Joens assists)
Shot Made
Shot Missed
Shot Made
Shot Missed
Data is currently unavailable.
Matchups
2025-26 Standings
Women's National Basketball Assoc.
| Eastern Conference | W | L | PCT | GB | STRK |
|---|---|---|---|---|---|
| Indiana | 0 | 0 | .000 | - | - |
| Washington | 0 | 0 | .000 | - | - |
| Chicago | 0 | 0 | .000 | - | - |
| Atlanta | 0 | 0 | .000 | - | - |
WNBA News

Sources: Aces agree to $1.19 million deal with Jackie Young
The Aces are finalizing an agreement for four-time All-Star guard Jackie Young to return to Las Vegas, sources told ESPN on Thursday.
4h

WNBA free agency and trade tracker 2026: Deals, news, moves
WNBA free agency is here. Jackie Young is returning to Las Vegas. Follow all the news, including key trades around the league.
4h

Wings send Diamond Miller to Sun in exchange for Rayah Marshall
The Sun acquired Diamond Miller, the No. 2 pick in the 2023 draft, from the Wings in exchange for Rayah Marshall.
4h
GAMBLING PROBLEM? CALL 1-800-GAMBLER, (800) 327-5050 or visit gamblinghelplinema.org (MA). Call 877-8-HOPENY/text HOPENY (467369) (NY). Please Gamble Responsibly. 888-789-7777/visit ccpg.org (CT), or visit www.mdgamblinghelp.org (MD). 21+ and present in most states. (18+ DC/KY/NH/WY). Void in ONT/OR/NH. Eligibility restrictions apply. On behalf of Boot Hill Casino & Resort (KS). Terms: sportsbook.draftkings.com/promos.
Copyright: © 2026 ESPN Enterprises, LLC. All rights reserved.
