


Game Information
Mars Stadium
| fourth Quarter | |||
|---|---|---|---|
| Time | Team | Play | Score |
| 31:11 |  | K. Farrell Behind | 34 - 78 |
| 28:42 | | C. Wingard Behind | 34 - 77 |
| 25:08 | | K. Farrell Goal | 34 - 76 |
| 22:45 | | C. Dixon Goal | 34 - 70 |
| 21:02 | | C. Dixon Behind | 34 - 64 |
| 11:41 | | T. Boak Behind | 34 - 63 |
| 9:29 | | R. Gray Goal | 34 - 62 |
| 7:29 | | C. Dixon Goal | 34 - 56 |
| 6:15 | | J. Westhoff Behind | 34 - 50 |
| 2:39 | | D. Byrne-Jones Behind | 34 - 49 |
| third Quarter | |||
| Time | Team | Play | Score |
| 28:52 |  | T. McLean Behind | 34 - 48 |
| 26:53 | | J. Trengove Behind | 33 - 48 |
| 25:45 | | M. Honeychurch Behind | 32 - 48 |
| 21:36 | | R. Gray Behind | 31 - 48 |
| 20:17 | | H. Crozier Behind | 31 - 47 |
| 18:34 | | J. Schache Goal | 30 - 47 |
| 14:03 | | C. Dixon Goal | 24 - 47 |
| 13:02 | | Rushed | 24 - 41 |
| 5:07 | | C. Wingard Goal | 24 - 40 |
| 0:51 | | C. Dixon Goal | 24 - 34 |
| second Quarter | |||
| Time | Team | Play | Score |
| 29:43 | | C. Dixon Behind | 24 - 28 |
| 22:26 | | J. Trengove Goal | 24 - 27 |
| 13:52 | | S. Motlop Goal | 18 - 27 |
| 9:15 | | J. Polec Behind | 18 - 21 |
| 5:27 | | F. Greene Goal | 18 - 20 |
| 2:21 | | C. Dixon Goal | 12 - 20 |
| first Quarter | |||
| Time | Team | Play | Score |
| 26:49 | | J. Westhoff Goal | 12 - 14 |
| 23:34 | | J. Trengove Goal | 12 - 8 |
| 21:08 | | S. Powell-Pepper Behind | 6 - 8 |
| 15:16 | | C. Wingard Behind | 6 - 7 |
| 4:08 | | J. Watts Goal | 6 - 6 |
| 0:47 | | M. Wallis Goal | 6 - 0 |
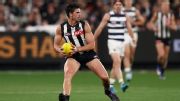
In his 432nd game, Scott Pendlebury gets on the scoreboard with a set shot from straight in front.
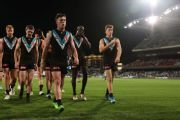
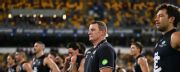
Port Adelaide superstar Zak Butters has avoided an AFL suspension, keeping him in Brownlow Medal contention.
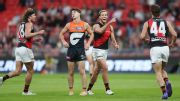
Sam Durham provides the clever tap that leads to a Darcy Parish goal.
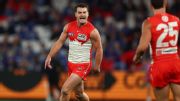
Tom Papley's forward craft was on full display, with the Sydney livewire slotting two clever goals from sharp reads.
Carlton have flirted with a second Gabba miracle in three seasons before Michael Voss's men fell to a seventh straight AFL loss.
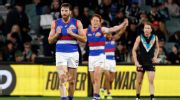
Western Bulldogs coach Luke Beveridge has seen his captain Marcus Bontempelli be a match-winner so many times, it's almost normal.
| POS | Team | Pts. | % | Form |
|---|---|---|---|---|
| 1 |
 SYD SYD
|
32 | 157.2 | WWWWW |
| 2 |
 FRE FRE
|
32 | 131.6 | WWWWW |
| 3 |
 HAW HAW
|
26 | 116.8 | WWWDL |
| 4 |
 BL BL
|
24 | 124.5 | WLWWW |
| 5 |
 GEEL GEEL
|
24 | 120.4 | WWLWW |
| 6 |
 SUNS SUNS
|
24 | 118.5 | LWLWW |
| 7 |
 MELB MELB
|
20 | 100.2 | WLWWL |
| 8 |
 WB WB
|
20 | 92.4 | LLLLW |
| 9 |
 COLL COLL
|
18 | 99.9 | LWWDL |
| 10 |
 STK STK
|
16 | 109.3 | WLWWL |
| 11 |
 NMFC NMFC
|
16 | 104.4 | LWLLL |
| 12 |
 ADEL ADEL
|
16 | 96.6 | LWWLW |
| 13 |
 GWS GWS
|
16 | 91.1 | WLWLW |
| 14 |
 PORT PORT
|
12 | 109.5 | LLWLL |
| 15 |
 WCE WCE
|
8 | 59.3 | LLLLL |
| 16 |
 CARL CARL
|
4 | 79.3 | LLLLL |
| 17 |
 ESS ESS
|
4 | 71.8 | WLLLL |
| 18 |
 RICH RICH
|
4 | 60.0 | LLLLW |