

Game Information
Marvel Stadium
| fourth Quarter | |||
|---|---|---|---|
| Time | Team | Play | Score |
| 30:25 |  | D. Sheed Goal | 140 - 69 |
| 29:36 |  | T. De Koning Behind | 140 - 63 |
| 28:01 | | D. Cuningham Goal | 139 - 63 |
| 28:01 | | D. Cuningham Goal | 139 - 63 |
| 22:32 | | C. Curnow Behind | 133 - 63 |
| 20:49 | | G. Hewett Goal | 132 - 63 |
| 19:29 | | S. Petrevski-Seton Goal | 126 - 63 |
| 18:25 | | J. Hunt Behind | 126 - 57 |
| 16:32 | | A. Gaff Goal | 126 - 56 |
| 12:52 | | C. Curnow Goal | 126 - 50 |
| 11:45 | | C. Curnow Behind | 120 - 50 |
| 9:11 | | J. Darling Goal | 119 - 50 |
| 5:49 | | Bailey J. Williams Goal | 119 - 44 |
| 2:54 | | P. Dow Goal | 119 - 38 |
| third Quarter | |||
| Time | Team | Play | Score |
| 28:44 | | Rushed | 113 - 38 |
| 26:29 | | C. Curnow Goal | 113 - 37 |
| 20:32 | | M. Cottrell Behind | 107 - 37 |
| 16:33 | | T. De Koning Behind | 106 - 37 |
| 14:00 | | J. Darling Goal | 105 - 37 |
| 10:44 | | R. Maric Goal | 105 - 31 |
| 9:22 | | C. Curnow Goal | 105 - 25 |
| 8:05 | | M. Cottrell Behind | 99 - 25 |
| 6:22 | | J. Cripps Goal | 98 - 25 |
| 4:12 | | Rushed | 98 - 19 |
| 2:26 | | J. Petruccelle Behind | 98 - 18 |
| 0:43 | | N. Long Behind | 98 - 17 |
| second Quarter | |||
| Time | Team | Play | Score |
| 29:32 | | L. Duggan Behind | 98 - 16 |
| 27:29 | | O. Hollands Behind | 98 - 15 |
| 24:59 | | C. Curnow Goal | 97 - 15 |
| 23:16 | | E. Curnow Goal | 91 - 15 |
| 19:06 | | J. Petruccelle Goal | 85 - 15 |
| 15:00 | | C. Curnow Goal | 85 - 9 |
| 13:16 | | C. Curnow Goal | 79 - 9 |
| 11:43 | | E. Hewett Behind | 73 - 9 |
| 8:51 | | S. Walsh Goal | 73 - 8 |
| 7:27 | | L. Young Behind | 67 - 8 |
| 4:47 | | J. Motlop Goal | 66 - 8 |
| 2:40 | | N. Long Goal | 60 - 8 |
| 0:47 | | L. Fogarty Behind | 60 - 2 |
| first Quarter | |||
| Time | Team | Play | Score |
| 34:28 | | C. Curnow Goal | 59 - 2 |
| 31:07 | | T. De Koning Behind | 53 - 2 |
| 28:07 | | J. Cripps Behind | 52 - 2 |
| 25:43 | | J. Silvagni Goal | 52 - 1 |
| 23:27 | | J. Motlop Goal | 46 - 1 |
| 21:44 | | A. Cincotta Goal | 40 - 1 |
| 19:24 | | C. Curnow Goal | 34 - 1 |
| 17:29 | | M. McGovern Behind | 28 - 1 |
| 15:05 | | O. Allen Behind | 27 - 1 |
| 12:21 | | C. Curnow Behind | 27 - 0 |
| 9:10 | | J. Honey Goal | 26 - 0 |
| 7:34 | | C. Curnow Goal | 20 - 0 |
| 5:57 | | N. Newman Goal | 14 - 0 |
| 3:58 | | C. Curnow Goal | 8 - 0 |
| 2:45 | | Rushed | 2 - 0 |
| 0:47 | | Rushed | 1 - 0 |
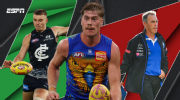
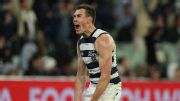
Harley Reid showed just how scary he can be, and the Blues finally broke thorugh. But more than one coach is under the pump. Here's whose stocks are up and down after Round 10.
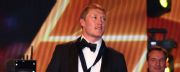
The Brownlow Medal is the highest individual honour in the AFL. In 2026, ESPN is giving you an advantage with our one-of-a-kind predictor.
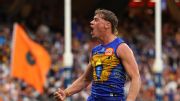
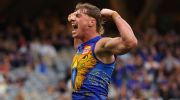
West Coast Eagles secure just their third win of the season against the GWS Giants.
West Coast coach Andrew McQualter has declared the sky is the limit for Harley Reid after the star midfielder willed his team to an upset 17-point win over GWS at Optus Stadium.
The Coleman Medal is awarded to the player who kicks the most goals throughout the AFL home and away season. Who is on track to win the award in 2026?
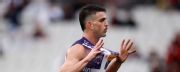
Brad Scott has lamented a horrid start and put the heat on Essendon's more experienced players after Fremantle equalled a club record.
| POS | Team | Pts. | % | Form |
|---|---|---|---|---|
| 1 |
 SYD SYD
|
36 | 152.2 | WWWWW |
| 2 |
 FRE FRE
|
36 | 134.9 | WWWWW |
| 3 |
 GEEL GEEL
|
28 | 123.5 | WLWWW |
| 4 |
 SUNS SUNS
|
28 | 119.9 | WLWWW |
| 5 |
 MELB MELB
|
28 | 107.6 | WWLWW |
| 6 |
 HAW HAW
|
26 | 110.2 | WWDLL |
| 7 |
 BL BL
|
24 | 116.6 | LWWWL |
| 8 |
 ADEL ADEL
|
24 | 109.7 | WLWWW |
| 9 |
 STK STK
|
20 | 112.8 | LWWLW |
| 10 |
 WB WB
|
20 | 91.7 | LLLWL |
| 11 |
 COLL COLL
|
18 | 99.1 | WWDLL |
| 12 |
 NMFC NMFC
|
16 | 96.7 | WLLLL |
| 13 |
 GWS GWS
|
16 | 90.1 | LWLWL |
| 14 |
 PORT PORT
|
12 | 105.2 | LWLLL |
| 15 |
 WCE WCE
|
12 | 64.2 | LLLLW |
| 16 |
 CARL CARL
|
8 | 81.8 | LLLLW |
| 17 |
 ESS ESS
|
4 | 70.6 | LLLLL |
| 18 |
 RICH RICH
|
4 | 60.9 | LLWLL |