


Game Information
Adelaide Arena at Jiangwan Stadium
| fourth Quarter | |||
|---|---|---|---|
| Time | Team | Play | Score |
| 31:05 |  | R. Marshall Behind | 69 - 139 |
| 29:54 |  | R. Bonner Behind | 68 - 139 |
| 28:13 | | R. Gray Behind | 68 - 138 |
| 27:01 | | L. Dunstan Behind | 68 - 137 |
| 25:34 | | R. Gray Goal | 67 - 137 |
| 23:43 | | D. Kent Behind | 67 - 131 |
| 22:42 | | S. Powell-Pepper Behind | 66 - 131 |
| 21:40 | | R. Gray Goal | 66 - 130 |
| 20:22 | | M. Parker Behind | 66 - 124 |
| 17:28 | | J. Gresham Goal | 65 - 124 |
| 16:47 | | S. Gray Behind | 59 - 124 |
| 9:37 | | J. Gresham Goal | 59 - 123 |
| 7:22 | | S. Motlop Goal | 53 - 123 |
| 5:23 | | R. Bonner Goal | 53 - 117 |
| 4:10 | | J. Sinclair Behind | 53 - 111 |
| third Quarter | |||
| Time | Team | Play | Score |
| 30:46 | | S. Lycett Goal | 52 - 111 |
| 27:55 | | R. Marshall Goal | 52 - 105 |
| 23:48 | | D. Kent Behind | 46 - 105 |
| 22:01 | | J. Gresham Goal | 45 - 105 |
| 20:21 | | P. Ryder Goal | 39 - 105 |
| 18:34 | | X. Duursma Goal | 39 - 99 |
| 15:34 | | J. Newnes Behind | 39 - 93 |
| 13:12 | | Z. Butters Goal | 38 - 93 |
| 12:02 | | P. Ryder Goal | 38 - 87 |
| 4:43 | | D. Howard Goal | 38 - 81 |
| second Quarter | |||
| Time | Team | Play | Score |
| 29:29 | | R. Bonner Goal | 38 - 75 |
| 26:35 | | J. Sinclair Behind | 38 - 69 |
| 22:18 | | S. Gray Goal | 37 - 69 |
| 21:10 | | J. Gresham Behind | 37 - 63 |
| 19:55 | | D. Kent Behind | 36 - 63 |
| 18:08 | | K. Farrell Goal | 35 - 63 |
| 15:28 | | R. Gray Behind | 35 - 57 |
| 12:51 | | J. Westhoff Goal | 35 - 56 |
| 10:45 | | B. Long Goal | 35 - 50 |
| 9:12 | | K. Farrell Goal | 29 - 50 |
| 7:57 | | T. Membrey Goal | 29 - 44 |
| 5:35 | | J. Bruce Behind | 23 - 44 |
| 4:06 | | R. Gray Goal | 22 - 44 |
| 2:36 | | T. Boak Goal | 22 - 38 |
| 0:16 | | S. Powell-Pepper Behind | 22 - 32 |
| first Quarter | |||
| Time | Team | Play | Score |
| 29:19 | | Rushed | 22 - 31 |
| 28:15 | | E. Phillips Behind | 21 - 31 |
| 26:25 | | J. Sinclair Behind | 20 - 31 |
| 24:10 | | C. Rozee Goal | 19 - 31 |
| 21:28 | | M. Parker Goal | 19 - 25 |
| 19:08 | | R. Bonner Goal | 13 - 25 |
| 14:24 | | Z. Butters Goal | 13 - 19 |
| 12:42 | | J. Billings Goal | 13 - 13 |
| 11:14 | | T. Boak Goal | 7 - 13 |
| 9:58 | | J. Newnes Goal | 7 - 7 |
| 7:40 | | M. Parker Behind | 1 - 7 |
| 4:56 | | C. Rozee Behind | 0 - 7 |
| 1:52 | | D. Howard Goal | 0 - 6 |
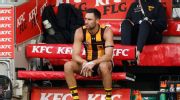
Round 16 of the 2026 AFL season kicks off with a Thursday night blockbuster between Brisbane and Sydney at the Gabba. Then, on Friday evening, Hawthorn and GWS clash at the MCG.
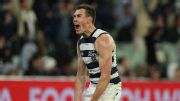
The Josh Fraser hype train keeps gaining momentum at Carlton, and Luke Jackson looks almost unstoppable. But should the Saints be worried about their finals chances? Here's whose stocks are up and down after Round 15.
Marcus Bontempelli cleanly gathers a low ball and snaps home a beauty in one seamless motion.
The Coleman Medal is awarded to the player who kicks the most goals throughout the AFL home and away season. Who is on track to win the award in 2026?
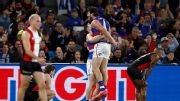
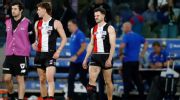
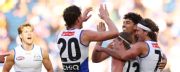
St Kilda's 22-point defeat to the Western Bulldogs at Marvel Stadium has been compounded by injuries to key duo Jack Sinclair and Tom De Koning.
Having consigned their Fremantle debacle to history, North Melbourne are putting themselves back on track to break their AFL finals drought.
| POS | Team | Pts. | % | Form |
|---|---|---|---|---|
| 1 |
 FRE FRE
|
52 | 144.4 | WWWWW |
| 2 |
 SYD SYD
|
48 | 143.7 | WLWWW |
| 3 |
 HAW HAW
|
38 | 113.5 | LWWLW |
| 4 |
 GEEL GEEL
|
36 | 120.6 | WLLWL |
| 5 |
 ADEL ADEL
|
36 | 113.2 | WLWWW |
| 6 |
 MELB MELB
|
36 | 104.2 | LLWWL |
| 7 |
 WB WB
|
36 | 92.8 | WWWLW |
| 8 |
 BL BL
|
32 | 108.4 | LLLWW |
| 9 |
 SUNS SUNS
|
28 | 105.3 | WLLLL |
| 10 |
 NMFC NMFC
|
28 | 90.7 | LWLWW |
| 11 |
 COLL COLL
|
26 | 101.5 | LWLLW |
| 12 |
 STK STK
|
24 | 100.6 | LLLWL |
| 13 |
 GWS GWS
|
24 | 100.3 | LWWLL |
| 14 |
 CARL CARL
|
24 | 91.1 | WWWWW |
| 15 |
 PORT PORT
|
16 | 98.7 | LLWLL |
| 16 |
 WCE WCE
|
16 | 72.7 | WLWLL |
| 17 |
 RICH RICH
|
8 | 61.3 | LWLLL |
| 18 |
 ESS ESS
|
4 | 70.4 | LLLLL |